Copyright © 2013 text and photos - Joseph Mack;
v2013Dec06, released under GPL
Abstract
Kayaking in Lake Opeongo, Algonquin Park, Ontario.Table of Contents
- 1. Background
- 2. About kayaking
- 2.1. Canoe (canadian) or kayak
- 2.2. The kayak is constrained by volume
- 2.3. Kayaking uses your arm, not your legs
- 2.4. Weather in August is pleasant
- 2.5. map
- 2.6. The LLBean one man tent is a bad idea
- 2.7. You don't need much food
- 2.8. Campsites
- 2.9. Getting out of the kayak is difficult
- 2.10. Planning pit stops
- 2.11. Sitting all day
- 2.12. Watching the clouds and the weather
- 2.13. You don't get wet paddling in the rain
- 2.14. You cook in the sun
- 2.15. Recent advances in water treatment
- 2.16. Water, water everywhere
- 2.17. Silica Gel dessicant
- 2.18. helmet
- 2.19. glasses
- 2.20. gloves
- 2.21. sandals
- 2.22. you aren't alone
- 2.23. kedge
- 2.24. Spray Skirt
- 2.25. Dry Bags and where to store the camera
- 2.26. Paddle Clips
- 2.27. Spherical compass
- 2.28. Navigation
- 2.29. Most people are on short trips
- 2.30. Eskimo Roll
- 3. Sun 25 Aug 2013: Algonquin Outfitters to top of South Arm. 4hrs
- 4. Mon 26 Aug 2013: Annie Bay: 6hrs
- 5. Tue 27 Aug 2013: Annie Bay to North Arm: 6hrs
- 6. Cormorant Island
- 7. Tue 27 Aug 2013: camping at North Arm
- 8. Wed 28 Aug 2013: Hailstorm Creek: 6hrs
- 9. Wed 28 Aug 2013: Beach Reshaping and Huygen's Principle
- 10. Thurs 29 Aug 2013: Graham Bay: 8hrs
- 11. Fri 30 Aug 2013: North Arm to the Outfitters: 4hrs
- 12. Non kayaking trip considerations
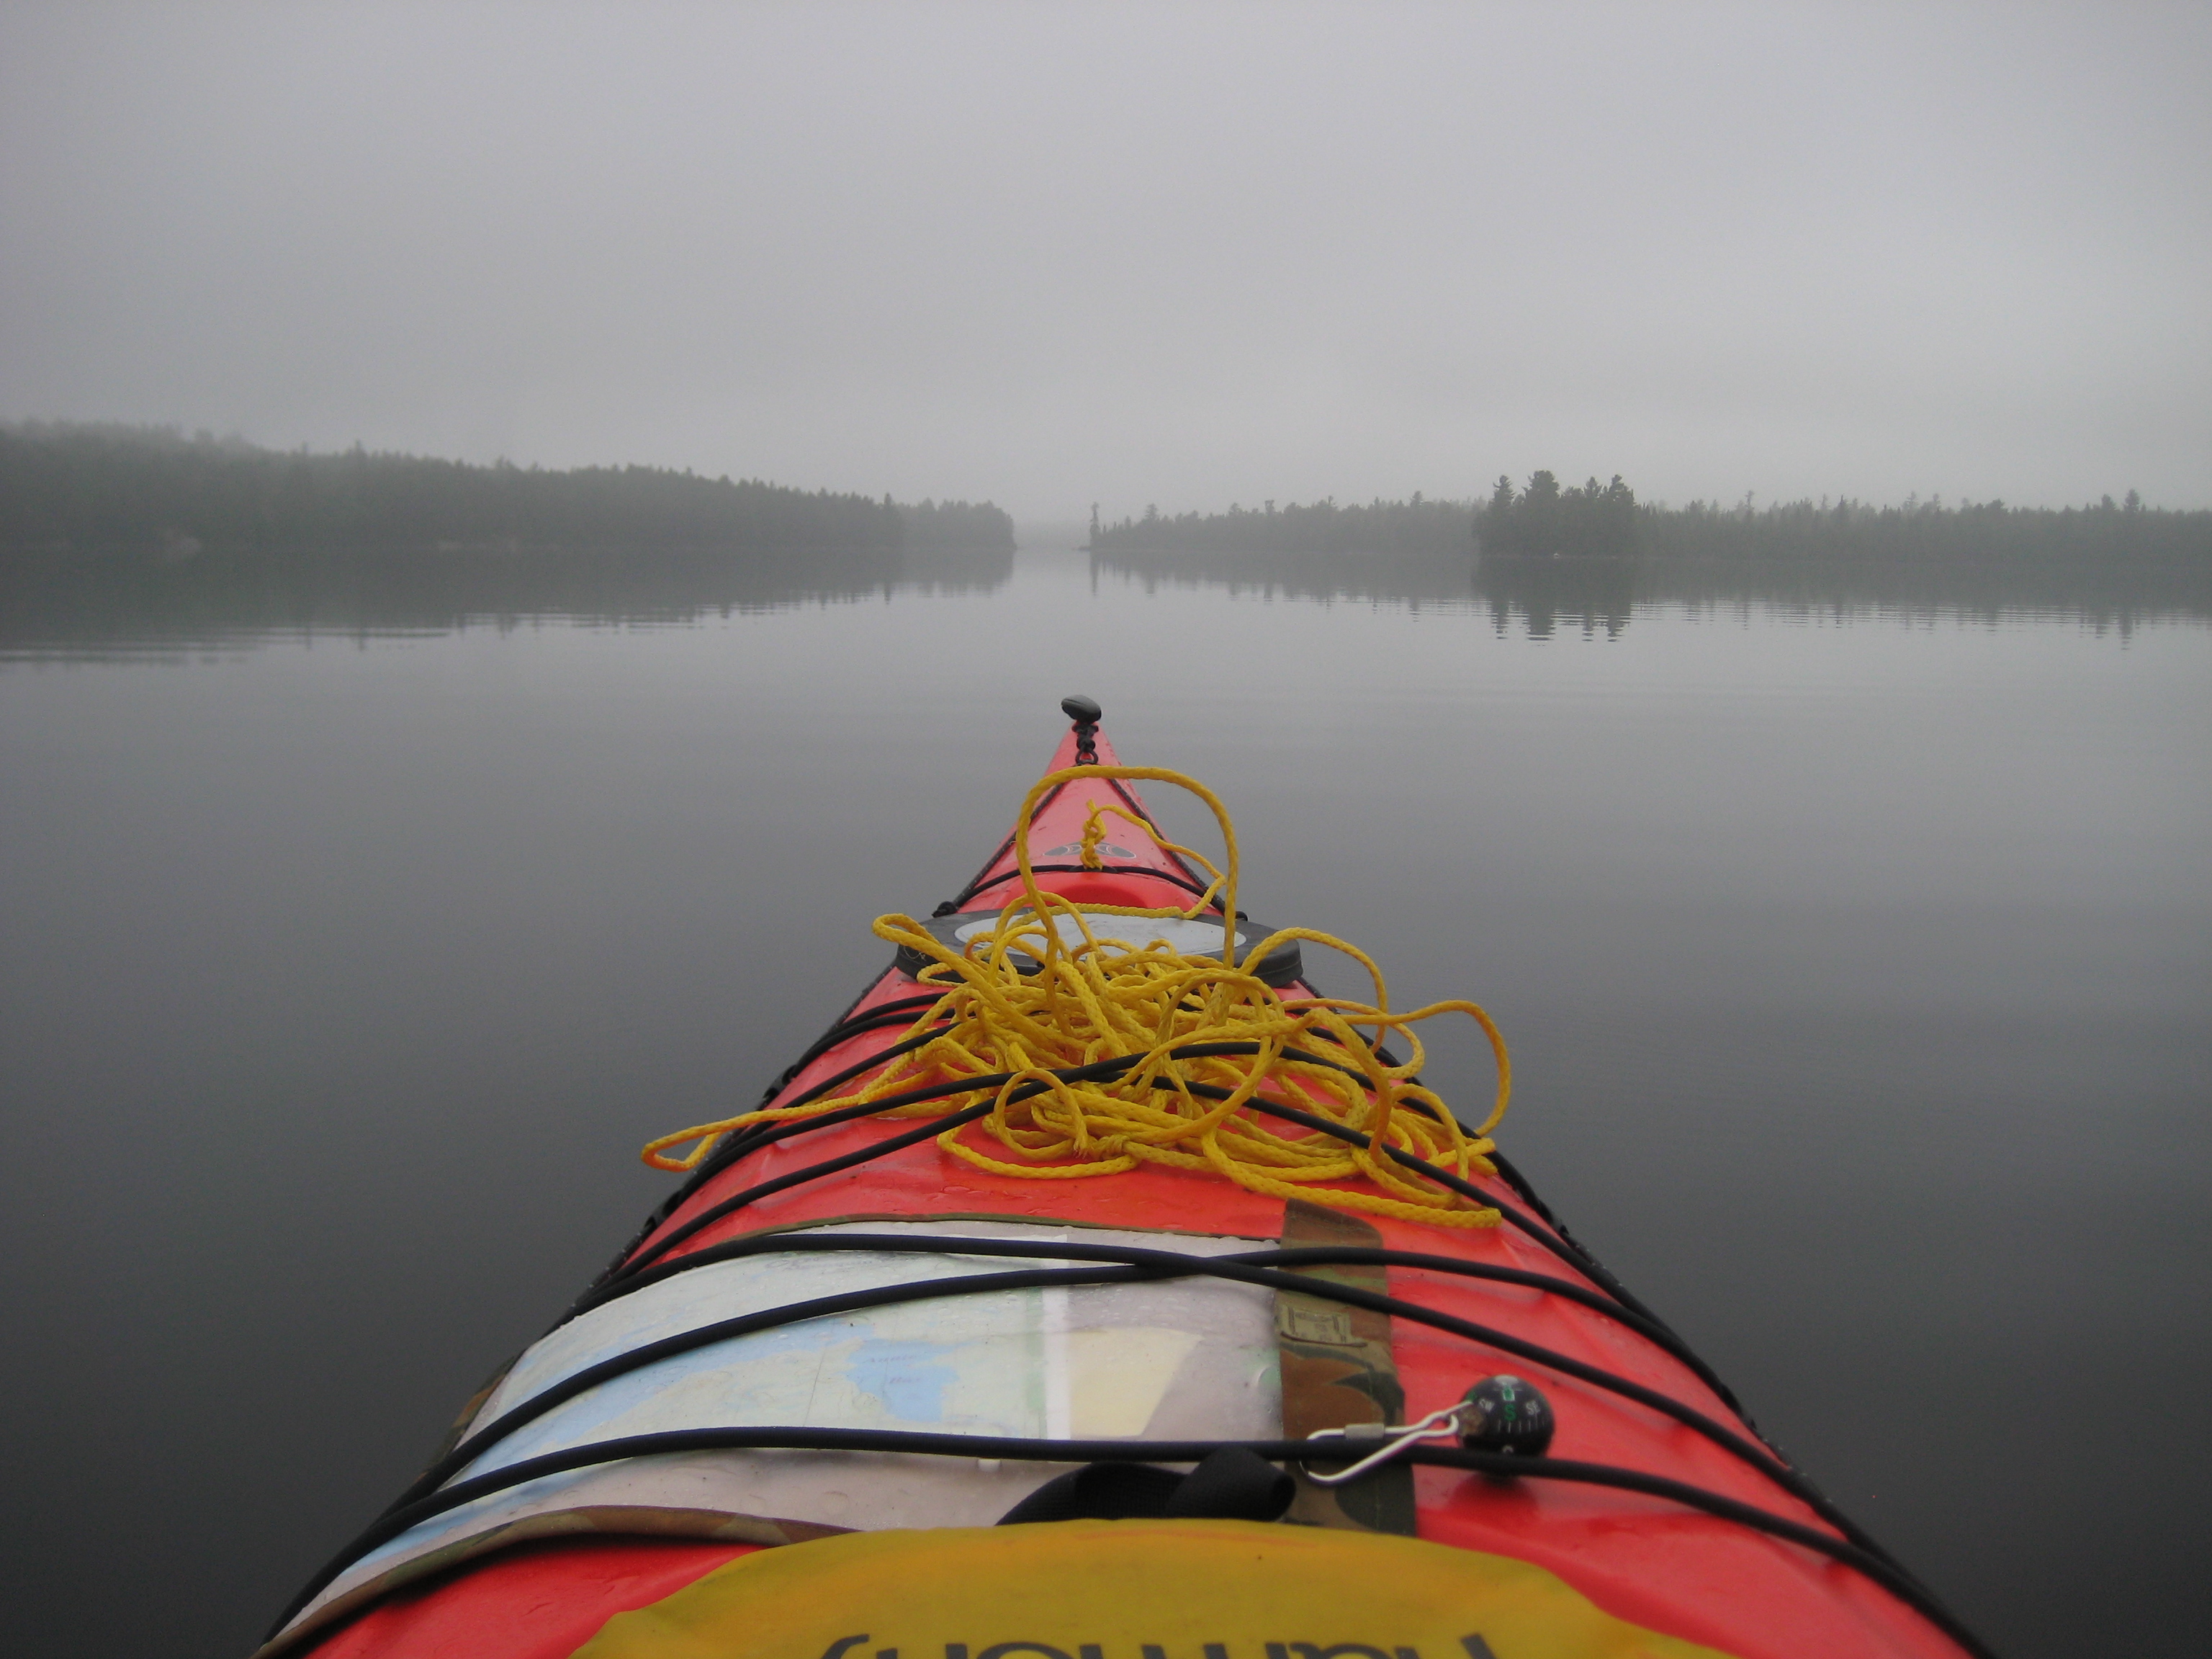
Figure 1. Algonquin Park, Lake Opeongo: ready to set off on kayak trip at the south end of South Arm
 |
On the deck (L. to R.): camera on dry bag on compartment lid, spray skirt on cockpit (not clipped in at front yet) and paddle, camouflage pack for cockpit (snack, water, camera, suntan cream), helmet, lifejacket, map case under webbing (under helmet). Not attached yet: bow rope for tying up kayak, also for grabbing if I get tipped out of kayak.
This was my 2nd overnight trip with a kayak (the other one being a not particularly interesting trip on the Ottawa River). The trip described here, five nights out, is my longest trip so far. This trip was an extended version of my Canoe trip to Lake Opeongo, Algonquin Park, Ontario, Canada 17-20 Jul 2004 . There I'd paddled a canoe by myself. In wind (even the mildest breeze), it's impossible for one person to steer a canoe. The front of the canoe catches the wind and with you having all the mass and acting as a pivot, swings the canoe around you. I spent much time trying to figure ways around the problem. Even stacking my gear under the bow seat, while I sat in the stern seat did nothing: the bow of the canoe still stuck up in the air. (On this 2013 trip, I met someone who filled canoe bags with water to weigh down the bow end. The kayak is a better solution.) In 2004, I had an arduous trip and a harrowing crossing of the large body of open water between the north arm and the south arm. I had to complete the crossing in one go, without stopping, or else have the canoe turned sideways to the wind. Once the canoe turned, I would only be able to go across the wind and wouldn't be able to go where I wanted. This 2013 trip became possible when I found that Algonquin Outfitters, at Opeongo Lake, made a touring kayak available for rental.
My outdoors adventures on the east coast of USA have been limited. Most of the place is paved over. In the US, recreation is not a part of living and you only get 2 weeks annual holiday, so any reasonable length trip is proscribed by work. (In the US, living isn't an expected part of being alive either. You're expected to have a job so that you can consume. Health and education aren't part of the lifestyle; you handle that yourself.) If I want to go hiking, it's easier to save my holidays for 2 years and come back to Sydney for a month. I've been raising a son for the last 18yrs. With retirement and my son moving to Boston for college, I planned this long trip, to avoid the heat of NC in the summer, to visit friends, and on the way back, to see my son in Boston.
This time, rather than fly, I drove from North Carolina, via a week at Stellafane and then a week in the Adirondacks, with a few visits to friends in between.
I'd last been to the Adirondacks with Chris Cosgrove 28yrs ago, when Chris had been living in Potsdam NY, only a 2hr drive from the Adirondacks. I have happy memories of visiting Chris. I'd visit him from Maryland twice a year, once in summer to go hiking, and the other in winter to go snowshoeing. (Chris was active in SUBW till the mid 90's.)
In the Adirondacks, I re-did two of the trips that I'd done with Chris. One was climbing Mt Marcy (the highest point in New York State), the other Algonquin Peak (the 2nd highest). Both involved about 1000m up and 1000m down. I did them both in 10hrs, the same time as I did them with Chris 30yrs ago. The only difference was that this time I did them on two separate days. When I did it with Chris, we did them back to back, on one day, getting back after midnight, doing the last couple of hours by torch/flashlight.
There were many German speaking tourists in the campground at the Adirondak Loj. What were they doing here, when they could visit the Alps? I asked one. He wasn't a tourist. He was living in the US and he was homesick for the mountains he knew. The Adirondacks were the best he could do.
On leaving the Adirondacks, on my way to Algonquin Park, I passed through Potsdam and dropped in on Chris's old house, saying hello to the person who'd bought the house from him. I took a few photos of the house, which I sent to Chris and I mailed Chris a couple of postcards from the Adirondacks with postsmarks from Potsdam. An apple tree in Chris's old backyard is groaning with the best tasting apples I've ever had. The new owner just lets them rot.
After leaving Potsdam, I crossed into Canada bringing with me my propane canisters for my stove. Previously I'd flown in and couldn't bring propane with me, because as we all know, terrorists bring camping fuel with them in their luggage. (The first trip to Algonquin, I ate cold.) Terrorists don't bring pressurised cans of bug spray or shaving cream with them, so last time, I brought that in my luggage.
There was a noticable difference on entering Canada; drivers behaved intelligently and courteously - they overtook and pulled back into the slow lane after overtaking, rather than sitting in the fast lane next to the car in the slow lane. (On my return to USA, immediately after crossing at Ogdensburg, a pickup truck came up behind me and sat on my tail, untill I found a spot to pull over.)
On my way through Renfrew in Ontario (Canada), I stopped again at the Subway to eat and photograph the rock, but this time with my car in the background, rather than a rental car (see the 2004 trip, Ottawa to Algonquin for a write-up about the rock).
Figure 2. The Rock at Renfrew thumbnail
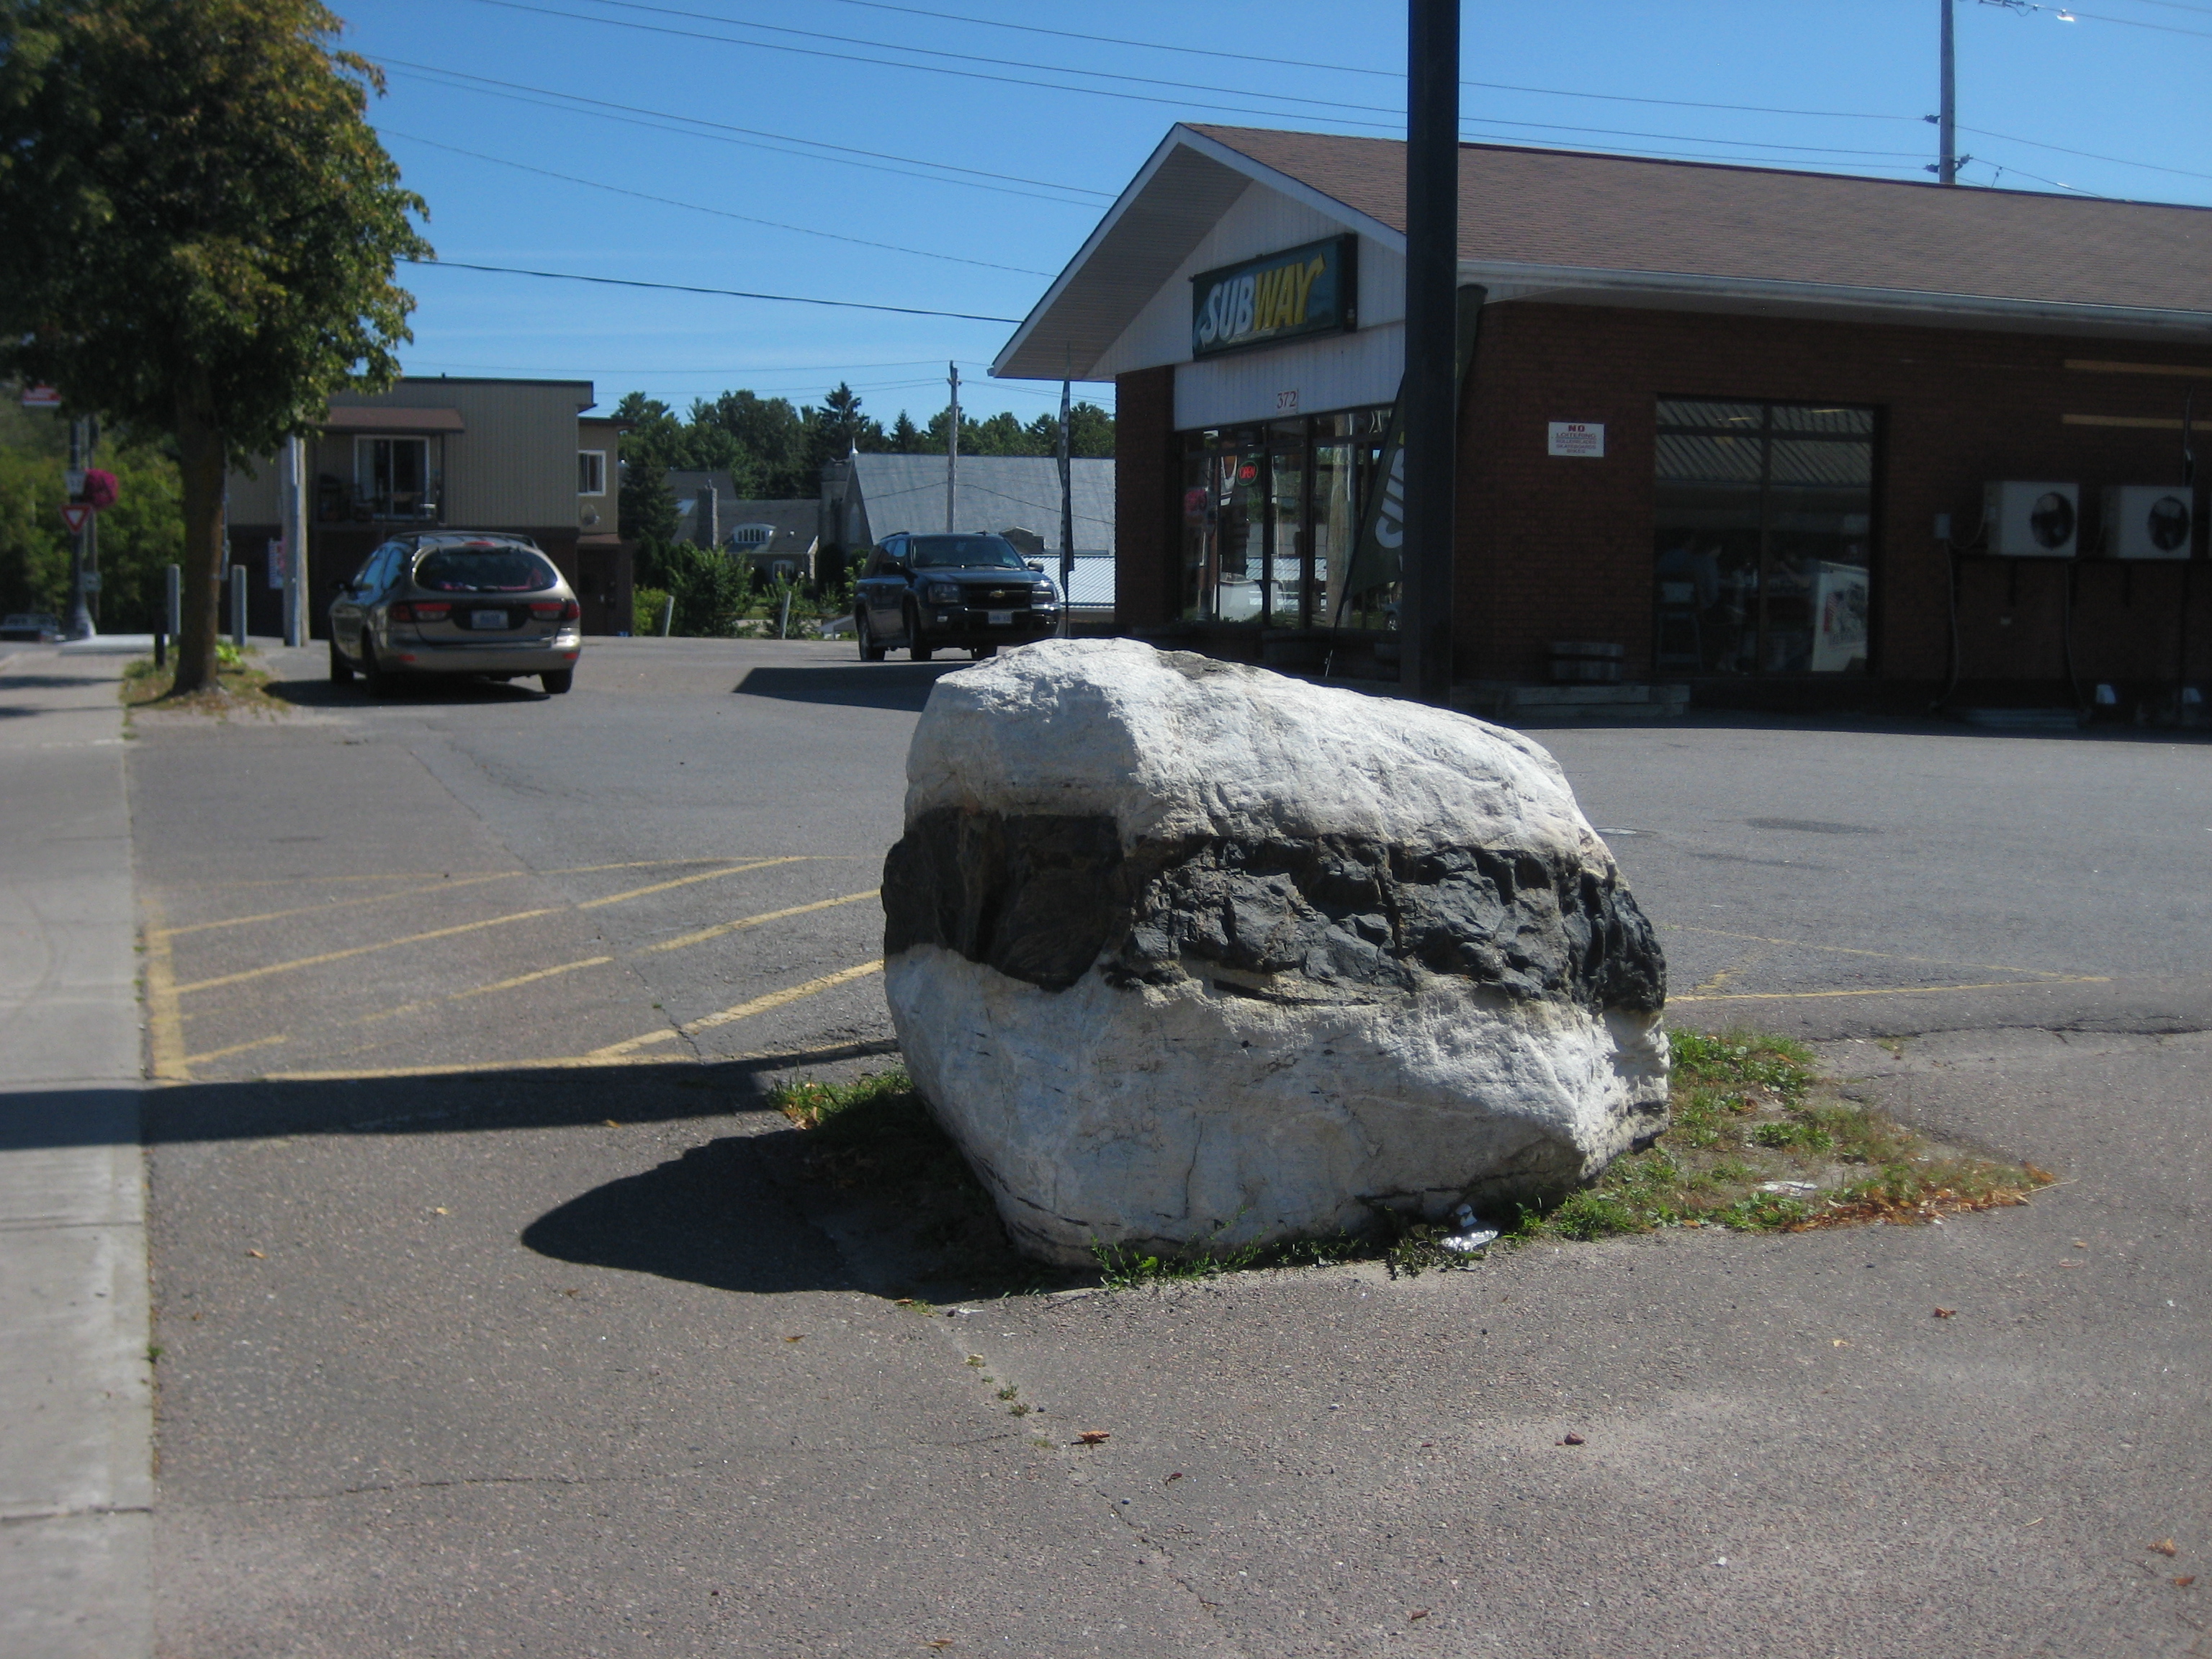 |
The rock at Renfrew
I always stop at Renfrew before heading off to Algonquin Park. The people in Renfrew are so nice. I called my Canadian friend Louise to tell her how nice Renfrew was. She said "Joe, it's not Renfrew, you're in Canada; everyone's nice." She's probably right.
Just outside Algonquin Park, I stayed in Barry's Bay at the Balmoral Hotel (recommended). This allowed me to repack from hiking mode to kayaking mode, in a dry room with a shower, and giving me an early start the next day. I had breakfast next morning at Dixie Lee's (also recommended) just opposite the Balmoral. I had originally intended to stay at the The Arlington in Maynooth, where I stayed last trip, but this time on calling, they told me they'd have a band playing till 1am. They recommended a few places in Barry's Bay, all of which were full with weddings. Thanks to a helpful receptionist at the Ash Grove Inn in Barry's Bay, I found the Balmoral, which was nice and quiet.
On arrival at the bottom of Opeongo Lake, I picked up the prebooked touring kayak from Algonquin Outfitters and my prebooked camping permits from the hut of Ontario Parks (888-668-7275) and was on my way.
This section is about the differences between kayaking and hiking. If you don't care about any of this, you can hop directly to the trip report at algonquin_2013.day_1
The main advantage of a canoe is that it can carry cargo (e.g. beaver pelts or 3 months of food). Paddling is not ergonomic; you have to lean over the side. Paddling a canoe in a straight line in any wind requires two people (you will always have wind).
A kayak doesn't have much storage space. A 1 week trip in fine weather is about the limit. Paddling is more ergonomic. One person can steer a kayak. If you're solo and want an easy time paddling, you have to be in a kayak.
In both cases, you need two people of my strength to portage. In this trip, I stayed within one lake system and did no portaging.
Once waves reach a certain height, in both a canoe or kayak, you can only go at right angles to the wavefront, without risking swamping or rolling (you can't paddle while large waves are striking you at an angle). Once you reach that stage, you shouldn't be out there. You only need a little more wave height and you'll roll. The wind only has to pick up a little bit more, or by statistics, you get hit by a single large wave.
In my solo trip on the Ottawa R, I was caught out in a sudden squall. I was close to one bank, but it was large boulders against a cliff. I wouldn't have been able to get out there even in calm weather and there was no way to pull a kayak out; it would have been dashed on the rocks in wind. The river was about 1km wide and I saw the rain coming towards me from a distance. Shortly after the rain moved from land to over the river, I started getting small waves, which grew larger and larger as the squall approached. Initially I turned parallel to the waves, but as the waves became more peaked, I couldn't keep the kayak stable with respect to roll when I was at the top of a wave; my paddle couldn't reach the water anymore. I turned at right angles to the waves and let them flow towards me along the deck and over the spray skirt. When the wind hit, the waves were in every direction. The squall only lasted minutes before passing onto the land behind me. With no fetch behind me, the waves disappeared in a flash. I was glad I wasn't left in the water, in sun and calm, trying to figure out how to right a kayak against boulders and a cliff.
On a hike, a constraint is weight. In a kayak, weight is no big deal (I brought cans of soup and plastic bottles of orange juice.) Volume is the killer in a kayak. There are day kayaks and there are touring kayaks. According to the outfitters, a week is a long trip in a kayak, so they gave me the biggest touring kayak. I had expected it to have lots of room. It didn't. The storage is at the ends of the kayak in conical compartments, which have 1/3 the volume of a cylinder with the same base. (I guess if you want volume, you take a canoe.) You can't go much beyond a week in a touring kayak in pleasant weather. The access holes to the waterproof compartments are too small for canoe bags, so anything you want dry, has to go in individual ziplock bags. Having a million little ziplock bags is an organisational nightmare.
Although I've hiked and been physically active all my life, I'm not particularly muscley or strong. I'm a 1.75m, 55kg ectomorph, with arms like canary legs. My main upper body strengthener is a keyboard. When hiking, your larger legs do all the work. In a kayak your arms do the work and the rest of you is baggage. Still I have reasonable endurance and 6-8hrs of paddling gets you as far as you need to go, at least on this lake. Not having paddled for 6 days before, I started out with 4hrs of paddling the first day (an afternoon), building up to 8hrs on the last full day. I didn't want to be stuck out in the middle of nowhere, because I'd pushed beyond my limit and my arms couldn't get me back. I had expected my biceps to be sore, but the main effects I felt were on the triceps and the muscles on the outside of the shoulders. Your main work is pushing the end of the paddle furthest from the pivot point (the paddle). The end of the paddle that's being pulled is only moving half the distance.
Compared to hiking, where you can jolt from rock to rock, paddling is gentle and continuous and I didn't tear or sprain anything. You aren't getting scratched or torn up. With the pleasant temperatures, and all the water for swimming, you come back as clean as you left.
For planning, I used the Average Weather In August For Algonquin Park, Ontario, Canada. The actual weather was exceptionally pleasant, being 18° in the morning and 22° at sunset. I had planned for nights at 10° and brought my 3 season sleeping bag. I could have easily used my summer bag.
The worst of the insects (black flies) are earlier in the year. I brought bug spray, but didn't need it. I had a few mossies in the evening, but they weren't a problem; they were slow and easy to swat.
It's windy much of the time. You have to plan for a stiff breeze now and then. I had some wind almost every day. On the first afternoon and 2nd morning, I had 0.5m waves, coming over the deck. A rudder, rather than a kedge, would have been useful. Other than that, the wind could be easily paddled against.
Several mornings the air was dead still, the water like glass and the air filled with fog. With the rain, initially I couldn't tell whether the fog was low clouds or warm water fog. When later in the morning, it did start to clear, I could see a clear space above the fog and below the clouds. I expect most of the fog was warm water fog.
It rained on and off the first two days. Being in a kayak, it wasn't a real problem.
You need to get the maps before you arrive. The Park sells a map of the whole park. It shows all the lakes and portages. It's useful for pre-trip planning and selecting the lake(s) you want to visit, but the map is physically huge and the scale is too large to use when you get there. For the trip, I used the "Lake Opeongo" 1:50,000 map from the waterproof and robust "The Adventure Map" series by Chrismar. The scale is suitable for kayaking and the campsites are marked, so you can head straight for them. Algonquin Outfitters, situated on the shore of Opeongo Lake, has all sorts of Chrisma maps, except for the lake they're on. (I got a cheery "come back in a couple of weeks, we should have one". I said I'd be out of the country in a week. Fortunately I still had my map from my 2004 trip. I expect they don't sell many maps.)
I have a one man tent in Australia that's wonderful. It has a single pole and needs only 3 pegs (can use more for wind). It can be put up in minutes. It's windproof with a large flap that can be unzippered to reveal a mesh wall. In cold or wind, you're instantly warm on getting into it. It has a porch large enough for a pack and which in a pinch, you can prepare food. I'm pretty sure I've cooked (well, boiled water) on a stove there. I haven't seen anything comparable in the US. It was made in NZ and I haven't been able to find another to have here in the US.
I brought a one man tent from LLBean mainly relying on the good name of LLBean. The tent is all mesh with a fly. The all mesh design gives no protection from the wind, which comes in under the fly. The fly doesn't go to the ground, leaving a gap where rain and wind can come through. The thing is useless by design.
Figure 3. LLBean tent: fly doesn't go to the ground.
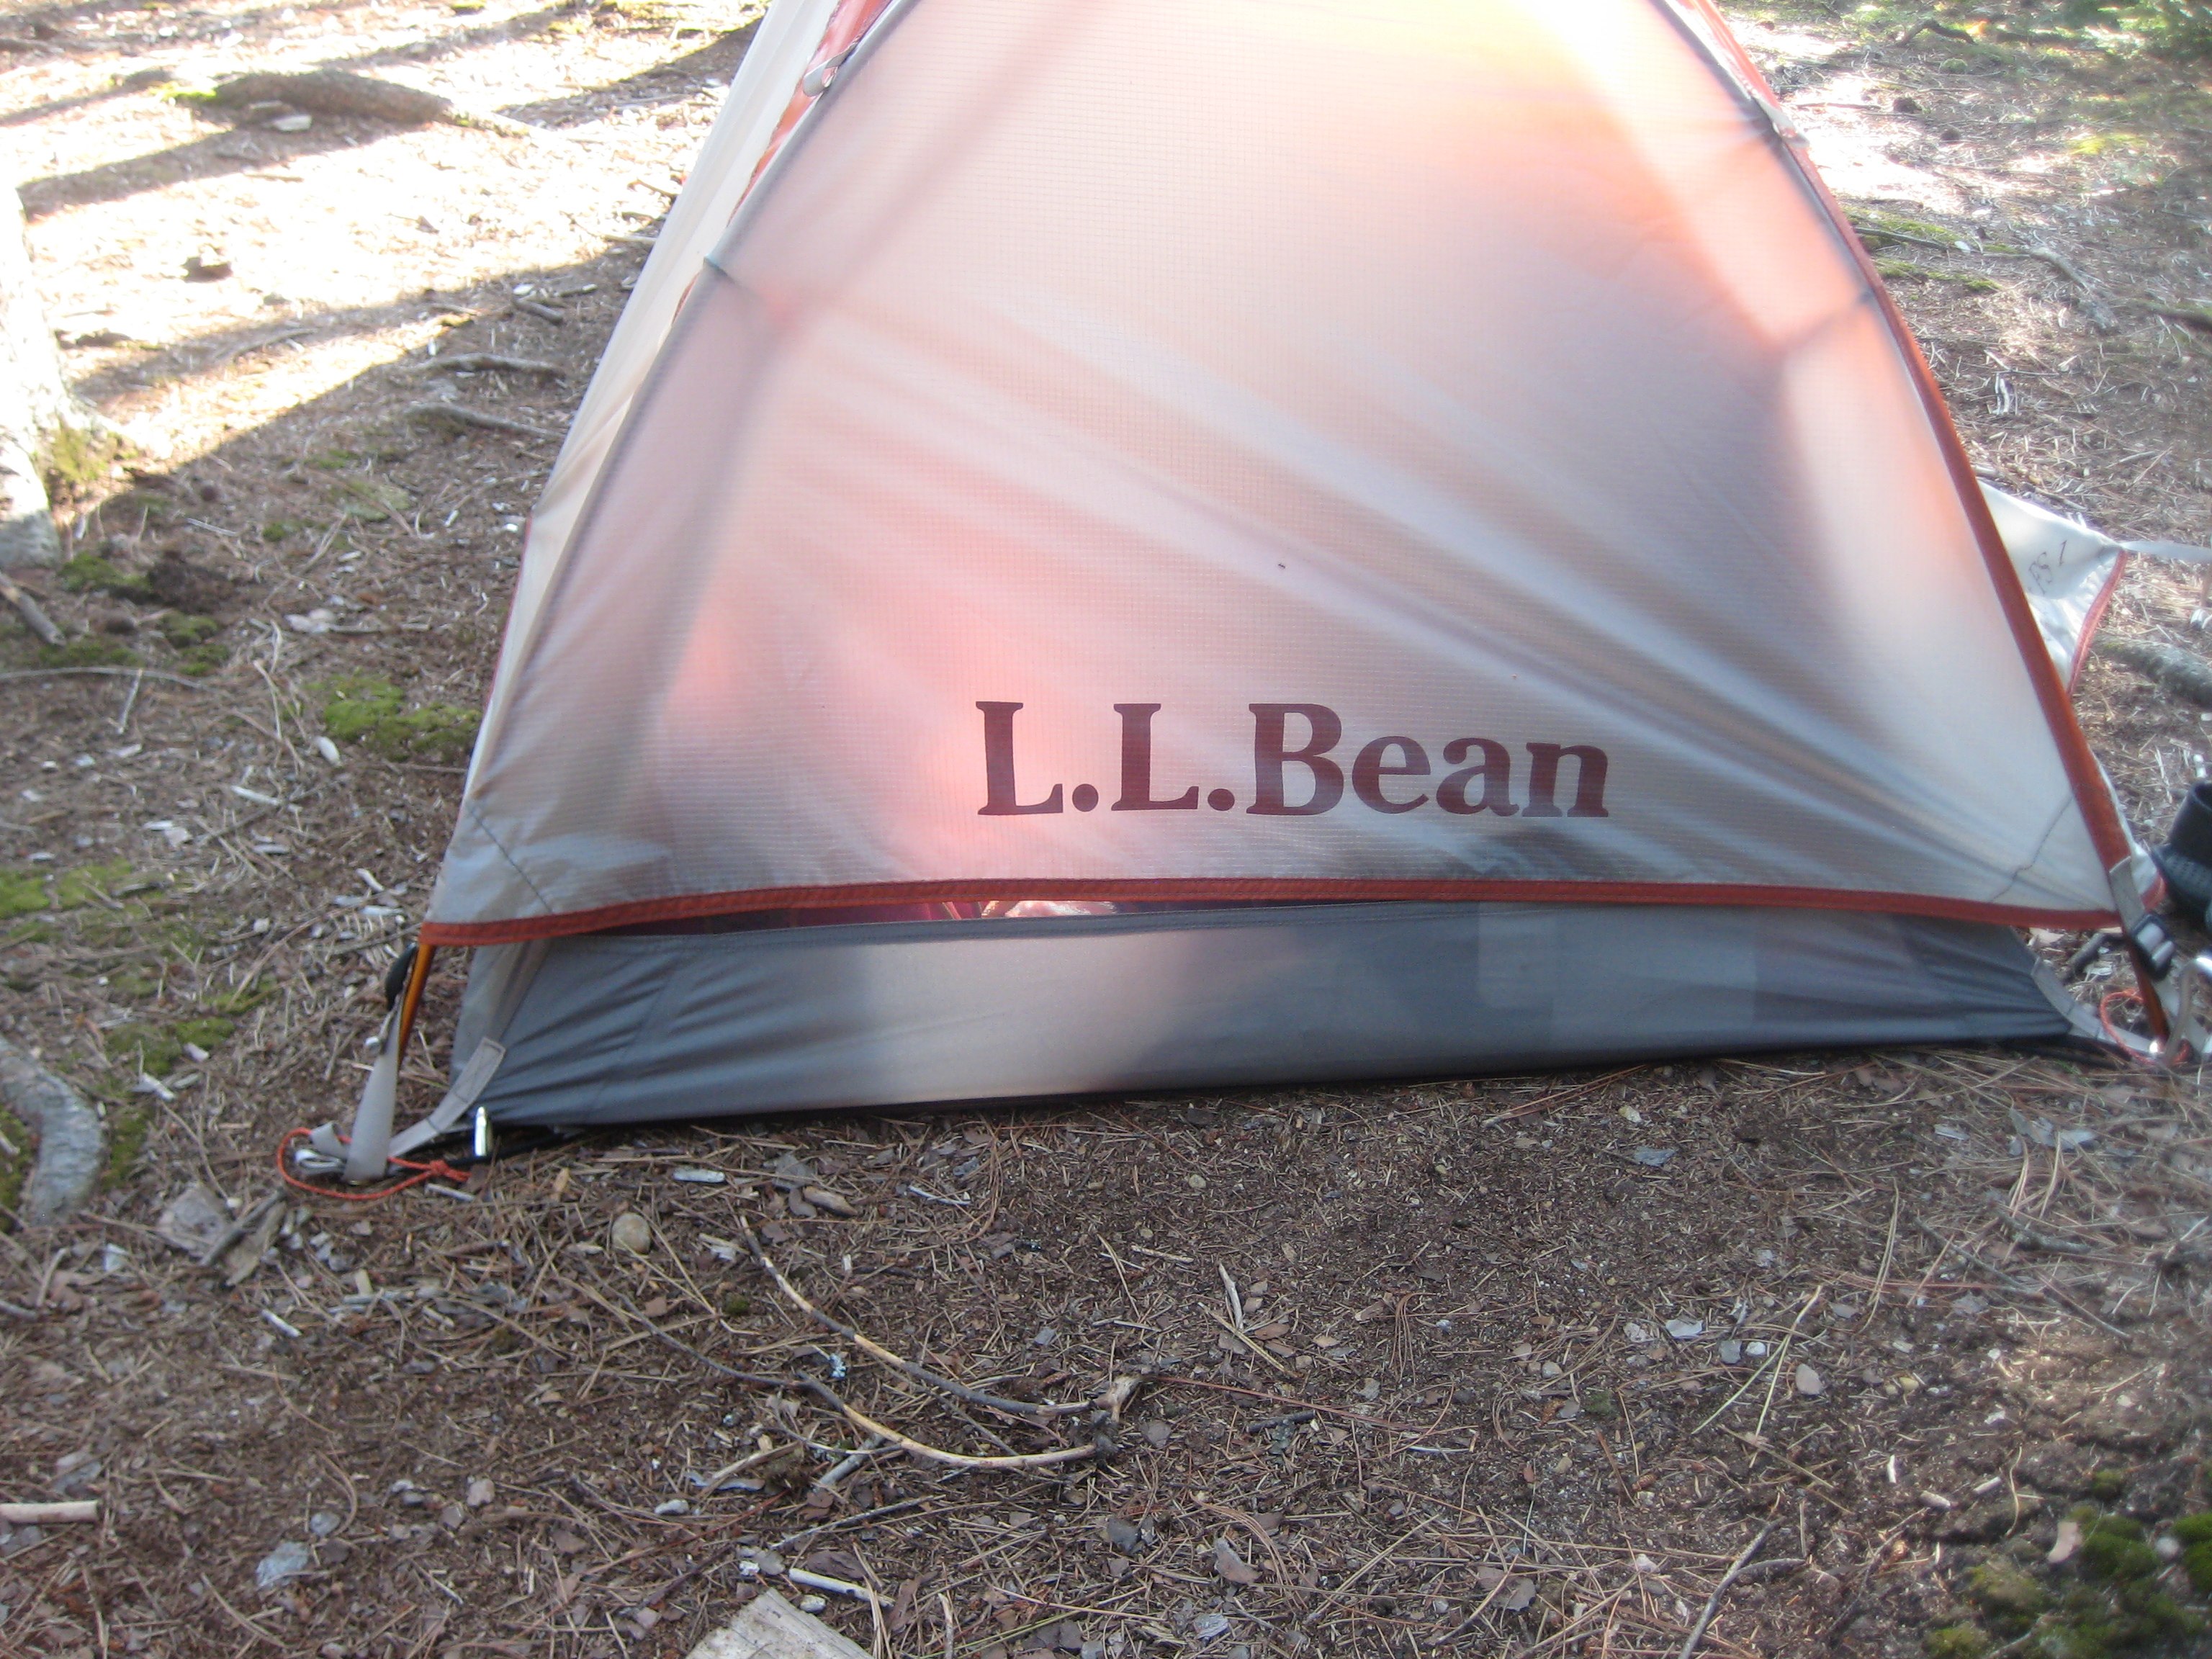 |
LLBean tent: fly doesn't go to the ground. There's not even an overlap in some places. Note the gap between the tent and the fly visible under the "L.L.".
There was no porch to store anything out of the rain. There was little room to store anything in the tent, like clothes, bug spray.
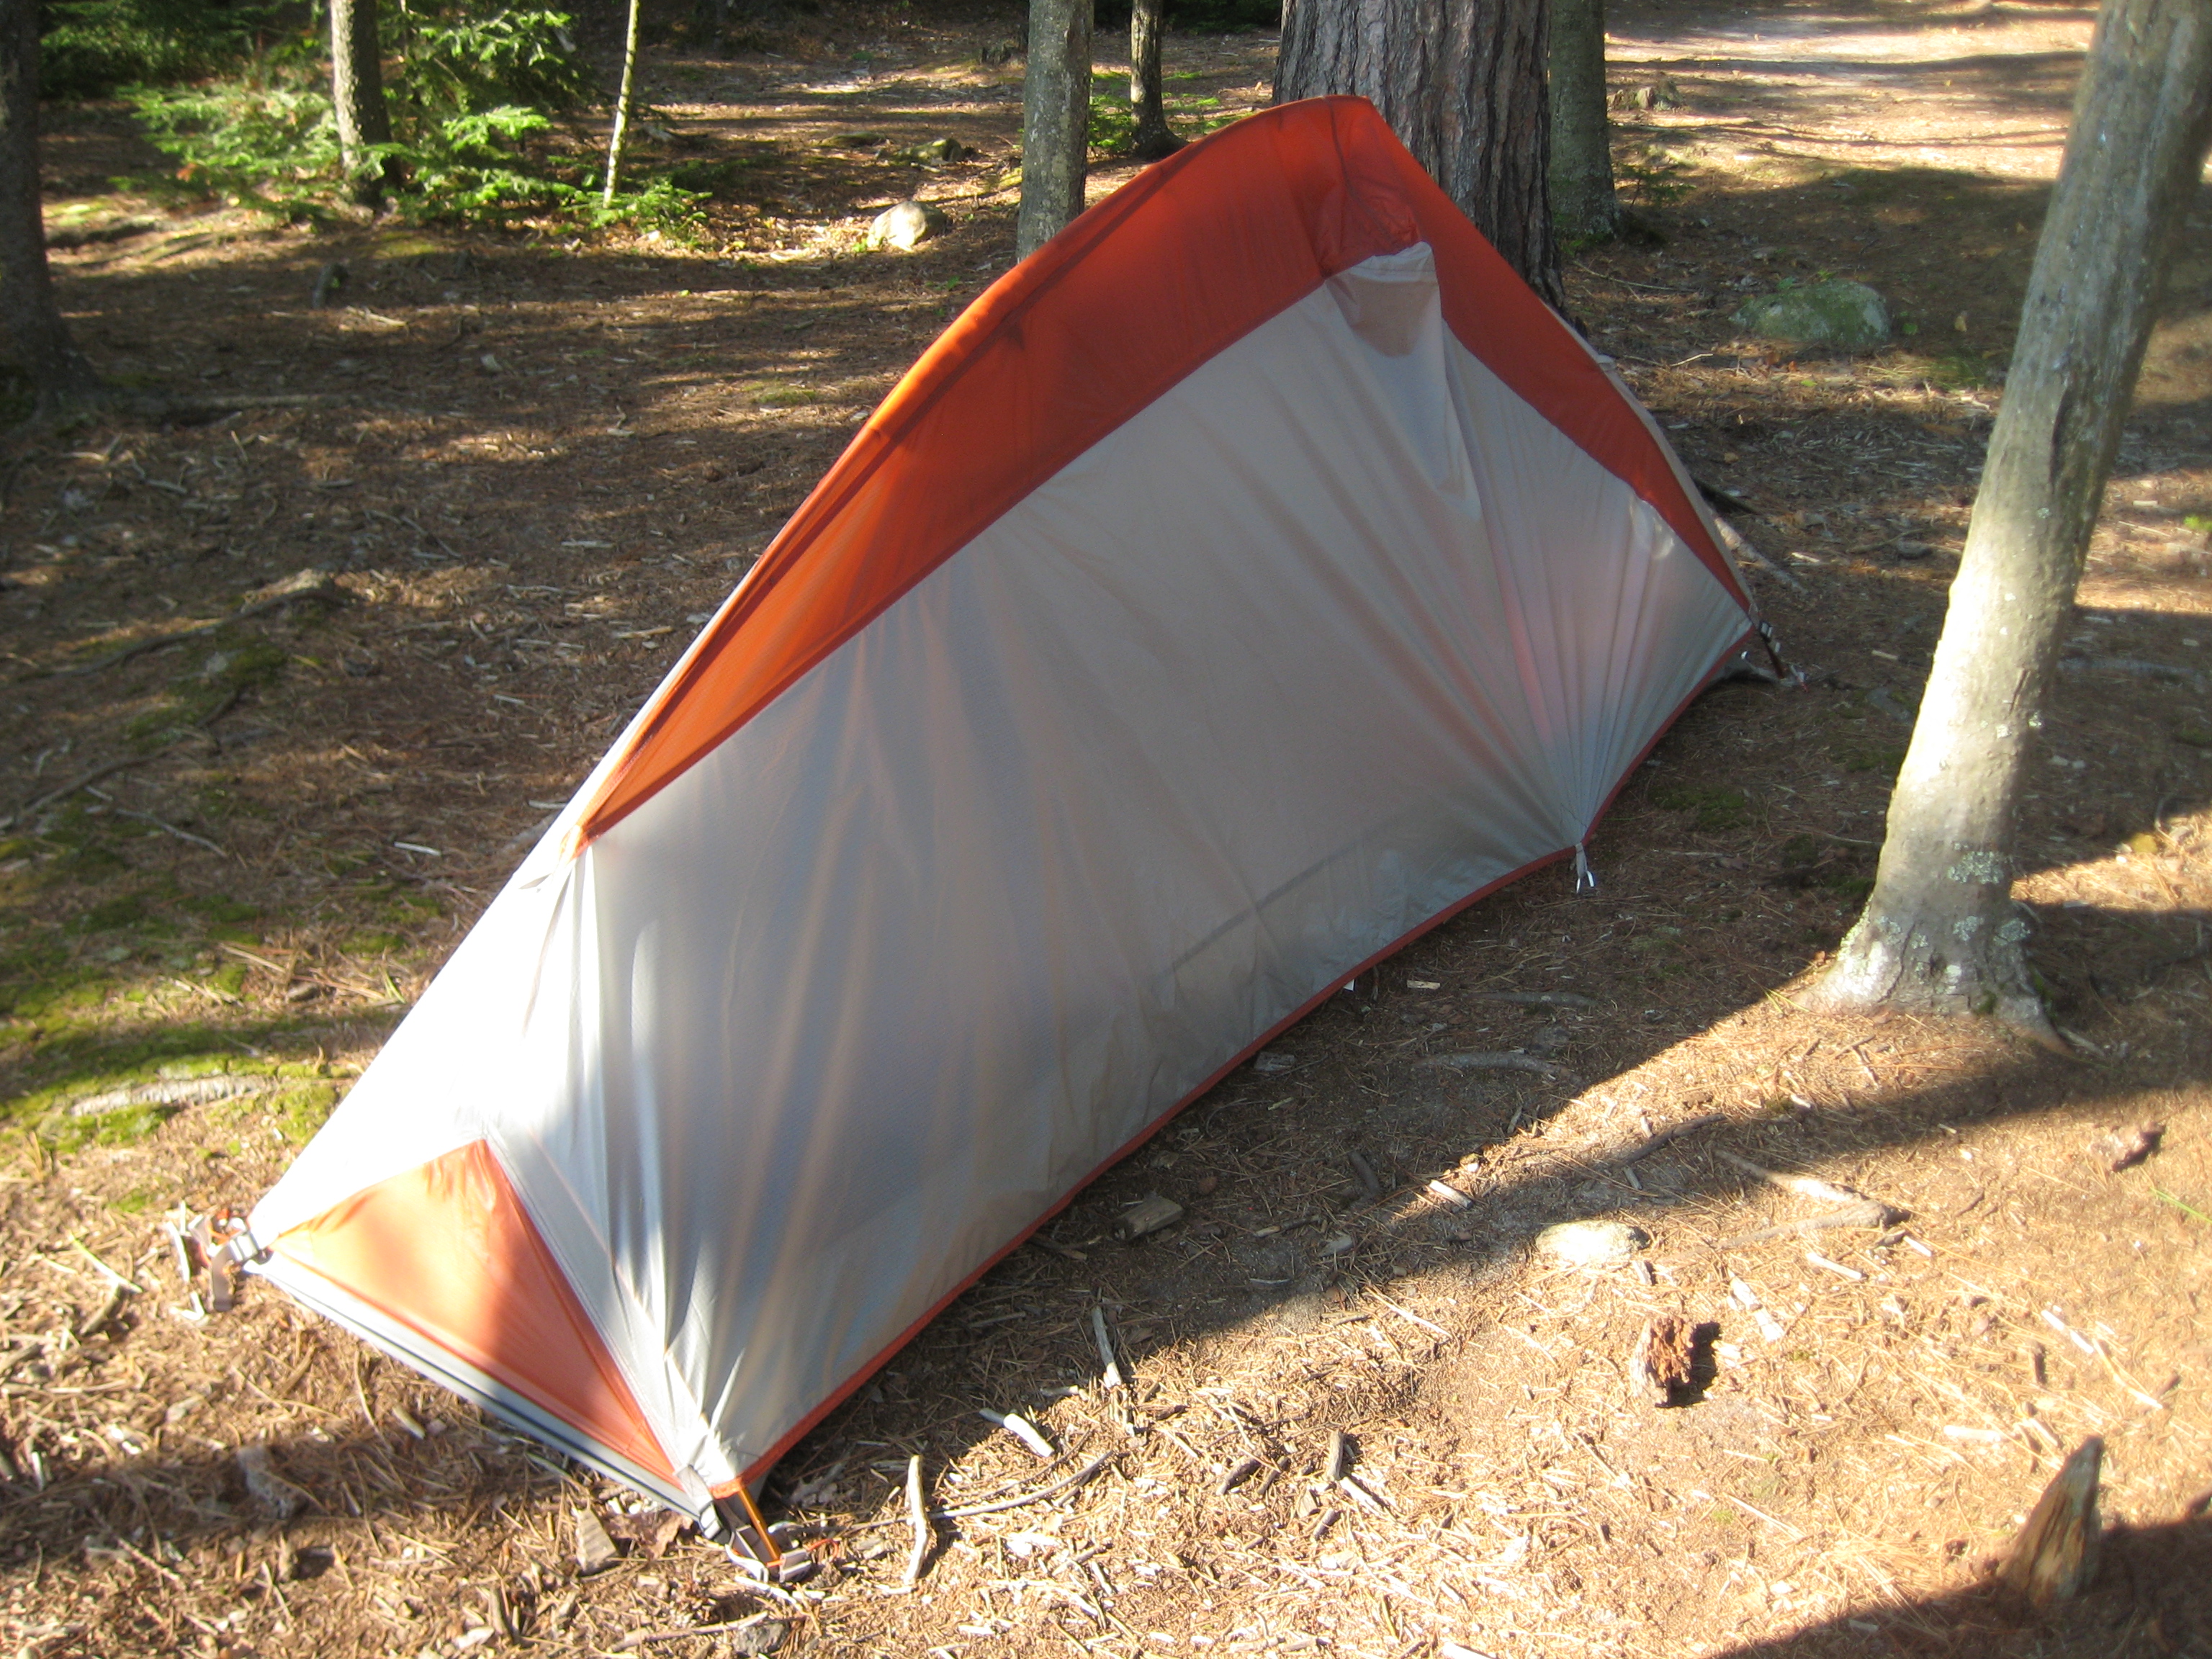
Figure 4. LLBean tent: flap open
 |
LLBean tent: flap is open, but not big enough to prepare food, rearrange your gear or store a pack.
There wasn't even a pocket for your glasses; you're supposed to roll over and crush them in the night. Because there's no room in the tent, everything had to be kept in the kayak at some distance. This required getting in and out of the tent multiple times. You need a porch where you can eat and prepare cold food in bad weather and rearrange your wet gear. In rain, you should be able to cook from (I originally said "in") the porch. In no wind, there was no way for the tent to breath and the inside of the fly was dripping in water in the morning even with the fly unzipped. To avoid the condensation in good weather, I had to fold the fly back over the tent, making the tent just a mosquitoe net.
Fortunately there were enough gaps in the rain on wet days that I could cook dinner outside the tent. But you need to be able to eat even in the rain.
Here's words from Steve about tents and cooking in the rain. Steve was my companion on the Colorado 2002 trip and lent me one of tents then.
The LLB tent, now that I've seen it, has issues common to many tents, including a couple I have used. It looks like most of the ultralight 1 (or 2) person tents I've seen. The one of mine you once borrowed had the mesh and fly issue, with snow blowing up under the fly and melting on the screen (door and window were scree mesh). The one I used that time, the mesh had a zip cover, but also had the fly not reach the ground, supposedly to improve ventilation and reduce condensation in the habitat. As consequence, the water from the fly drips onto the waterproof lower area of the tent and runs across a seam. This once caused a wet trip due to a "defective" water proof component.
I now use a Hilleberg Nallo tent. Not free standing, but the fly goes to the ground. I've been in storms with gusts I estimate in excess of 50mph (healthy aspen trees blew over), snow with 6+ inches on the ground the next morning (frequent wake-and-shake overnight to knock snow off the tent), and blowing rain, all without complaints. Sometime after the windy trip I noticed a small tear in the fly fabric, and Hilleberg did a really professional repair for a very small sum of money.
I would never cook under the fly of one of these tents. I put on my rain gear and cook in the weather. The tents are not flame resistant. When nylon burns, it melts, drips, and continues to burn while clinging to anything it touches (campers' napalm). The same is true of the nylon clothing I wear (if escaping a forest fire through area with embers or low flames, strip to your boots....).
Steve does a lot of snow trips, which is out of my leaque. My limit is Sydney winter, which around here is called 3-season. Most of my early hiking was done with cotton or similar non-flammable fabrics (e.g. japara) and I haven't changed my thinking to keep up with the new fabrics. Much of my clothing this time was flammable, which I hadn't thought about. I've just recently found that you can't use polypropylene for a shirt. I had one wear through, where my pack sits on my back, in a week.
The LLBean tent has a complicated set of poles to allow it to be self supporting. I initially decided this was a virtue, since I've camped on rock platforms. The poles for the tent have to be flexed to incredible tension to get them into the tent. I can't imagine that the sewing on the tent will last. You need to put one end of the pole against your foot and push the poles with both hands. I expected the poles to bend permanently. Even though the tent is self supporting, in wind it still needs to be pegged out, so the self supporting pole structure is an unneccessary complication.
There is an extra short single piece of pole to spread out the fly. Since the inside of the fly is wet in the morning and had to be hung up to dry, I wound up leaving this fly pole at a campsite on the 2nd night I used it. This pole should be a part of the main set of poles, making it impossible to forget. LLBean doesn't have any replacement poles; they'll be available next year (I hope).
Figure 5. LLBean tent: missing fly cross-spreader.
 |
LLBean tent: missing fly cross-spreader. The fly is sitting down on the tent.
The tent comes with a fitted groundsheet (called a "footprint", a word that doesn't mean anything; what's wrong with "groundsheet"?). It's smaller than the tent floor and looks more like a thong than a groundsheet. I expect it's not supposed to stick out from the tent and catch rain. You would hope that enough of the poles poked through the tent eyelets to clip the fly and then the groundsheet to the tent poles, but the part of the pole poking through the tent eyelets isn't long enough. As well the fly and the groundsheet aren't under the same tension as the tent and fall off the end of the poles. You still have to peg them out, defeating the purpose of the self supporting tent. I never figured out how to put the tent up in a stiff breeze. If I pegged the groundsheet down first, it was soon covered in leaves and twiggs negating the puncture protection I was expecting it to provide for the tent floor. Because the poles weren't long enough, I couldn't attach the groundsheet to the pole system directly and then plop the whole thing (tent, fly, groundsheet) on the ground.
Tent manufacturers put flaps over the zippers. In tent reviews, people seem to like these. All they ever do for me is get caught in the zipper and require careful two handed operation. Can't manufacturers make waterproof and windproof zippers?
The LLBean tent was more of a bivvy bag plus than a tent. I expect the design constraint was "what's the lightest tent that one person can sleep in on a gym floor?" rather than "what's a functional one man tent for an extended trip, including rain and wind?" You pay a large price for a self supporting tent, which still needs pegs in a breeze. I had expected the LLBean one man tent to be functional like my Australian tent. It's hard to imagine that anyone has tested this tent. It's a general all round bad design. It's unusable.
I brought the amount of food I'd need to hike; I only ate half of it. Presumably being limited by arm muscles, I was doing less work than if I was hiking. Here's my daily food intake:
- breakfast: whey protein (9g), and raisins mixed together, so that the whey protein sticks to the raisins. Add granola/muesli to make half a cup. Shake to mix in the whey. Eat dry (yes the whey protein makes it like glue). Coffee and 125ml orange juice.
- lunch: 2 granola/muesli bars
- dinner: soup and single serving of freeze dried dinner.
Yes it was austere, but it was all I needed for fuel. I wasn't going for a gastronomic experience. The only comfort food was the orange juice in the morning.
Whenever I do a lot of exercise, my appetit-o-stat is reset and I don't eat food nervously, like I do when I'm at home confronted with the insuperable problems of life. I had plenty of energy and just wasn't that hungry. By the end of the week, I'd lost a nice bunch of tummy flab, which I was most pleased about. There not being much to do at night, I got plenty of sleep.
There are 4 interconnected lakes (called arms on the map). As part of getting a permit, you declare to the Park Service, the arm of the lake you'll be in on any night. After that, on the day you can pick any of the 30 or so campsites in that arm. The campsites are marked by large triangular signs on a tree, easily visible from the middle of the lakes.
There are about 100 campsites spread out around the lake system. Each area is cleared of brush, has a fire ring and back in the woods somewhere, a short drop thunderbox. Many people have made tables out of natural materials (and nailed them to trees). At all the campsites I visited, I prepared my food standing up at one of these tables. Despite granite being everywhere, there is about 10cm of soil for tentpegs. (The soil is podzol Algonquin Provincial Park, one of the best agricultural soils. It also helps that there's lots of fresh glacial till.) Even though you are nominally in the wilderness, if you ignore the paddling, you are really just going from picnic spot to picnic spot.
One thing I'm not used to is pitch on pine trees. If you're used to grabbing trees as handholds, here you wind up with pine pitch on your hands. It's sticky and doesn't come off easily.
On arrival at a campsite, you can't always tell that a campsite is occupied till after you get out. There may be no canoe on the shore, but back in the woods you'll find a tent. The people are there for multiple nights and just now happen to be out paddling about.
When hiking, your tent, pack and cooking spot are in proximity. When kayaking, your kayak is your pack. In Algonquin, the kayak is on the edge of the lake and not within arm's reach of your tent or cooking spot. It's often 20-30m away from the cooking spot. I was constantly making trips backwards and forwards. At night, all food had to be returned to the critter-proof kayak compartments. Not having done much kayaking, I hadn't figured out the optimum algorithm for moving food to and from the kayak or in which compartment to store an item. Even by the end of the trip my gear had not reached equilibrium. Even worse than having gear in a sub-optimal location, was moving it to a new location; then I couldn't find it in its new obvious location.
The lakes are in the Canadian Shield. The hills and shore are deformed granite. Most of the shore is 30-60° sloping rock or rocks. About 2/3 of the campsites are reached over rock like this. On this type of sloping shore, you don't have to go far out before you're standing in water up to your neck. Getting into and out of a kayak at these spots is a hazardous moment, particularly in waves, and being by myself, with little chance of recovery if something went wrong I wasn't up for anything dramatic. You have to magically land your craft without dashing it on the rocks and then drag it far enough out of the water that it won't disappear overnight. This being freshwater, there's no tide, but having grown up in Sydney with the tidal water, I expected, while my head was turned away, for the lake level to rise and lift my kayak off, leaving me stranded, even after tying the kayak to a tree.
I looked for campsites with gently sloping approaches, and with a beach (rather than rock), where I could put feet down on both sides of the kayak, when it was parallel to the shore. When I came to a new lake, early in the afternoon, I would look for a campsite with a gentle approach, then setup camp, have dinner and later go for a paddle around the new lake. If I waited till the end of the day to look for a campsite, I'd be left with a campsite with a rocky approach.
On my first night, I didn't have the landing part worked out yet. I arrived at a campsite in wind and with relatively large waves parallel to a gravely shore, that was too steep to come in normal to it. I turned parallel to the shore, thus putting me parallel to the waves and at risk of rolling over. I quickly unclipped the sprayskirt, and before I got my feet out, the next wave poured over the gunwales, filling the cockpit, soaking me and nearly tipping me onto the shore. I still had to get out and stop the kayak from being dashed on the rocks. After that I carefully chose gently sloping approaches. Fortunately the first day turned out to be the only one with waves on landing.
With landing places few and far between, you had to plan to be in the kayak for extended periods. This meant you had to crap at the campsite. It also meant that you couldn't pee a whole lot. On a solo day kayak trip along the coast of Massachusetts, on the way here, I was in waves where I couldn't see over the tops, dying to pee, on a rocky coast where there was nowhere to get out for 2hrs. (I did have a rudder, which helped with the waves.) It really cramped my enjoyment of being on the water. As a result of this experience, in Algonquin, I ate the minimum amount of fibre and didn't drink anymore than I had to. Eating my main meal in mid afternoon helped with timing things next morning and with not having to pee in the middle of the night.
Sitting all day, without being able to move your lower body, is hard. My hips get sore and I get a numb bum, and that's if the seat cushion is dry. I guess the early astronauts had to do it. I sat in a mockup of a Gemini capsule once. It was much smaller than the front of a VW beetle. You could barely move your arms. There was no room over your head to stretch your arms and you couldn't straighten your body. They were in this thing for several days. It was like an MRI tube, without the thumping.
Leaning back in your seat, out in the middle of a treeless lake, you get a good view of the clouds. You can watch the weather all day. It can be quite pretty. It's better than having bushes whack you in the face all day.
Unlike walking in the rain in the bush, where you get soaked from both the inside and outside, being in the rain in a kayak is no problem at all. You have your sprayskirt and a jacket and you are sealed tight. As long as everything inside the cockpit is relatively dry, you're set. I paddled for an afternoon in the rain in comfort. The temperature was pleasant (low 20's). I expect it might not be so much fun if it was cold. The hard part is knowing that you're going to have to setup camp and prepare food in the rain. Preparing food in the rain is the same whether you're hiking or kayaking. However on the rainy day, I waited for a break in the rain in the afternoon, found a campsite, setup, had dinner, and then resumed kayaking when the rain started again.
You need the sprayskirt in rough weather (wind, rain). It stops waves and rain from coming into the cockpit. However you can feel the humidity inside the cockpit in your body and legs. If it was real warm, it wouldn't be much fun.
In contrast to paddling in the rain which is quite pleasant, in sun on an open lake with no shade, but wearing a lifejacket and longsleeve shirt, you cook. It's like being on snow. Even though I put ZnO on my nose and used #30 sunscreen, I still got sunburnt. I put almost nothing on my forehead thinking the helmet would shade it, but it blistered. Not having a mirror, I didn't realise what had happened till I got back. Obviously I didn't put enough sunblock on.
Some people I met said they'd been drinking the lake water every trip. To be safe, I treated it with iodine (tetraglycine hydroperiodide) or when cooking, boiled it first.
Recently I read that the iodine taste can be removed with ascorbic acid. I was stunned that it's taken this long for anyone to realise it can be done. I was a chemistry nerd of the first order in high school (LC in 1964) and spent most of my adult career in chemistry. I never thought of ascorbic acid to neutralise the iodine taste. If you'd asked me in high school "what chemical, harmless to humans, could you add to remove the excess I2?" I would have come up with nitrite or sulphite on the spot. (I didn't know the chemistry of ascorbic acid.) Apparently no-one else has figured it out till recently either. This shows that the most important part of science is not knowing the answer to the question, but being able to formulate a question that can be answered (easily). The first person who asked "what can neutralise the taste of I2?" would have had the answer in minutes.
Not having bought any iodine tablets recently, and expecting mine to be out of date, I picked up some ascorbic acid from the pharmacy on the way to REI, where to my surprise I found that iodine purification kits are now a binary set; tetraglycine hydroperiodide and ascorbic acid. How nice.
As we all know, iodine is purple. The iodine tablets are dark green/violet. If you don't already know the colour of iodine, you'll find out when you open the iodine bottle and see that the cotton plug is brown and the exposed part of the plastic cap liner is dark.
The ascorbic acid tablets are white.
The metal screw caps for the bottles have different colours too. One is white and the other is dark yellow. Obviously this is so that in the dark, the lashing wind and pouring rain, you don't have to find your glasses to read the microscopic font on the bottles to figure out which bottle to open first. Guess which cap is on which bottle [1] ?
Being on a large set of lakes, there's plenty of water. This time the water was colourless. Last trip the water looked like red-brown tea which was caused by pine tannins in the rain run-off. You can wash or swim anytime you like. I had expected to accumulate clothes with a week's sweat and grime. Instead, I wound up quite clean.
One of the down sides of having water everywhere is that water is everywhere. With two days of waves and rain, much of my gear was at least damp, most of it from the water that came in the cockpit on my landing on the first day, that seemed to get spread around everywhere. Your hands are always wet and when you reach into a dry bag for a camera, the water from your hands goes back into the dry bag. One of my dry bags had a transparent window; the inside was always covered with drops of water. There may not have been water sloshing in the dry bags, but they were always 100% humidity. The window on my map case was always covered with drops of water on the inside. By dumb luck, I brought a regular bathroom towel with me. There were plenty of things that needed drying off.
You need to carry something to mop up water (e.g. a sponge). The cockpit of this kayak is like a tyre; you can't get all the water out by turning it over. Tipping out a kayak requires a gravel beach with no rocks. With your feet and legs wet and the kayak deck wet, the gravel/sand sticks to things and gets everywhere. As well when rolling the kayak, you risk gouging out the ends of the kayak and scoring the deck. The kayak is about 35kg and not trivial to move. Rolling a kayak over on land is not something you really want to do and I only tried it once. If you flip the kayak to stop it filling with rain, you no longer can get at the compartments.
You're always flipping water into the kayak, even just from your feet getting in and out. On a hot day, maybe you'll dry out, but paddling and roasting in the sun on a hot day is no fun (you don't want to pray for a hot day to handle excess water). I didn't bring a sponge and used a T-shirt to mop up the cockpit. The T-shirt smelled like bilge by the end of the trip.
On the way to Algonquin, my cell phone failed (it drained the battery in a couple of hours, rather than a week and then I couldn't recharge the battery). The full story is in "The Tale of 3 cell phones". Since I was going to be kayaking solo, I was counting on having a cell phone on Opeongo Lake as backup. Thinking I had a battery problem, I called at a cell phone store in Potsdam NY, where they opened up the cell phone and showed me the pink water indicator on the battery and cellphone, indicating that the cell phone had been damaged by water. At home I walk every day with a pack, with my cellphone in a shirt pocket. In the heat I sweat and by the end of my walk, my shirt is soaked, and the cellphone bag is damp. Apparently this was enough to stew my cellphone and I had to buy a replacement on the way to Algonquin.
Later on the lake, in the rain, with water droplets visible on the inside of the dry bag window, I was worried that the water would do the same to my camera and the new cell phone. (They survived, but to be safe, once the rain stopped, I put everything in the sun for a day to dry them out.)
Consequently I don't have any photos in the rain. Sitting in open water, surrounded by hundreds of intersecting circles in the water from heavy raindrops is quite pretty. You'll have to take my word for it.
So I was out on a lake, kayaking in rain, with a camera and a new cell phone. Everytime I reached into my dry bag, it was with wet hands. The inside of the dry bag's transparent window always had water droplets on it. Although there was no water sloshing in it, it was damp. I wished I had some dessicant with me.
When I was a chemist, we'd dry our crystals overnight using (blue) silica gel in an evacuated dessicator jar. I never tested whether it made any difference; I did it because I was told to do it, in the days before I questioned what I was told. On my return home, I ordered bags of (blue) indicating silica gel thinking it would sop up water on my next trip, just like it did when I was a chemist. According to specs I found on the internet, silica gel can absorb 40% of its weight in water. This would absorb any amount of water I was likely to have to deal with. The drying would need to happen overnight to be any use. If it took a week, you were likely to be done with the trip, or have a sunny day first.
 | Note |
|---|---|
| silica gel contains cobalt as the indicator. This is toxic. You must not let the silica gel get into food. | |
Here are 3 different packagings I found.
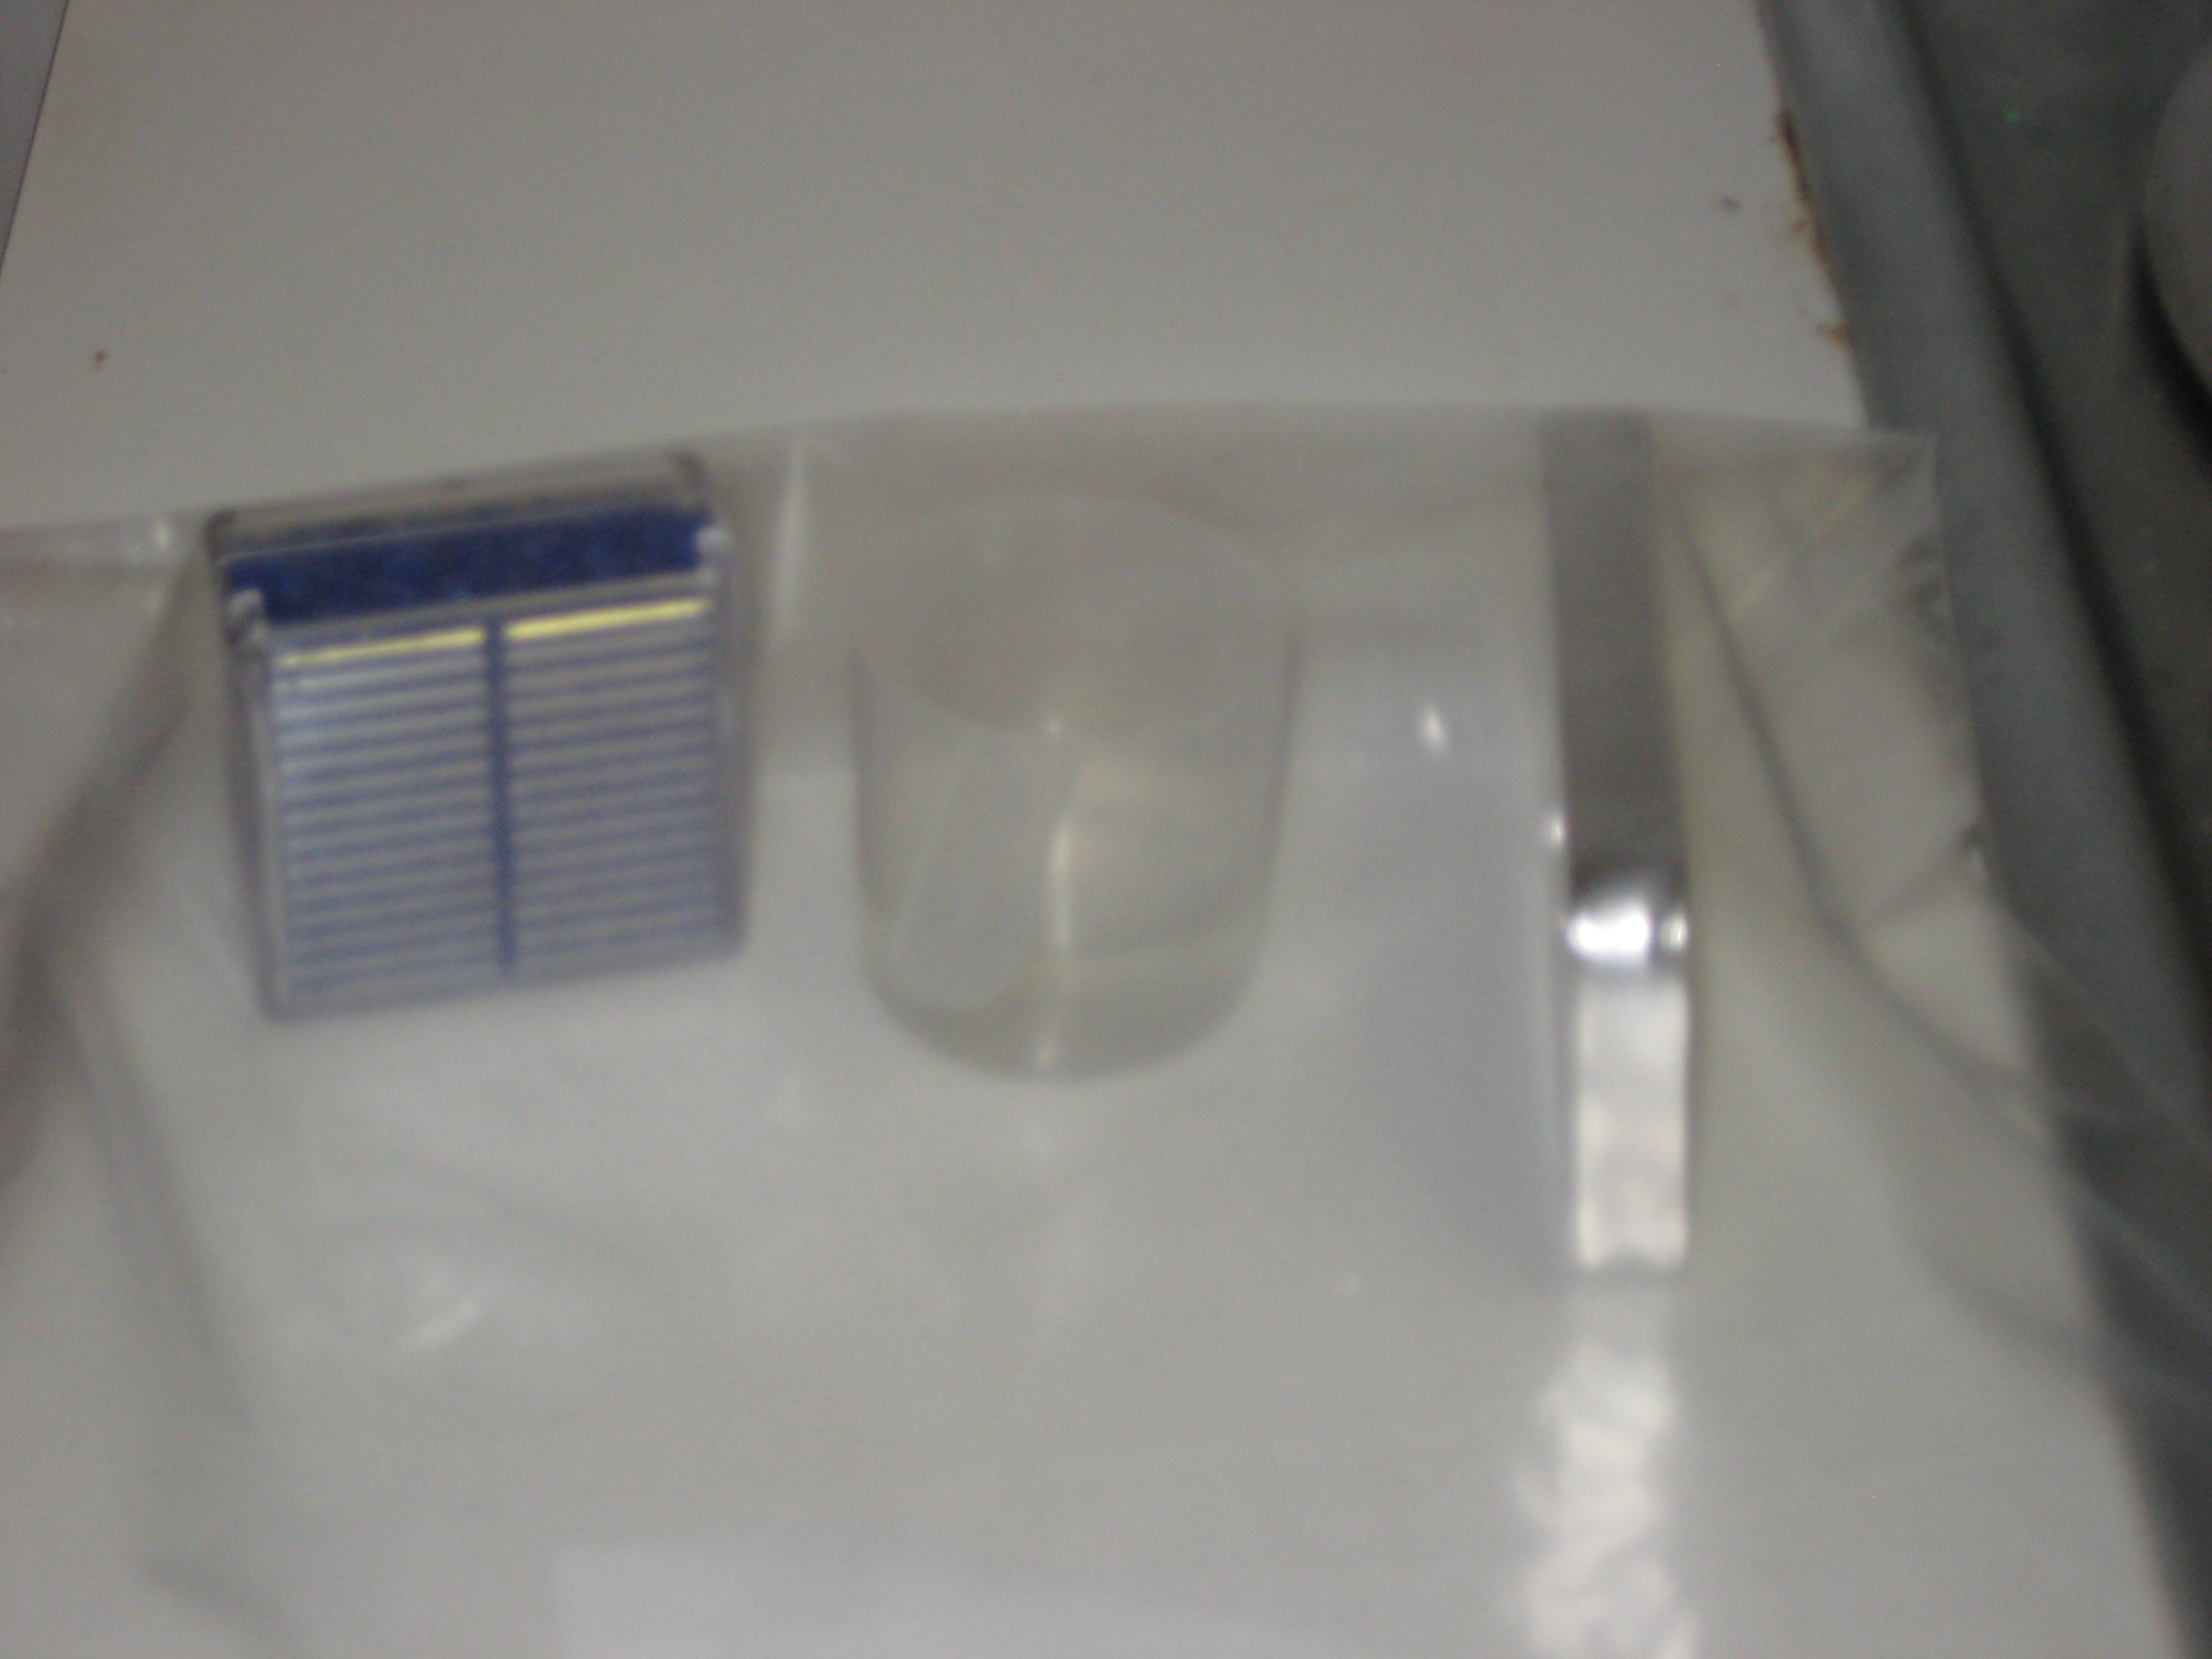
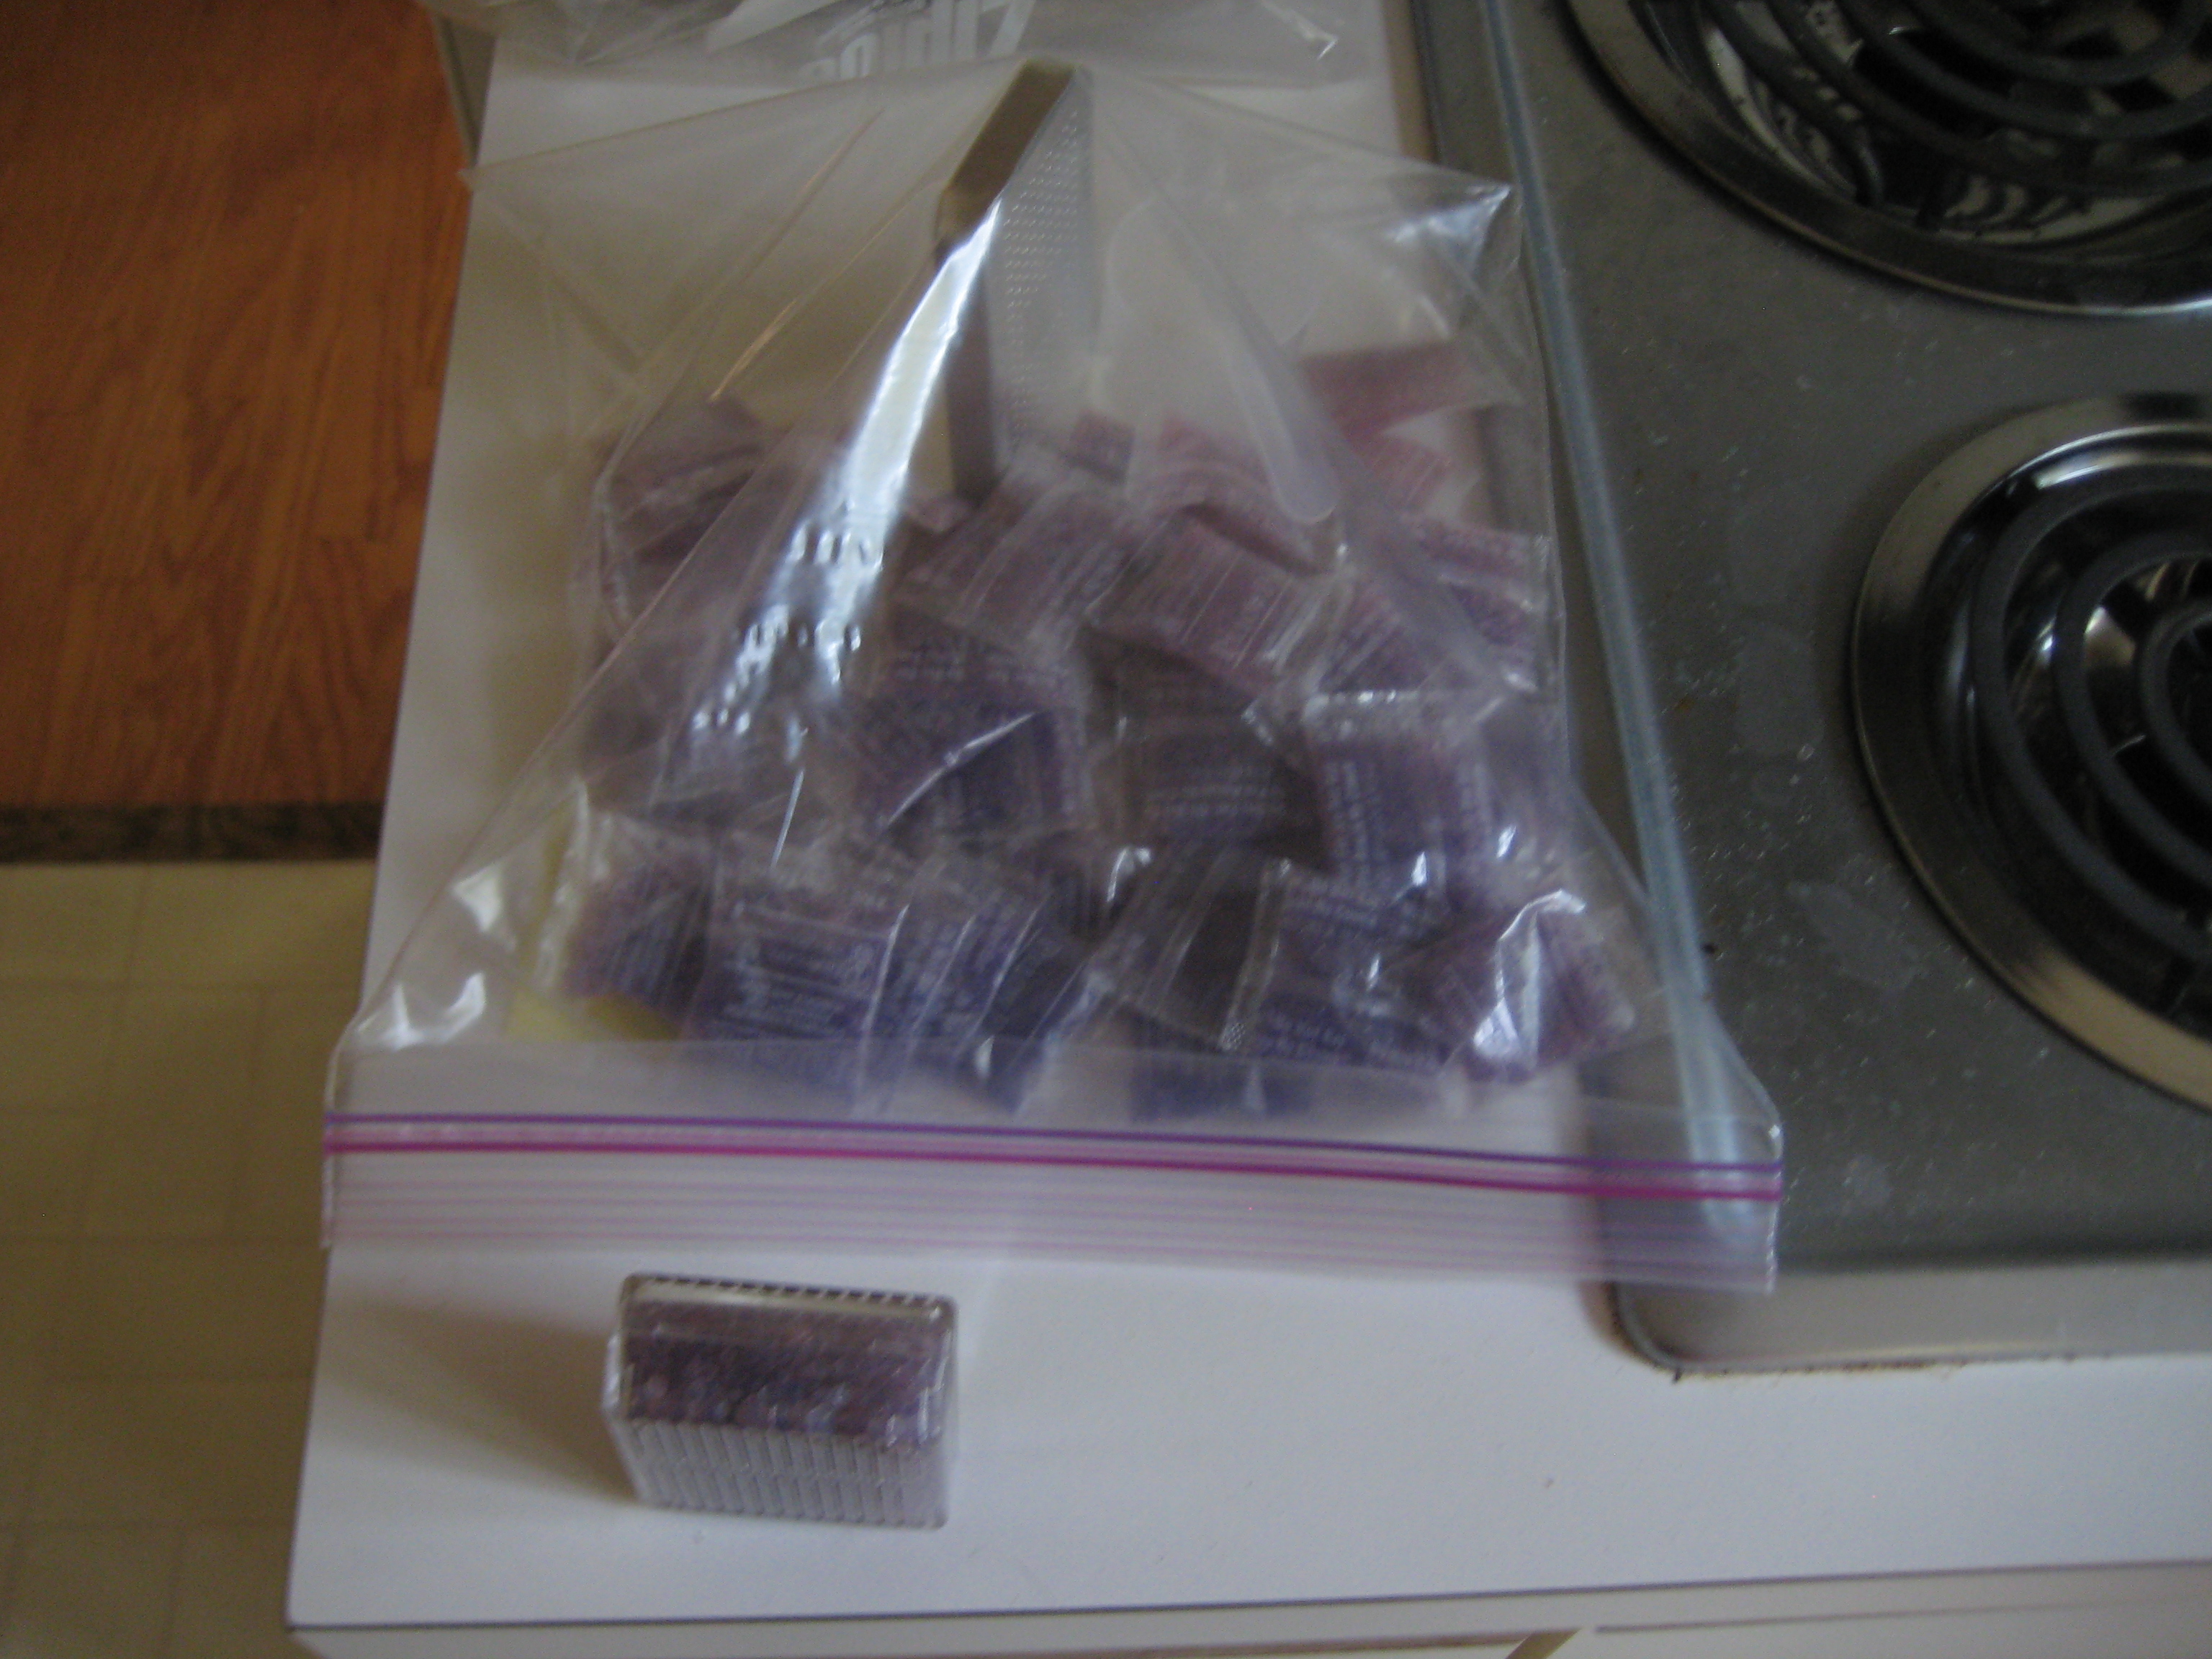
Figure 6. silica gel packages
 |
-
left; 3 columns of plastic packets,
increasing in the amount of water they've absorbed (becoming pinker)
The small plastic bags look like they could be easily torn. I expect I'd need many of these in a camera bag. It would be nice not to have to keep track of multiple easily torn bags of toxic chemicals.
I tried storing the packets in ziplock bags, but the silica gel turned clear in about a week. It seems that ziplock bags are porous. I expect if you're going to use silica gel to keep cameras dry, you'll need to arrive at the start of the trip with freshly activated silica gel in a tight container. I expect at the end of every day you'll need to replace the silica gel, as it will be wet.
-
bottom right; plastic box pack,
The box pack is made of hard plastic. I expect it would shatter or break on any physical abuse, like you'd find on a typical outdoor trip.
In testing (below), I find that this box absorbs water many times slower than the small packets. The air slots only expose a small fraction of the surface area of the box. Presumably the moist air can't get inside the box fast enough. This box is useless for drying anything. It may be useful for long term storage with things that are already dry, inside a box which is only opened occasionally.
In the air of my kitchen (20° 40-50% humidity), the packets become pink overnight. The box is barely beginning to turn pink in 5 days (even blowing air over it with a fan for a couple of days didn't make it go pink any faster).
-
top right; perforated aluminium canister.
The aluminum canister has a single plastic window. It has a black box design (any light entering is scattered by the silica gel and never exits). Thus on inspection of the window, all you see is black with vaguely discernable gel beads. As the beads absorb water (becoming pink) the view through the window is still black. Unless you shine a very bright light, or direct sunlight, on it, you can't tell the state of the beads. This canister is designed so you can't tell the state of the indicator (or else no-one has tested it). A better design would be to have another window on the other side of the canister, to let light in from the back. You need to be able to tell the state of the silica gel on casual inspection. You don't want to have to pull the canister out of whatever box or case it's in and go to bright sunlight to tell if it is still capable of absorbing water.
While with some trouble, you can tell if the silica gel around the window is used up (pink), you can't tell if the rest of the silica gel is still blue or not. The area of the pinholes seems comparable to the slots in the plastic box. I would have to weigh the cannister to see if it's absorbed any water, negating using the blue indicator.
It would seem that the only packaging that could possibly work in the outdoors is the fragile packets.
When the silica gel absorbs water, the indicator turns colourless/clear (actually pale pink). You drive off the water (reactivating it) by putting it in the oven for a couple of hours at 60-70°, when the silica gel will turn blue again. You can also reactivate the silica gel in plastic bags (but not the silica gel in the aluminum canister) in a microwave oven. I found even the lowest setting on the microwave made the box pack too hot to touch. Water droplets formed on the inside of the box pack and I was afraid that the heat would crack the box pack. I would run the microwave oven for 5mins at 10% power and then let the box pack cool for about 10mins. It took multiple cycles to reactivate the silica gel. Clearly just putting the silica gel in a low oven and forgetting about it for several hours is simpler.
I didn't know how long it takes to absorb water. Here's two boxes of silica gel starting to absorb 7ml of water inside a ziplock bag at 20°. The vapour pressure of water at 20° is 17.5mmHg, making the air inside the bag 2.3% water.
Figure 7. silica gel absorbing water
 |
silica gel absorbing water
I had expected that all the water would be absorbed by the silica gel in a day or so. In fact overnight nothing obvious happened at all.
- In a couple of days the cannister window was pink, but there was no change in the water level in the small cup. There was no change in colour of the plastic box. It wasn't absorbing any water.
- I added 3 of the packets. They turned pink in a couple of days, without any change in the water level in the cup. They were turning pink at the same rate they would if there was no water in the cup, i.e. they were absorbing water from the air in my kitchen through the plastic bag. I know the latent heat of vapourisation of water is high, but I was surprised that the packets seemed to be pulling water preferrentially from the air rather than from the water in the cup.
- The silica gel in the plastic box wasn't turning pink, while the silica gel in the packets was. The plastic box was useless, so I took it out to see how long it would take to become pink in the kitchen air; it barely became pink in a week.
- I kept shovelling in silica gel packets till the water level in the cup started to drop. I eventually used all of my silica gel packets.
Figure 8. 300g of silica gel not absorbing 7ml of water
 |
300g of silica gel not absorbing 7ml of water. The packets that have been in the bag for longest (about 10days) are at the back and they're mostly pink. The packets had been in the plastic bag for about a week. About 3/4 of the water in the cup was gone (say 5ml absorbed). This is takes a week for 300g of silica gel to absorb 5g water. If you want to dry something on a trip, it would be better to bring a 300g dry towel in a ziplock bag. I don't now where dessicant would be useful, but it sure isn't going to help here.
The plastic box in the front has been sitting in the kitchen air for about a week. It's barely starting to be pink.
Figure 9. comparison of silica gel in a box and in a packet
 |
comparison of silica gel in a box and in a packet. These both were left out for 24hrs in my kitchen at 20° 50% humidity. The box doesn't absorb much water (it has stayed blue, barely turning pink in a month). The packet has absorbed water (it's pink). Presumably the narrow slots in the box prevent the air getting to the silica gel.
This testing makes me realise that the method I used for drying crystals when I was a chemist, was probably a waste of time. If it helped, it would have only been from the evacuation, but not the silica gel.
As part of my testing, I put my water damaged cell phone in a sealed container full of silica gel packets for a week. After this, the battery life is normal again. Presumably the water damage was reversible (except for the red water indicators) and the original problem is fixed. I can't test the cell phone though, as I would have to pay to reactivate it. I guess I have a spare cell phone.
| Note |
|---|---|
| I now have two cell phones and four batteries all with water indicators in the red state. All work perfectly. The water indicators are unduly sensitive. The indicators seem to be a way for the cell phone companies to unilaterally abrogate their warantee. | |
While life jackets (the PC and absurdly longer name is "personal floatation device") are required when using rented equipment, helmets are not (the US didn't require people to use seat belts till recently either). From reading outdoor reports from Australia, some of the helmet preventable deaths have been from people tripping while not on climbs. I wore a helmet. At the outfitters, when I came into the equipment room, the guy looked instantly at the bright yellow helmet I was wearing. I asked him if it was rediculous to wear one in the flatwater here. I got a politically correct answer - it was fine with him - he's seen people wearing them. On my trip I saw about 2 dozen people. I was the only person wearing a helmet. In my red kayak and yellow helmet, I expect I was visible for quite a distance.
In case I rolled and lost my expensive trifocal glasses, I bought two pairs of cheap single focal length reading glasses from a pharmacy, one for long distance and one for reading maps. My regular trifocal glasses were stored in the kayak compartments to be brought out at night. I don't remember using my trifocals much (if at all; I wasn't doing any reading at night). The glasses were attached to my head by an adjustable cord, which is designed to keep glasses on, when rolling without a helmet. Inside the helmet, the glasses were tight enough on my head that they wouldn't have come off in a roll without the cord. I didn't do any heavy duty navigation, so most of the time in daylight, the long distance glasses were all I needed to read the map and the compass.
The only footwear I brought was rubber sandals with velcro straps. These were mainly to handle getting in and out of the boat and were fine for walking around the campsite, which was grass on soft soil and granite. I was never further than 20m from the water's edge and didn't need any hiking grade footwear.
While you would have to deal with a capsize by yourself, you aren't alone here. About half the campsites are occupied, so you could stop there. The ubiquitous water taxi is always zooming by you. A couple of times a day you'll pass other people on the water. In the popular North Bay,I could see my neighbour in his campsite 100m away on the same beach. (At the other campsites I couldn't tell where the next campsite might be, except by looking at the map.)
This kayak had a kedge and not a rudder. A kedge is a small tailfin inside the kayak, that drops down to help you steer straight. A rudder is a steerable fin that helps you go where you want to go. In wind these are different. A kedge is fine when there's no wind, otherwise you need a rudder. A kedge is perfect for an indoor swimming pool.
With the kedge up, you can turn easily; with it down, you go straight. The kedge is moved by a knob in a slot on the outside of the hull. You can't see the knob from the cockpit and there's no marking on the hull to guide you. To turn, you stop paddling, take a hand off the paddle and your eyes off the waves, fiddle around on the outside of the hull, move the kedge and resume paddling. When you've turned enough, you reverse the procedure. Taking your hands off the paddle and your eyes off the water is a real pain and, in wind, dangerous.
The kayak doesn't steer neutrally in wind, something that I would expect to be a design requirement. (It's not as bad as in a canoe, see my last trip.) Sure a square rigged sailing ship needs to steer to face into the wind when unreefed in a storm. This is a matter of life or death for the crew. In a kayak you just want to be able to get across the other side of the lake in a stiff breeze. You have a limited ability to steer with a paddle; you can put extra strength into one arm for a few strokes, but for a long crossing, you would need to decrease the pull on one arm. To steer in wind you need a rudder, not a kedge.
Sometimes the kedge doesn't work at all. One morning I set off in wind, across a lake to find 100m out that the kedge was jammed. There I was, like Apollo 13, with a disabled kayak. I had to steer with paddles till I reached the other side. There, like Cook at Cooktown, I careened the kayak and fiddled with the kedge till it dropped down. I can't imagine why anyone would choose a kedge over a rudder. Sure a kedge can't be snapped off by backing hard into a rock, but it doesn't work either.
I guess if you own the kayak and you're renting it out, you want your kayak to have a kedge.
The spray skirt keeps rain and waves out of the cockpit. If it's the slightest bit warm (or not cold) you can feel the humidity, inside the sealed cockpit, with your legs.
At night when the kayak is onshore, the spray skirt should cover the cockpit so it doesn't fill with rain. Unfortunately, when you aren't in it, the sprayskirt collapses and functions like a funnel, collecting the rain straight onto the spongy cushion in the seat in the cockpit (eew). You should be able to have the sprayskirt sit up, like a flattened cone, with the hole where you sit all closed up. I didn't have a pack to put in the seat (you can't get it through the covers in the deck remember). It took a couple of days before I figured out that I could pile non-food items into the seat, to prop up the spray skirt. I covered the hole with my helmet; the hole wasn't completely sealed up, but the rain was no longer funnelling into the cockpit.
In the end compartments, I stored everything in their own bags, in dry bags or in ziplocks. The bags weren't really necessary; the compartments were watertight and the only water came from things that I put in wet e.g. the tent. If the weather had been worse, I might have needed all the bags, but this time I didn't. The sleeping bag just had its regular cover - nothing special. Clothes were in ziplocks.
The cockpit was another matter. Water was still sloshing from the exit on the first night, mixed with the inevitabl gravel and dirt from getting in and out. In the cockpit you need; camera, lunch, water, jacket (on rainy days) and sunburn cream. A pencil and paper (for writing these notes) were in my shirt pocket. The paper got wet soon enough and later dried out.
Any bags I put on the floor in front of me, between my legs, would get wet and dirty and would be in my way getting in and out. A gap behind the seat held a gym bag, with everything except the camera. I hoped the contents wouldn't get wet. They did. The gym bag was sitting in a puddle. Oh well. When you lent back in the seat, the gym bag was stuck pretty tight. Between the spray skirt and the tight fit, it was almost impossible to get anything out of the gym bag without getting out. On rainy days, I kept my jacket on all the time.
So the camera: On rainy days, it was in a dry bag jammed between a hip and the side wall of the kayak. When I got to Hailstorm creek and the weather was nice, I put the camera (it its dry bag) on my lap, under the spray skirt, so it would be handy when taking a photo. (I didn't really need the spray skirt that day, but having nowhere to put it, I deployed it for wet weather.) When I decided to take a break, I pulled into shore, popped the spray skirt and stood up, whereupon the camera (in its dry bag) plopped in the water. oops. The camera was fine. However I never found a good spot for the camera. I went back to jamming it between my hip and the kayak wall.
There's nowhere to secure the paddle when your hands are doing something else, like taking a photo, changing the position of the kedge, or getting in and out. No kayak has this. Kayaks should have someway (a pair of clips, one on each side of the cockpit?) to hold the paddle.
A conventional compass has to be level to work. After some confusion, I now keep my southern hemisphere compass in Sydney and my northern hemisphere compasses in the US. Because a kayak pitches and rolls, a normal compass is useless; instead I used a spherical compass (look for it in my photos, next to the map case). These work in both the northern and southern hemisphere and in any orientation (including upside down). I got these at the map store in Parramatta.
When hiking, to locate yourself on the map, you have 3-D information about the land around you. On water, you only have 2-D information; all islands close up look round, you can't tell if a peninsular is an island till you go around it, you can't tell if the bay you see turns around and keeps going behind the land (remember Cook missed Port Jackson).
On my previous trip here, I tried using the standard 3-D navigation from hiking. On unexpectedly entering a bay filled with islands, I couldn't figure out where I was. This time I used the method of navigating a 2-D maze; run your finger along the wall. I just followed the shoreline with my eye, even if I was in the middle of the lake. (The lakes were small enough that I could always see both shores, except in short periods of fog.) This time, I had no navigation problems. It also helped that I recognised much of the land from my previous trip.
From last trip, I'd accepted that there'd be power boats (and the noise and the wake) at any time of day, mostly from the water taxi of Algonquin Outfitters. It seems that most people on the lake aren't paddling the whole way. They load their gear and rented canoe into the water taxi and are taken at high speed and high noise level to a campsite, where they stay for a while and just paddle around for a bit.
My trip was 5 nights, the time it took to explore every bay. I would have thought my trip was the normal one. At the end of the trip, on check-in, the cashier's eyes bugged out when he saw on the form how long I'd been out.
An eskimo roll is used on river kayaks after you've capsized and passed your obstacle. Out on a lake or open ocean, if you capsize and right yourself, you're right back in the situation that rolled you in the first place. The thinking is that if you roll, you shouldn't even be out there. Unlike a river kayak, a touring kayak has a broad beam, is quite stable and if rolled is equally difficult to right. I can do an eskimo roll in relatively flat and swirling water in a river kayak, but not in rapids. I wouldn't like to depend on being able to do an eskimo roll in waves in a touring kayak. The short lesson is that in weather, not to expect an eskimo roll to save you. If you're out there by yourself and you tip over, you're in trouble. You shouldn't be out there. I expect an eskimo thinks about this differently, but they're out there every day and not once every couple of years.
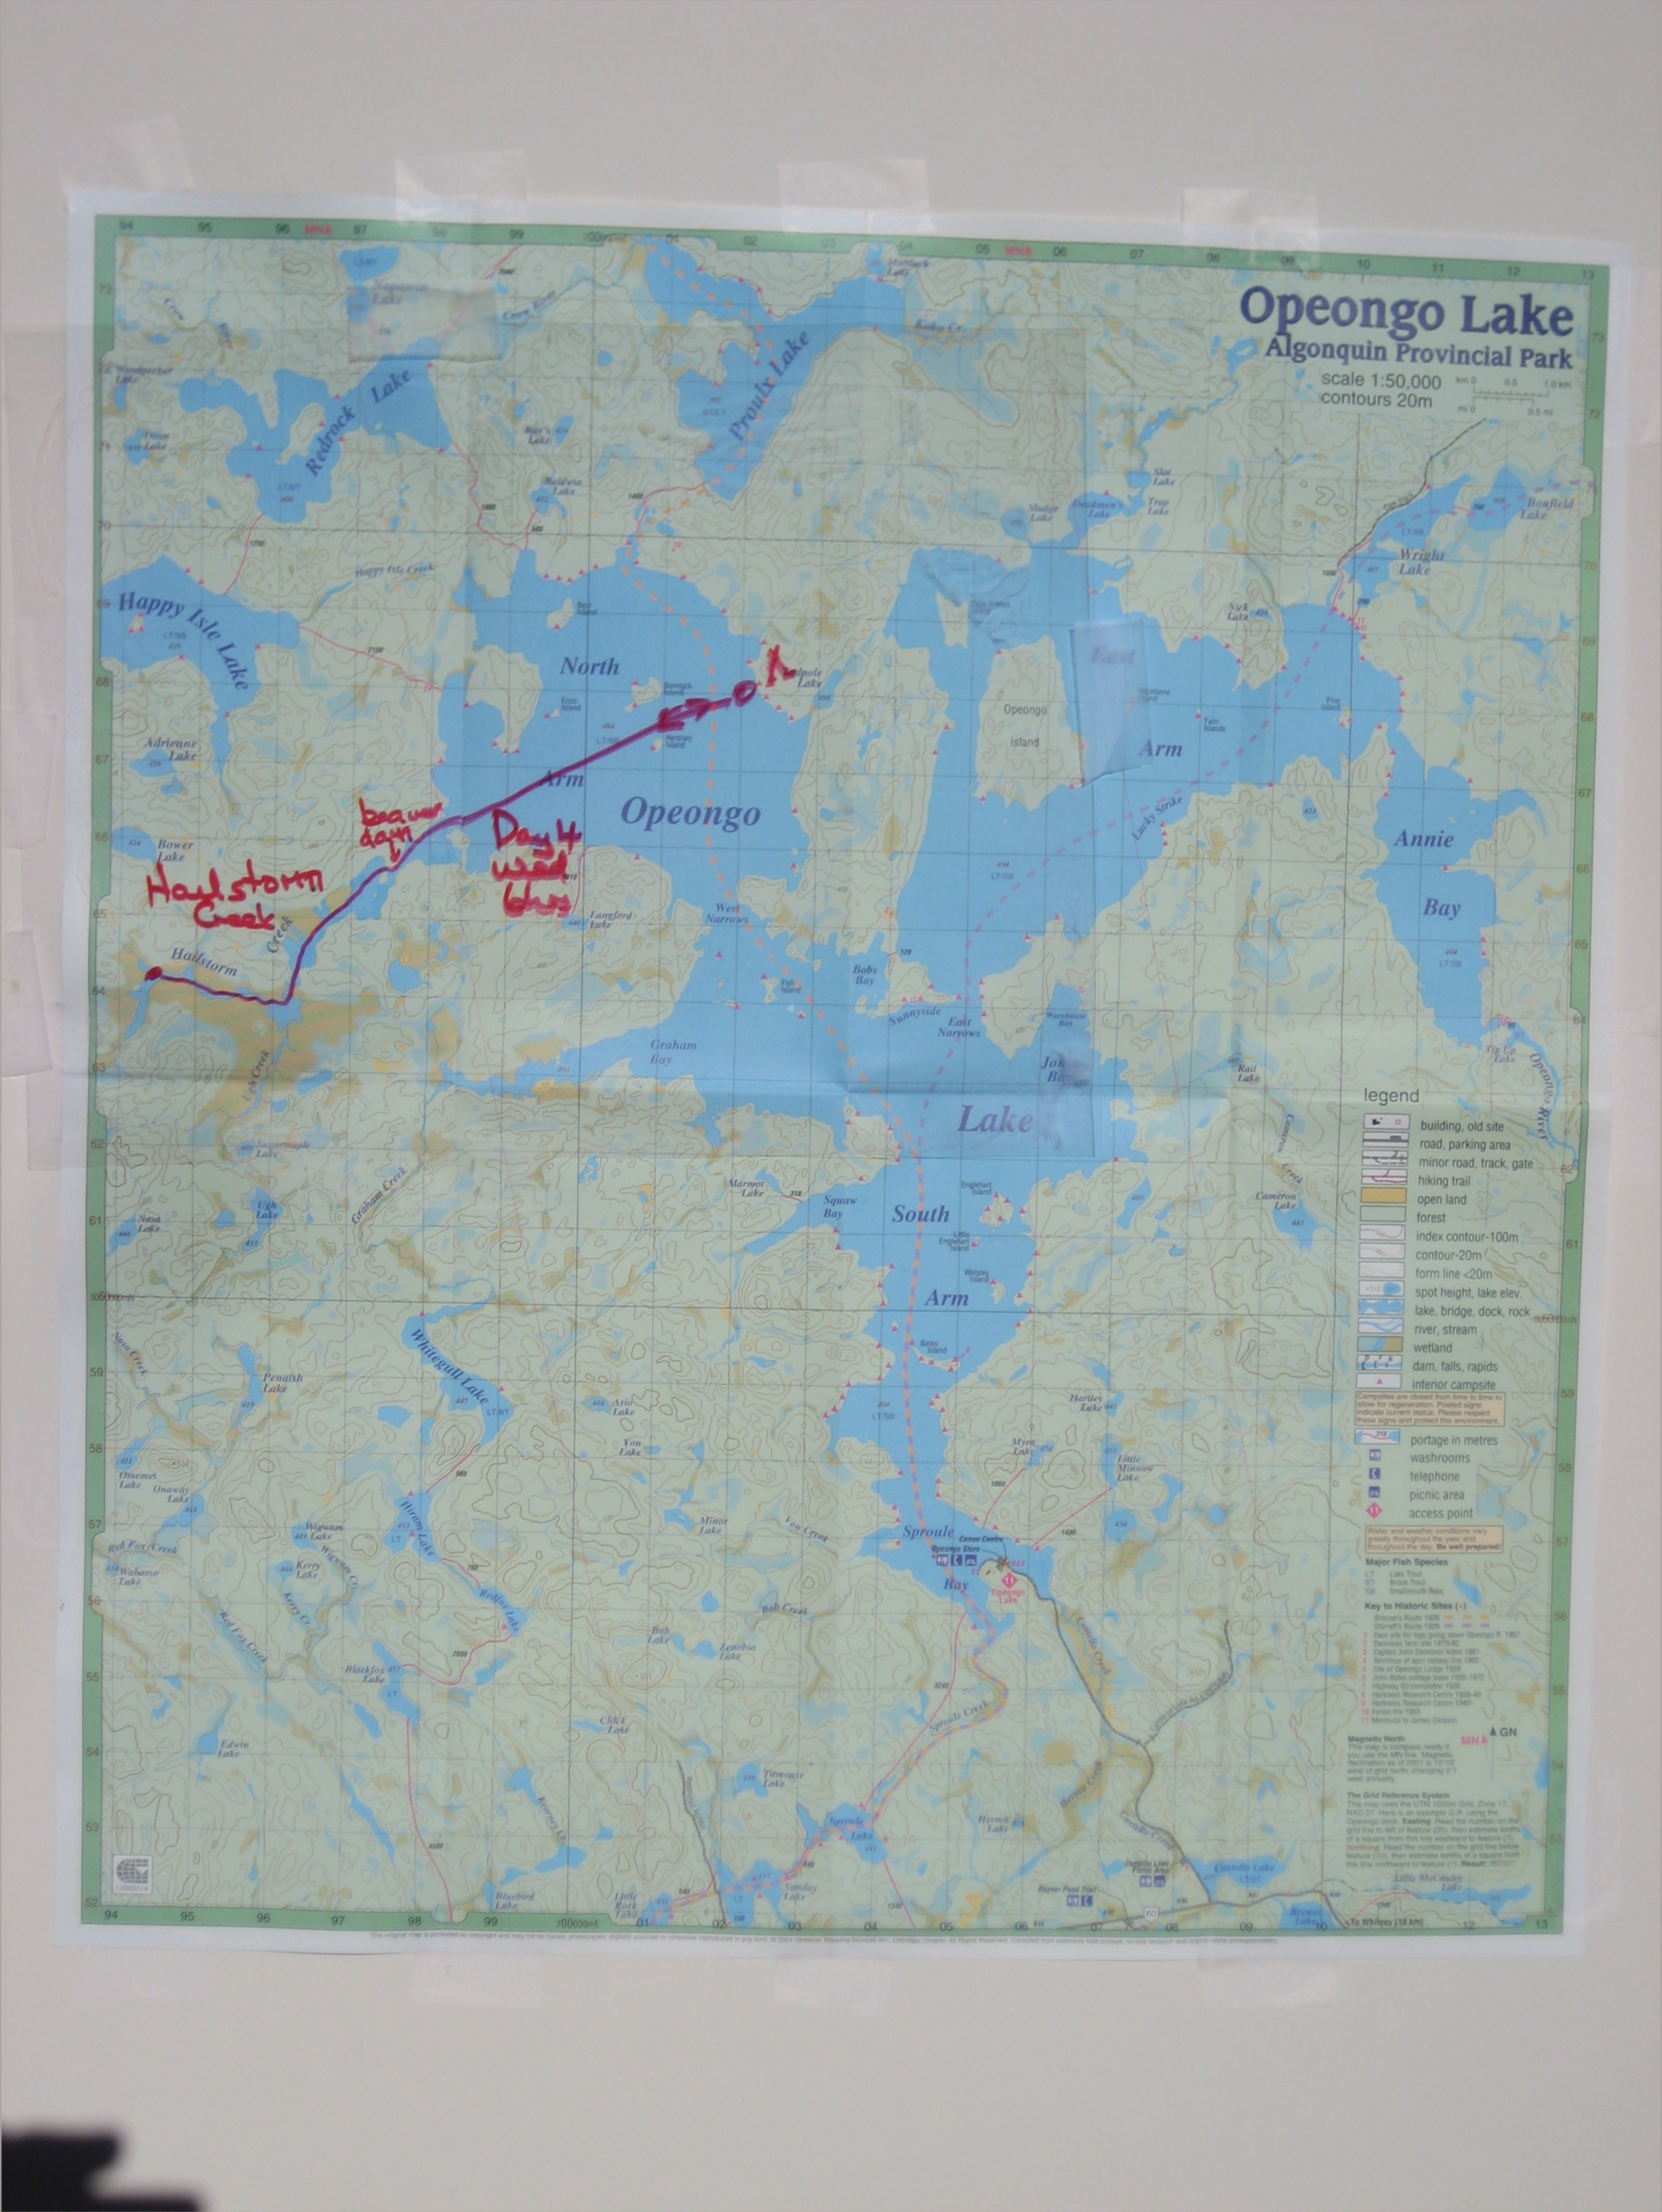
Figure 10. Map: Day 1
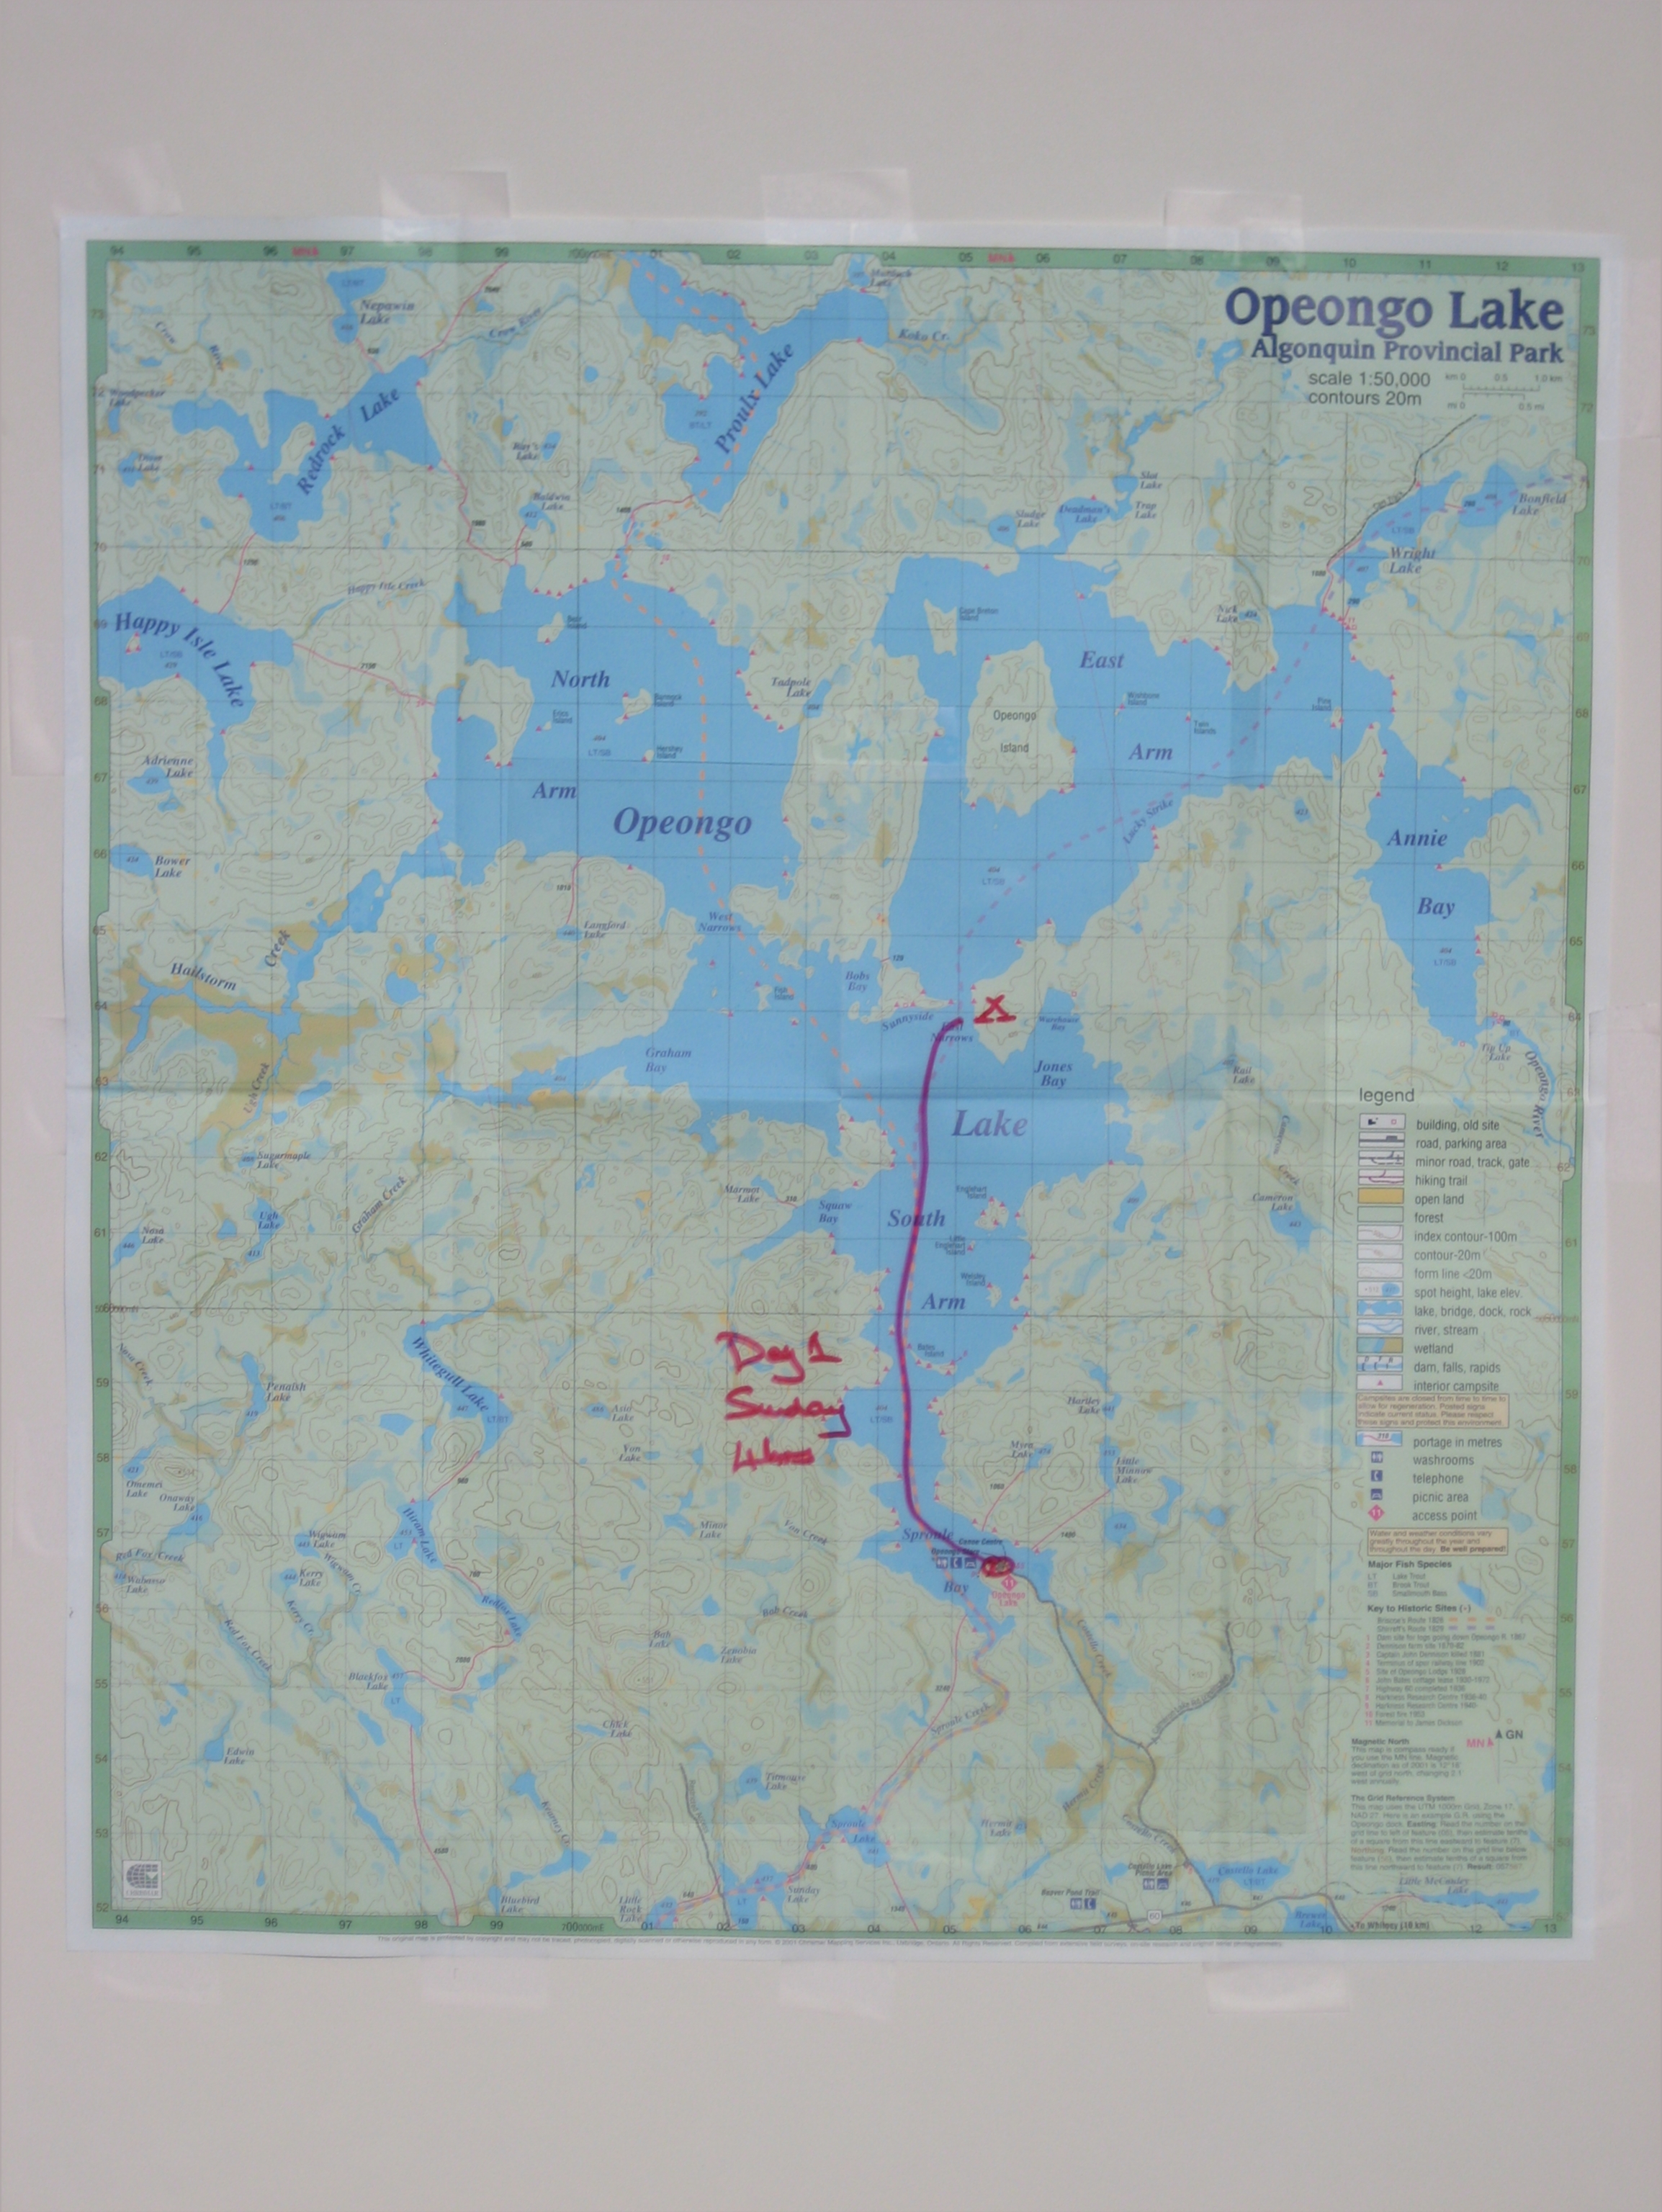 |
This is the waterproof Lake Opeongo map by Chrismar
I set off about midday from Algonquin Outfitters in fine weather. The forecast was for wind and rain. Shortly afterwards the wind picked up and the sky filled with cloud. In relatively short time I traversed the south arm and was at the south end of the large E-W bay, which crossed into both the north and east arm. This is the widest (E-W) single body of open water in the lake system, with the fetch starting on the west side at Graham Bay. On my last trip (in a canoe), this crossing had been problematic due to wind. Today my nominated campsite was across the bay. There were enough free campsites on this side that I could bail now without inconveniencing anyone. However it was still early in the afternoon and if I bailed, I'd be starting my trip with a short first day. I wanted to be further into the lake system and I'd just spend one and half days in a car; I needed exercise. The wind was about the same as last time, but this time was coming abeam. But this time I was in a kayak; in principle I could handle the wind. As I came into the open bay, I met the full fetch of whitecaps abeam, the spray filling my glasses. I pressed on regardless.
I crossed in good time. For the last half the waves ran a broad reach coming over the deck, the kayak rolling and yawing with each wave. I hoped I wouldn't meet a rogue wave. As I reached the other side, I was unnerved and decided I had no business being out solo in such conditions. (I'm sure it would have been a lot better with a rudder.) Rather than continue, I pulled into (more accurately, was blown into) the first campsite. It was about an hour short of the target campsite. It had a gravel beach, rather than rock, and that was good enough. Presumably the gravel beach was the result of being pounded by the prevailing wind, It was there that I half filled the cockpit getting out.
Figure 11. campsite at east narrows between South Arm and East Arm (Lake Opeongo, Algonquin Park)
 |
I'm looking west across the top of the South Arm. Just around to the right would have been calm water, if I'd thought to look.
Although I didn't realise it, I'd pulled into the campsite facing the maximum fetch on the lake for the wind that day. It wasn't cold, but I was wet, the sky was gray and the wind was brisk. I bundled up, and for the rest of the afternoon, listened to the waves crashing on the beach, wondering if my kayak was going to be torn off its moorings, leaving me stranded. At night with the wind whipping under the fly and through the mesh tent, I couldn't sleep for cold feet. I eventually figured out that I could pull my sleeping bag cover over the end of the sleeping bag (with my feet in it) to block the wind. I had warm feet instantly.
The campsite was up a hill from the beach on a granite platform and required clambering over tree roots and rocks and grabbing trees for support each time I went to the kayak. Every now and again I would wake enough to hear the waves crashing and would get out of the tent and go check on the kayak. I kept getting pine pitch on my hands and didn't identify the tree responsible till daylight. After that I looked for campsites where I didn't have to clamber from the kayak to the campsite.
Then sometime in the night, the wind stopped and I was instantly hot in my sleeping bag (see LLBean_tent for an explanation of why the tent is useless in wind).
My campsite was at the south end of the east narrows, the channel between the south and the east arm. My side of the channel was being pounded by the waves from the south arm. On the other side of the channel, opposite me and sheltered by land, was relatively calm. If I'd been thinking a little more clearly the night before, or been more experienced, I would have realised that once through the channel, I was out of the waves and that the east arm, having much less fetch in the direction of the wind, was calm. In fact, the campsite only 50m on the other side of the channel opposite me was facing away from the wind and had no waves at all. Of all the campsites on the lake, I had inadvertently picked the campsite most exposed to that night's weather. I had pulled in relatively early in the afternoon after only 4hrs of paddling. I had plenty of time and could have easily found a less exposed campsite in a matter of minutes. Sure it would have been equally windy, but I would have had no waves, an easy egress from the kayak and would not have had to get up through the night to check that the kayak hadn't been ripped off its mooring. If I'd realised that I was out of the whitecaps and kept paddling, I could have paddled another hour or two in relatively calm water.
Figure 12. Map: Day 2
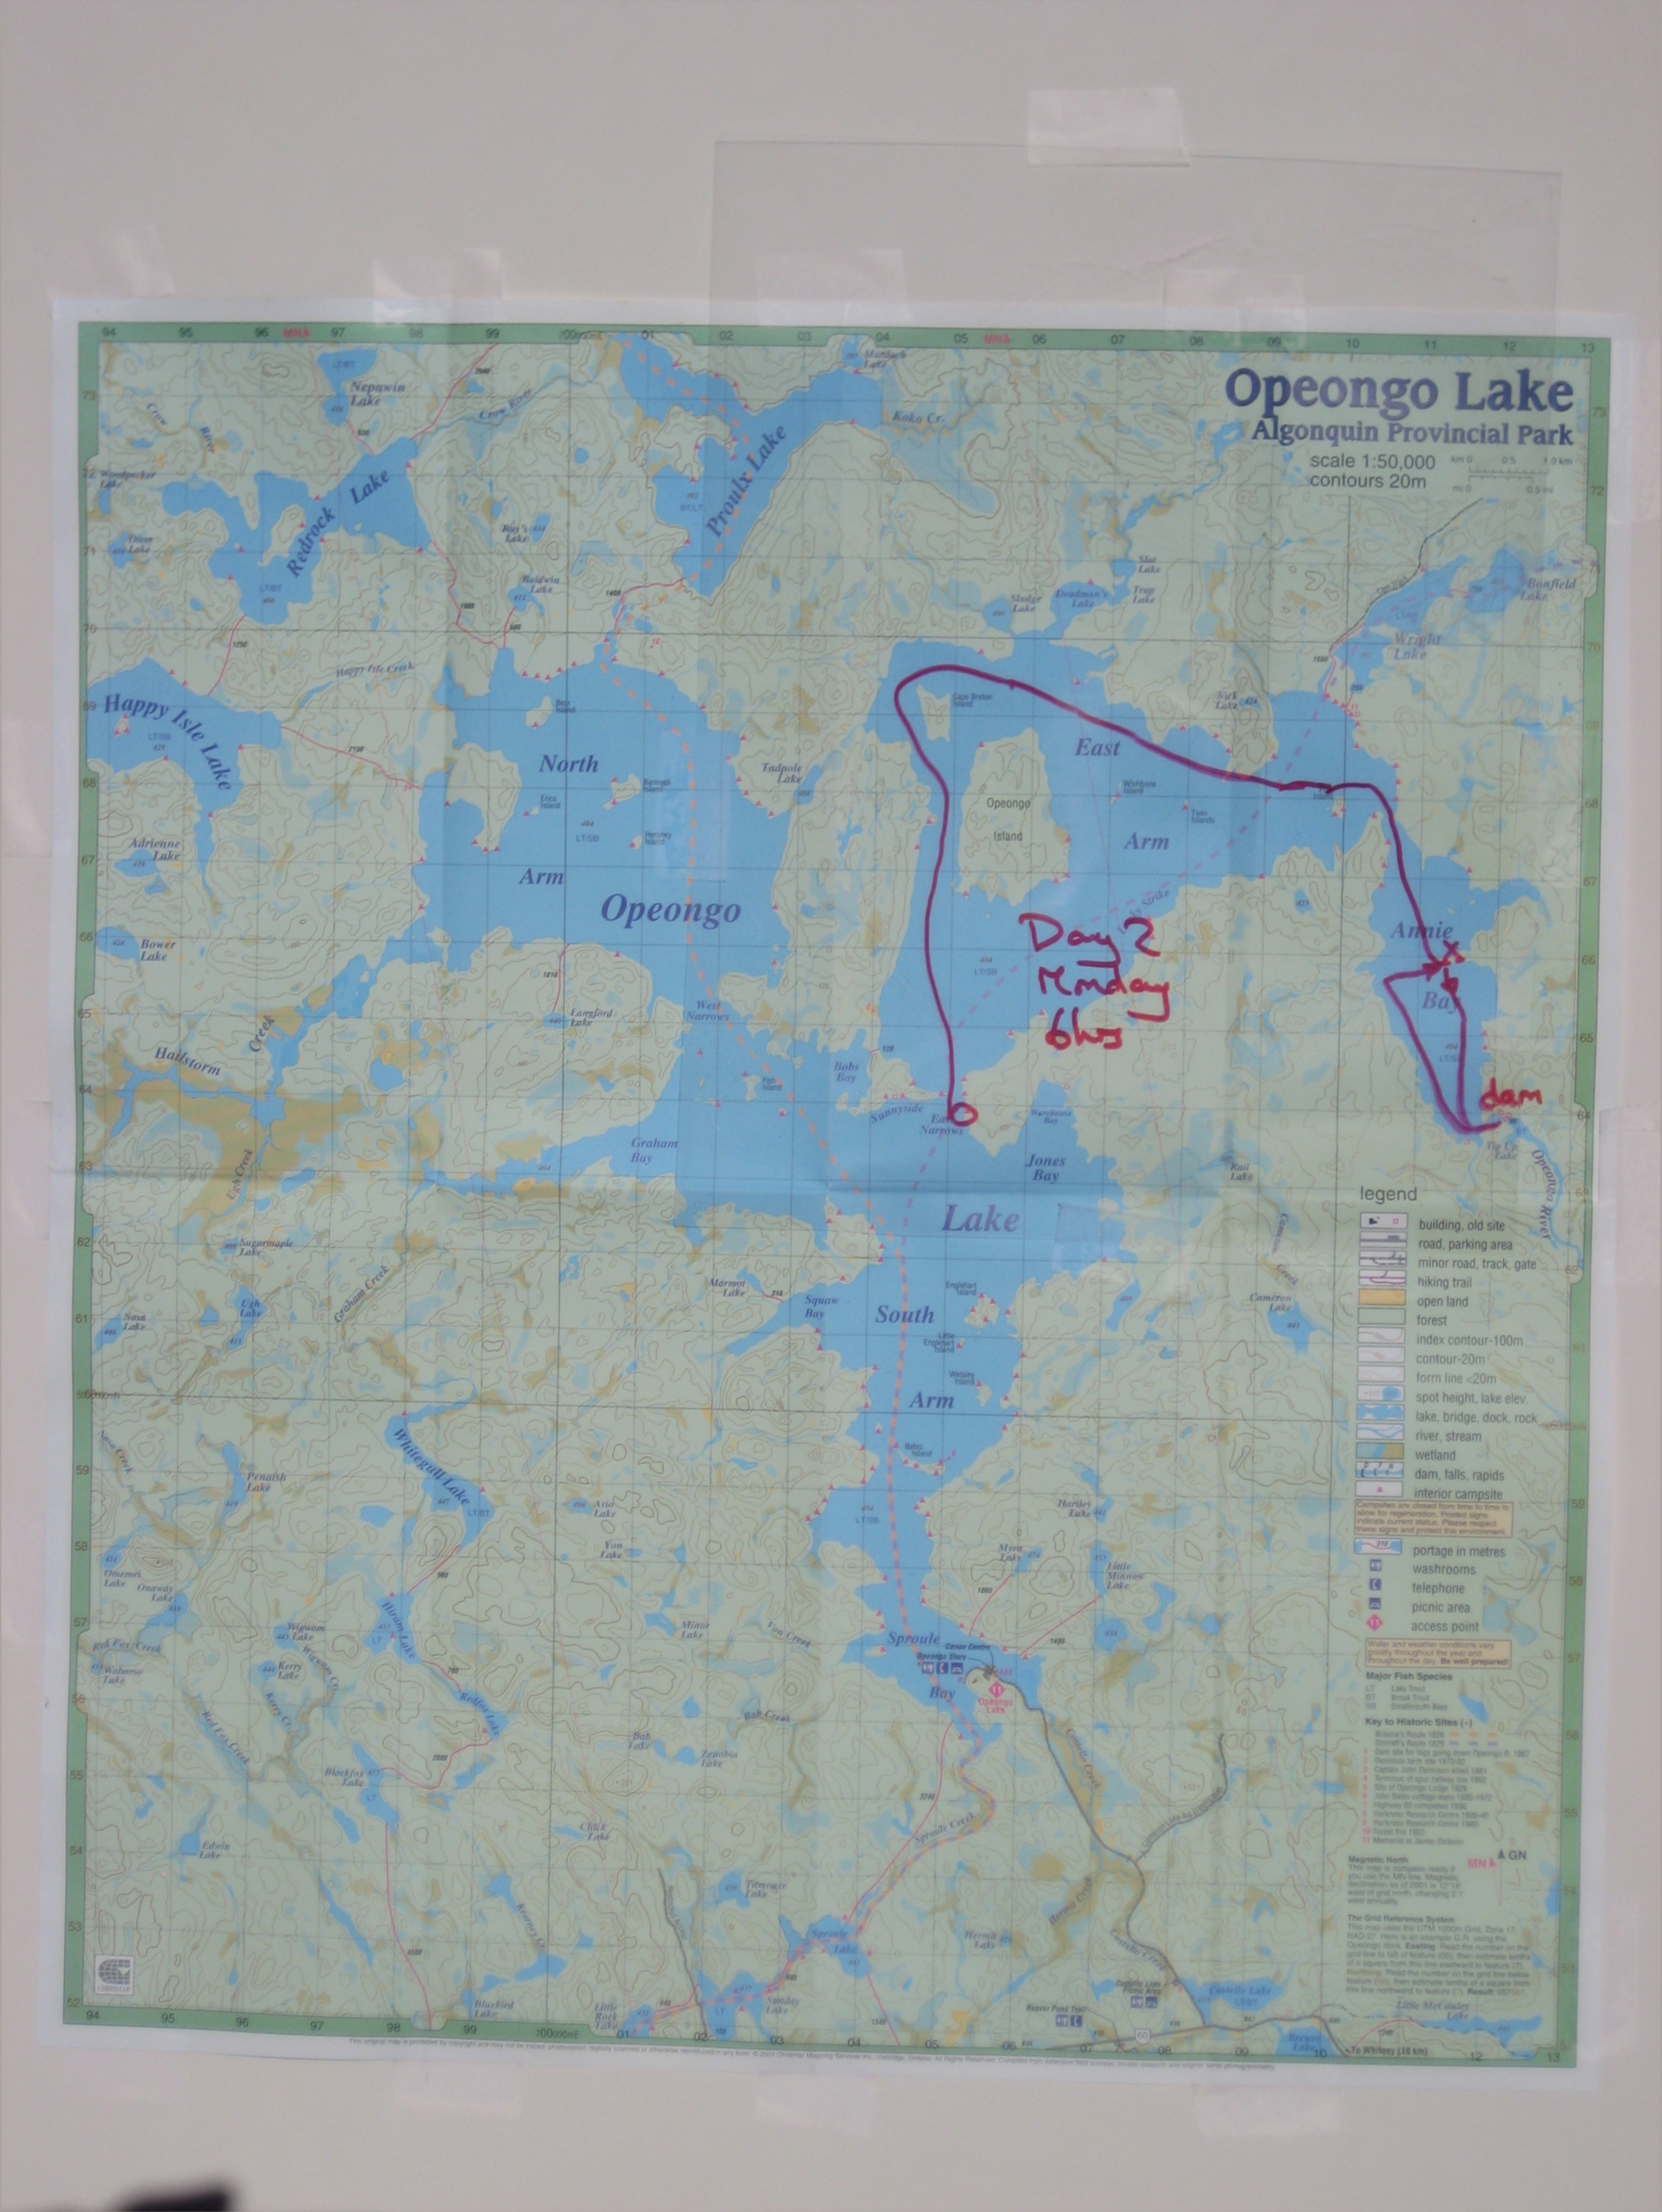 |
Light breeze, 100% overcast with low cloud. The loons are a delight with their call "ala-loo" (they call at night too). Where do they go in winter? (I was told that they fly south. They need water, so they must fly over lakes. I don't see them in NC.)
I went through the strait to the west of Opeongo Is. and around Cape Breton Is., my furthest point in my last trip. I followed the northern shore of the east arm, negotiating waves for a while and entered Annie Bay.
Figure 13. water plants from kayak, Annie Bay (Lake Opeongo, Algonquin Park)
 |
If you paddle around the shore, rather than in the middle of the lake, you often find shallow (<0.5m) bays filled with plants. Here I was trying to see how far I could go up the river on the NE of Annie Bay. I didn't get far.
Note the spherical compass attatched to the webbing at the bottom right of the map case and the yellow bow rope which is quite long and is spooled into the cockpit.
By then it was raining and early afternoon. First order of the afternoon was to setup camp during a break in the rain and have dinner. I setup at the campsite on the peninsula in the middle of the eastern side of Annie Bay. It had a beach on the north side and a minimal climb to the campsite. I had dinner mid afternoon and as the rain started again, hopped in the kayak and set off to the bottom of Annie Bay, bundled in a Paddy's jacket and the sprayskirt.
The water was flat and reflective. The only disturbance was the bow wave and the hundreds of circles radiating from the rain drops. I would have liked to have taken a picture, but I wasn't going to get my camera wet from handling it in the rain. The colour was uniform gray, but the glass flat water was beautiful.
I thought I was in wilderness (apart from the campsites and other people canoeing, ah, oh, and the water taxi), so I was surprised when turning into the river outlet at the SE corner of Annie Bay, to see cement walls and ramparts, chain link fences, orange floating barricades and warning signs at the point the lake became a river. The signs were huge and could be read 100's of metres away. They said something like "DO NOT APPROACH. DANGEROUS CURRENTS. CERTAIN DEATH." This seemed a little alarmist. This was the sort of signage I'd come to expect in the US, from the Dept Homeland Security defending our freedoms, or the millions of self appointed protectors of our feeble morals, but not in Canada. Canadians are intelligent. They pull to the slow lane after overtaking. They handle certain death on a daily basis, without even thinking about it. In case of a problem, they just tell you to watch your step, knowing you will handle it. A lake flowing out to a river was a pretty normal piece of geography. I had no idea what the problem could be. Obviously someone had gone to a lot of trouble to let me know there was one. It would be a shame if all their work went for nought. What could cause certain death on a flat lake? I had to go over and investigate (wouldn't you?).
I approached the cylindrical orange foam floats/pontoons. They were twice as long as the kayak and as high as my head. They were in a semicircle around the junction with the river, and looked like they were supporting a net going down to the lake floor. The ramparts instead of going down to a river, went to a thin dam wall that you could barely see. It wasn't like there was a spillway on the other side. The dam couldn't have been more than 0.5m above the river level.
This dam was a complete mystery to me. Over the next few days on asking the locals and then after the trip, visiting the Musée du Bûcheron, I found that the lake level is controlled by the dam. In the lumberjack days, a wooden dam here raised the water level in preparation for the spring thaw. During winter, the lumberjacks hauled the logs on skids over the frozen lake (often at -40deg) to the dam. Then when the thaw came, they'd open the dam gates and let the lake flush the logs down river. Although this was the classic era of lumberjacking, taking logs down river was a difficult task. Dams had to be built. The lake needed sufficient water which wasn't guaranteed. Not all rivers had enough flow to float logs. Log jams had to be freed by men standing upto their waists in ice water. Men were crushed when the logs unexpectedly broke free or they died of exposure (but didn't feature on the balance sheet). Next trains took over the job, running on multilayer wooden tressles high in the air, whose engineering and construction boggle the mind. Eventually trucks that could take the load took over from the trains. I saw a photo of the old wooden dam here at Annie Bay in the Musée du Bûcheron, but I haven't found it on the internet. The old wooden dam had been recently replaced by the cement dam and now someone (a bureaucrat in Ottawa?) determines the lake level. I can't find a photo of the new dam on the internet either. On inspecting the beaches and shore, it didn't look like the water level has ever varied.
I also found that the dam is being used to stop entry of the introduced northern pike into the lake system.
However sitting alongside the orange floats, I knew none of this and was mystified as to why this dam even existed. The water should just be able to go out the river without man's help as far as I could tell. As I got closer to the dam wall, the water flow picked up. In my kayak, there was no way I would go over the dam wall nose first, down the river. There wasn't enough water depth; this wasn't a light river kayak designed for rapids; it was a loaded touring sea kayak designed for deep water. If I got sucked in, I would turn sideways and be pinned against the dam wall and roll over with the underflow.
With the dam wall looming, I turned at right angles and paddled away radially from the dam till I was in still water again. I completed the circuit of Annie Bay and arrived in rain at my campsite about dark. Some canoeists were investigating the campsite as I paddled up and were leaving after seeing my tent pitched in the campsite. Again I was damp but not cold.
Figure 14. sunset from campsite at Annie Bay (Lake Opeongo, Algonquin Park)
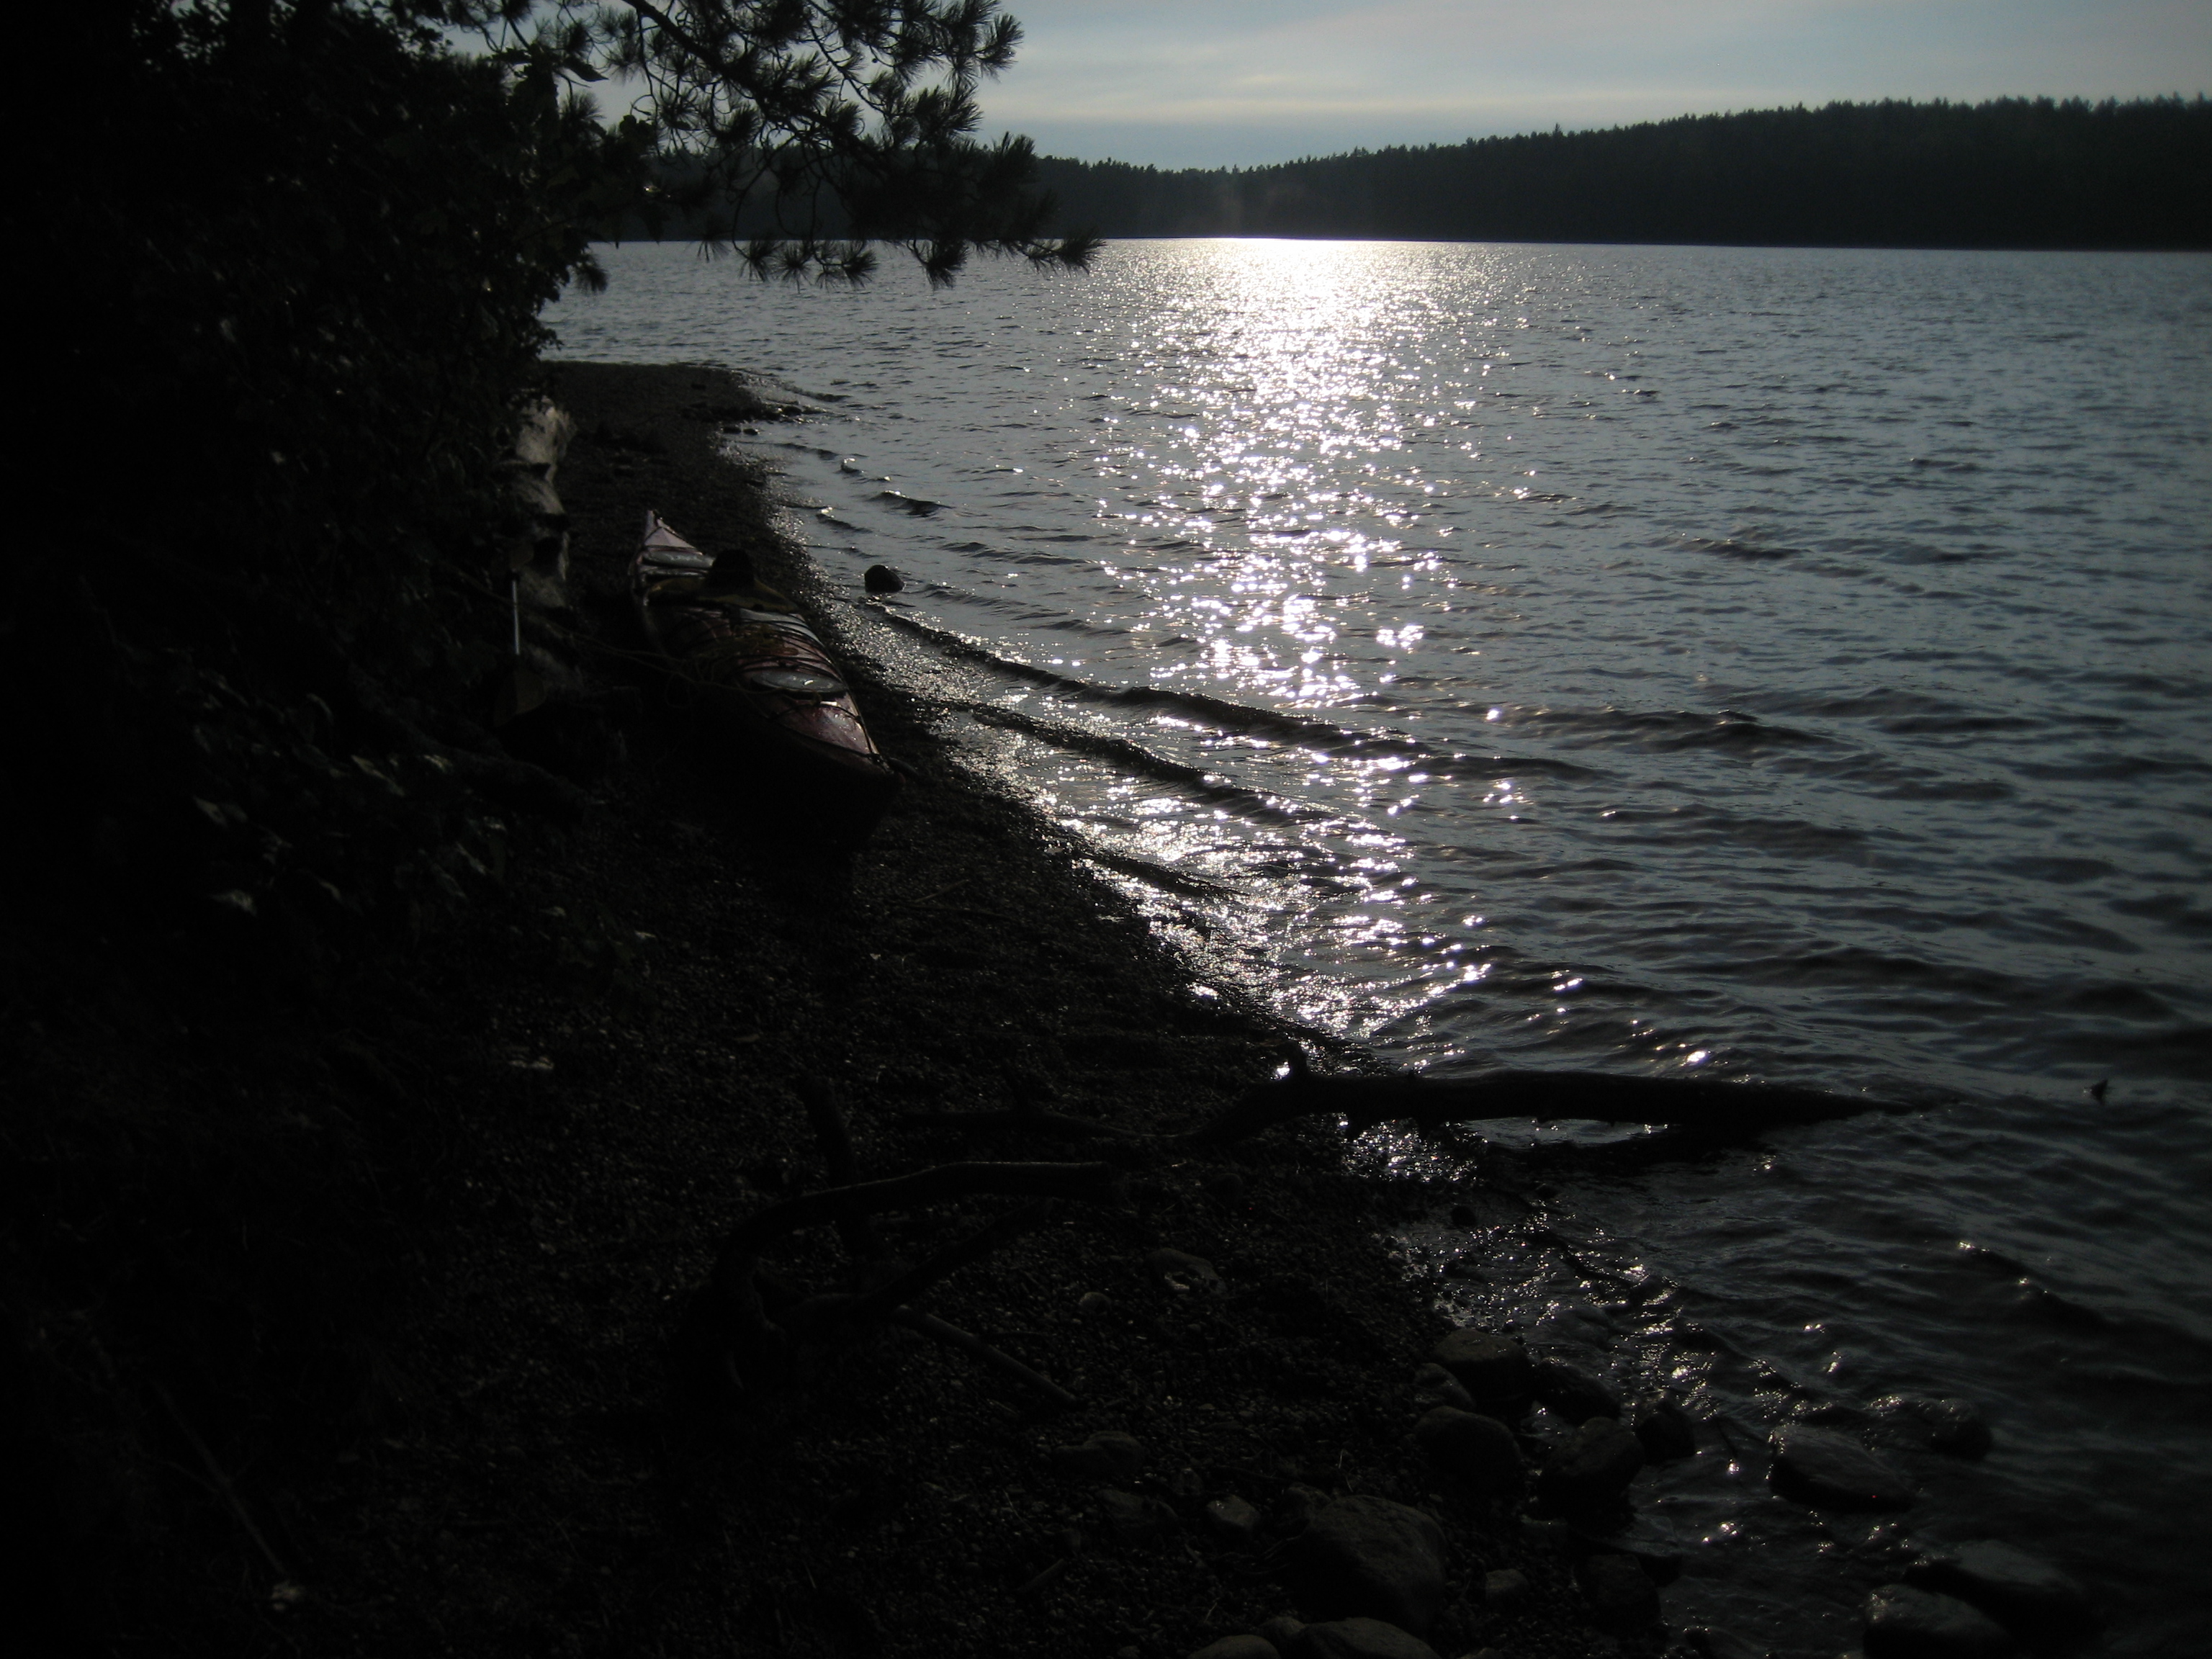 |
A break in the rain. The kayak is on the gravel beach near the top left.
Figure 15. Map: Day 3
 |
The rain had stopped. I hung up the fly up to drip dry a bit and then packed my tent wet. My dry bags were damp but not wet. I wished I had dessicant for my camera and cell phone. I paddled off in 100% fog, heading north out of Annie Bay, navigating by compass. Navigation wasn't a problem; if you got it wrong, you'd run into one or other of the shores. Then you'd look to see which side of the kayak the shore was on. About half way out of Annie Bay, I got a glimpse of the narrows joining East Arm, telling me I was on course. The fog cleared as I exited Annie Bay.
Figure 16. from the kayak: approaching the narrows at the north end of Annie Bay (Lake Opeongo, Algonquin Park)
 |
heading out of Annie Bay into the narrows at the north end of the bay. Mote: the bow rope is now piled on the deck with some parts looped under the webbing. I hope having all the rope on top makes it easier to grab if I get tipped out.
I crossed the SE side of the East Arm. At the East Narrows, I talked to the people at the campsite where I should have stayed on the first night, the one on the pensinsula on the west side of the narrows. It wasn't till I got home, that I realised I could have made a better choice on the first night.
I headed for the North Arm. The entrance to the North Arm is a bay with about a dozen islands (I call it the Bay of Islands). It's beautiful. Some of the islands are large enough to have campsites. Last time I was here, I got completely navigationally confused and had to ask someone where I was. Back then I was trying to navigate by 3-D, figuring out where I was by the shapes of islands and bays, rather than the 2-D method of running my finger along the wall.
Figure 17. from the kayak: In the bay of islands. Distinctive treeline on island at the narrows to North Arm (Lake Opeongo, Algonquin Park).
 |
In the bay of islands. Distinctive treeline on island at the narrows to North Arm.
On entering the North Arm, the first island has a hole in the solid green of the trees about 1/4 way up. It looks like a window.
Figure 18. Island in North Arm with a window in the trees (Lake Opeongo, Algonquin Park).
 |
Island in North Arm with a window in the trees.
On entry to the North Arm, an alarming sight awaits you. In the distance, you can just make out the sunbleached hull of a large wooden ship, heeled over 30°, presenting its deck (you can see it in the middle right of the previous photo). It has multiple masts, which, adding to the optical confusion, are vertical rather than tilted at 30°. I know from my last trip that this is an island, but my mind's eye only sees a shipwreck. It reminded me of Hurley's photos of Shackleton's Reliance trapped in ice
Figure 19. Cormorant Is, North Arm (Lake Opeongo, Algonquin Park).
 |
Cormorant Is.
On close inspection, cormorants are perched in the trees and the rocks covered in white guano. Dead trees are rare in the park. Are all the trees young? All of the area was logged 100yrs ago. It wasn't till the early 1900's that logging companies were required to plant new trees in their wake. About 1950 the current park plan was formulated, with restricted logging and emphasis on recreation. Opeongo lake is one of the more accessible areas and back in the 1800s, it would have been the first to be stripped of timber. In winter, water is frozen and travel is safest; the trees on the islands would have been accessible via the frozen lake. What we see now as wilderness, 100yrs ago may have looked like the surface of the moon. Still trees only live 50yrs, not 100, so presumably we're looking at 2nd generation steady state forest.
Still it's hard to imagine we're looking at young forest. On land at least the soil is well developed with lots of organic matter. Presumably the soil has been around for a while. If the trees had been recently cleared, the soil would have washed away, before the trees could regrow.
With no dead trees anywhere else in the park, here we have a whole island of dead trees. What's going on? I haven't got the whole picture, but from asking a few people and from information at the visitor's center, it appears that the cormorant guano is acidic and has killed the trees. Cormorants need a dead tree to perch in. Presumably once one tree dies, the cormorants can perch in it and kill the surrounding trees. Presumably it only happens on islands where the soil is thin. On land, there is enough soil to neutralise the acidity.
How does the first tree die? Here's what I know.
Just about every rock has a tree growing on it. Surprisingly to me, you need little soil to grow a tree, particularly considering the brutal weather (average daily minimum for Jan is -18°). This tree must have started as a seedling, in a crevice with a little bit of soil, on a bare rock. As the tree grew, the soil accumulated.
Figure 20. tree growing on rock in North Arm (Lake Opeongo, Algonquin Park)
 |
This photo was taken 2 days later on a day when I was burned to a crisp.
This next dead tree is big; presumably it had a happy and productive life with its shallow root system before dying and tearing out its roots (or being blown over and dying). Still you can see that the roots are shallow, even on big trees. This dead tree still has its needles. Presumably the needles need to fall off before cormorants can perch in it.
Figure 21. dead tree with shallow roots, bay of islands at narrows to North Arm (Lake Opeongo, Algonquin Park)
 |
An island in the Bay of Islands at the entrance to the North Arm.
Why haven't the cormorants taken over all the islands? They only have to wait for one tree to die then in short time they'll have the whole island. It turns out that cormorants are a recent (50yrs?) arrival to the park. Cormorants live in the middle of the country and have only started moving east and arriving in the park recently. I expect then that more islands will have dead trees in the future.
My explanation for the small number of dead trees and only one island denuded by cormorants is that the trees are young and the cormorants have just arrived. It doesn't really fit; the trees have been there for 100yrs, not 40.
I pulled in at the first camp site with a beach. The rain had gone and I put things out to dry. My black camera case was soggy, so after removing my camera, I put the case directly in the sun, starting its trajectory to 5500° [2]. I planned to stay here for 3 nights at least and do day trips. Setting up and pulling down is not my idea of fun.
On pulling out my LLBean one man tent, I find I left the cross spar for the fly at the last campsite. Having one part of the pole setup with about 12 pieces and the other with only one piece, when they all could be joined, is a recipe for loosing the single piece. Not understanding this, is why the Challenger blew up. When packing the tent, you know there is a spider which holds the tent up, but there's no need for the pole for the fly to be separate from the spider. If you are going to have two sets of poles, of such different properties, the principle of affordance requires that they be kept together someway. I expect no-one has ever tested this tent in field conditions.
It's warmer than I expected. The sun is blasting. Standing in the direct sun, I'm sweating. In my own way, I was quite happy in the rain; I don't want to be in the sun. I'd come up here to escape the heat of North Carolina summer. I'm 10° N of my hot home in NC and more than half way (45.8°) to the pole. I didn't expect to be hot. I could have brought a summer sleeping bag. Except for the lower humidity, it felt like NC. It would be cooler by the sea in Boston right now. I went for a swim. At sunset, it was 25°.
Figure 22. Sunset from my personal granite sand beach on the North Arm (Lake Opeongo, Algonquin Park).
 |
Sunset from my personal granite sand beach on the North Arm.
Figure 23. Map: Day 4
 |
The attraction in North Arm is Hailstorm Creek. This is several km of floating vegetation, birds and beaver lodges. A clear path meanders through the floating vegetation allowing you to paddle through. You are supposed to see moose, but I didn't see one this time or on my last trip.
On my last trip to Hailstorm Crk, I took a photo of a beaver lodge with a cheap disposable film camera. I've had two requests to use this photo (which I gave), one for a kid's TV show and another for the box of a board game. They never called me back to tell me where or when I could see my photo in action, so I don't know if it was ever used.
This time I left my campsite in fog, navigating by compass. Suddenly I found myself in a fogbow and then, just as quickly, it was gone. I didn't think to take a photo till I'd passed well out of it. It was an arc of bright light in the fog, like a rainbow (centre opposite the sun), except it was white. Soon I saw holes in the fog above me showing blue sky. I was in warm water fog.
At the second narrows to Hailstorm creek, where last time I paddled through, this time my way was blocked by a beaver dam.
Beavers are industrious fellows, able to chew through a 30cm tree in a night. Usually they dam flowing water on a gentle slope, turning a creek into a large pond. The dam wall starts with vertical stakes, followed by horizontal trunks of small trees, much as we would build a pallisade. Somewhere removed from the dam, they build a lodge in the pond. The lodge allows them to live and raise a family and keeps them safe from wolves in winter. The pond fills in gradually with sediment, producing shallow water for vegetation and nesting birds. After a couple of centuries, you have a meadow.
Here's a photo of a flat valley in the Adirondack, that I'd visited the previous week. The beavers had dams all over the valley, which had flooded, killing the trees. From the nearby peak, you could see that the pond/grass/dead trees extended for several km up the valley.
Figure 24. dead trees behind beaver dam Hailstorm Creek (Lake Opeongo, Algonquin Park)
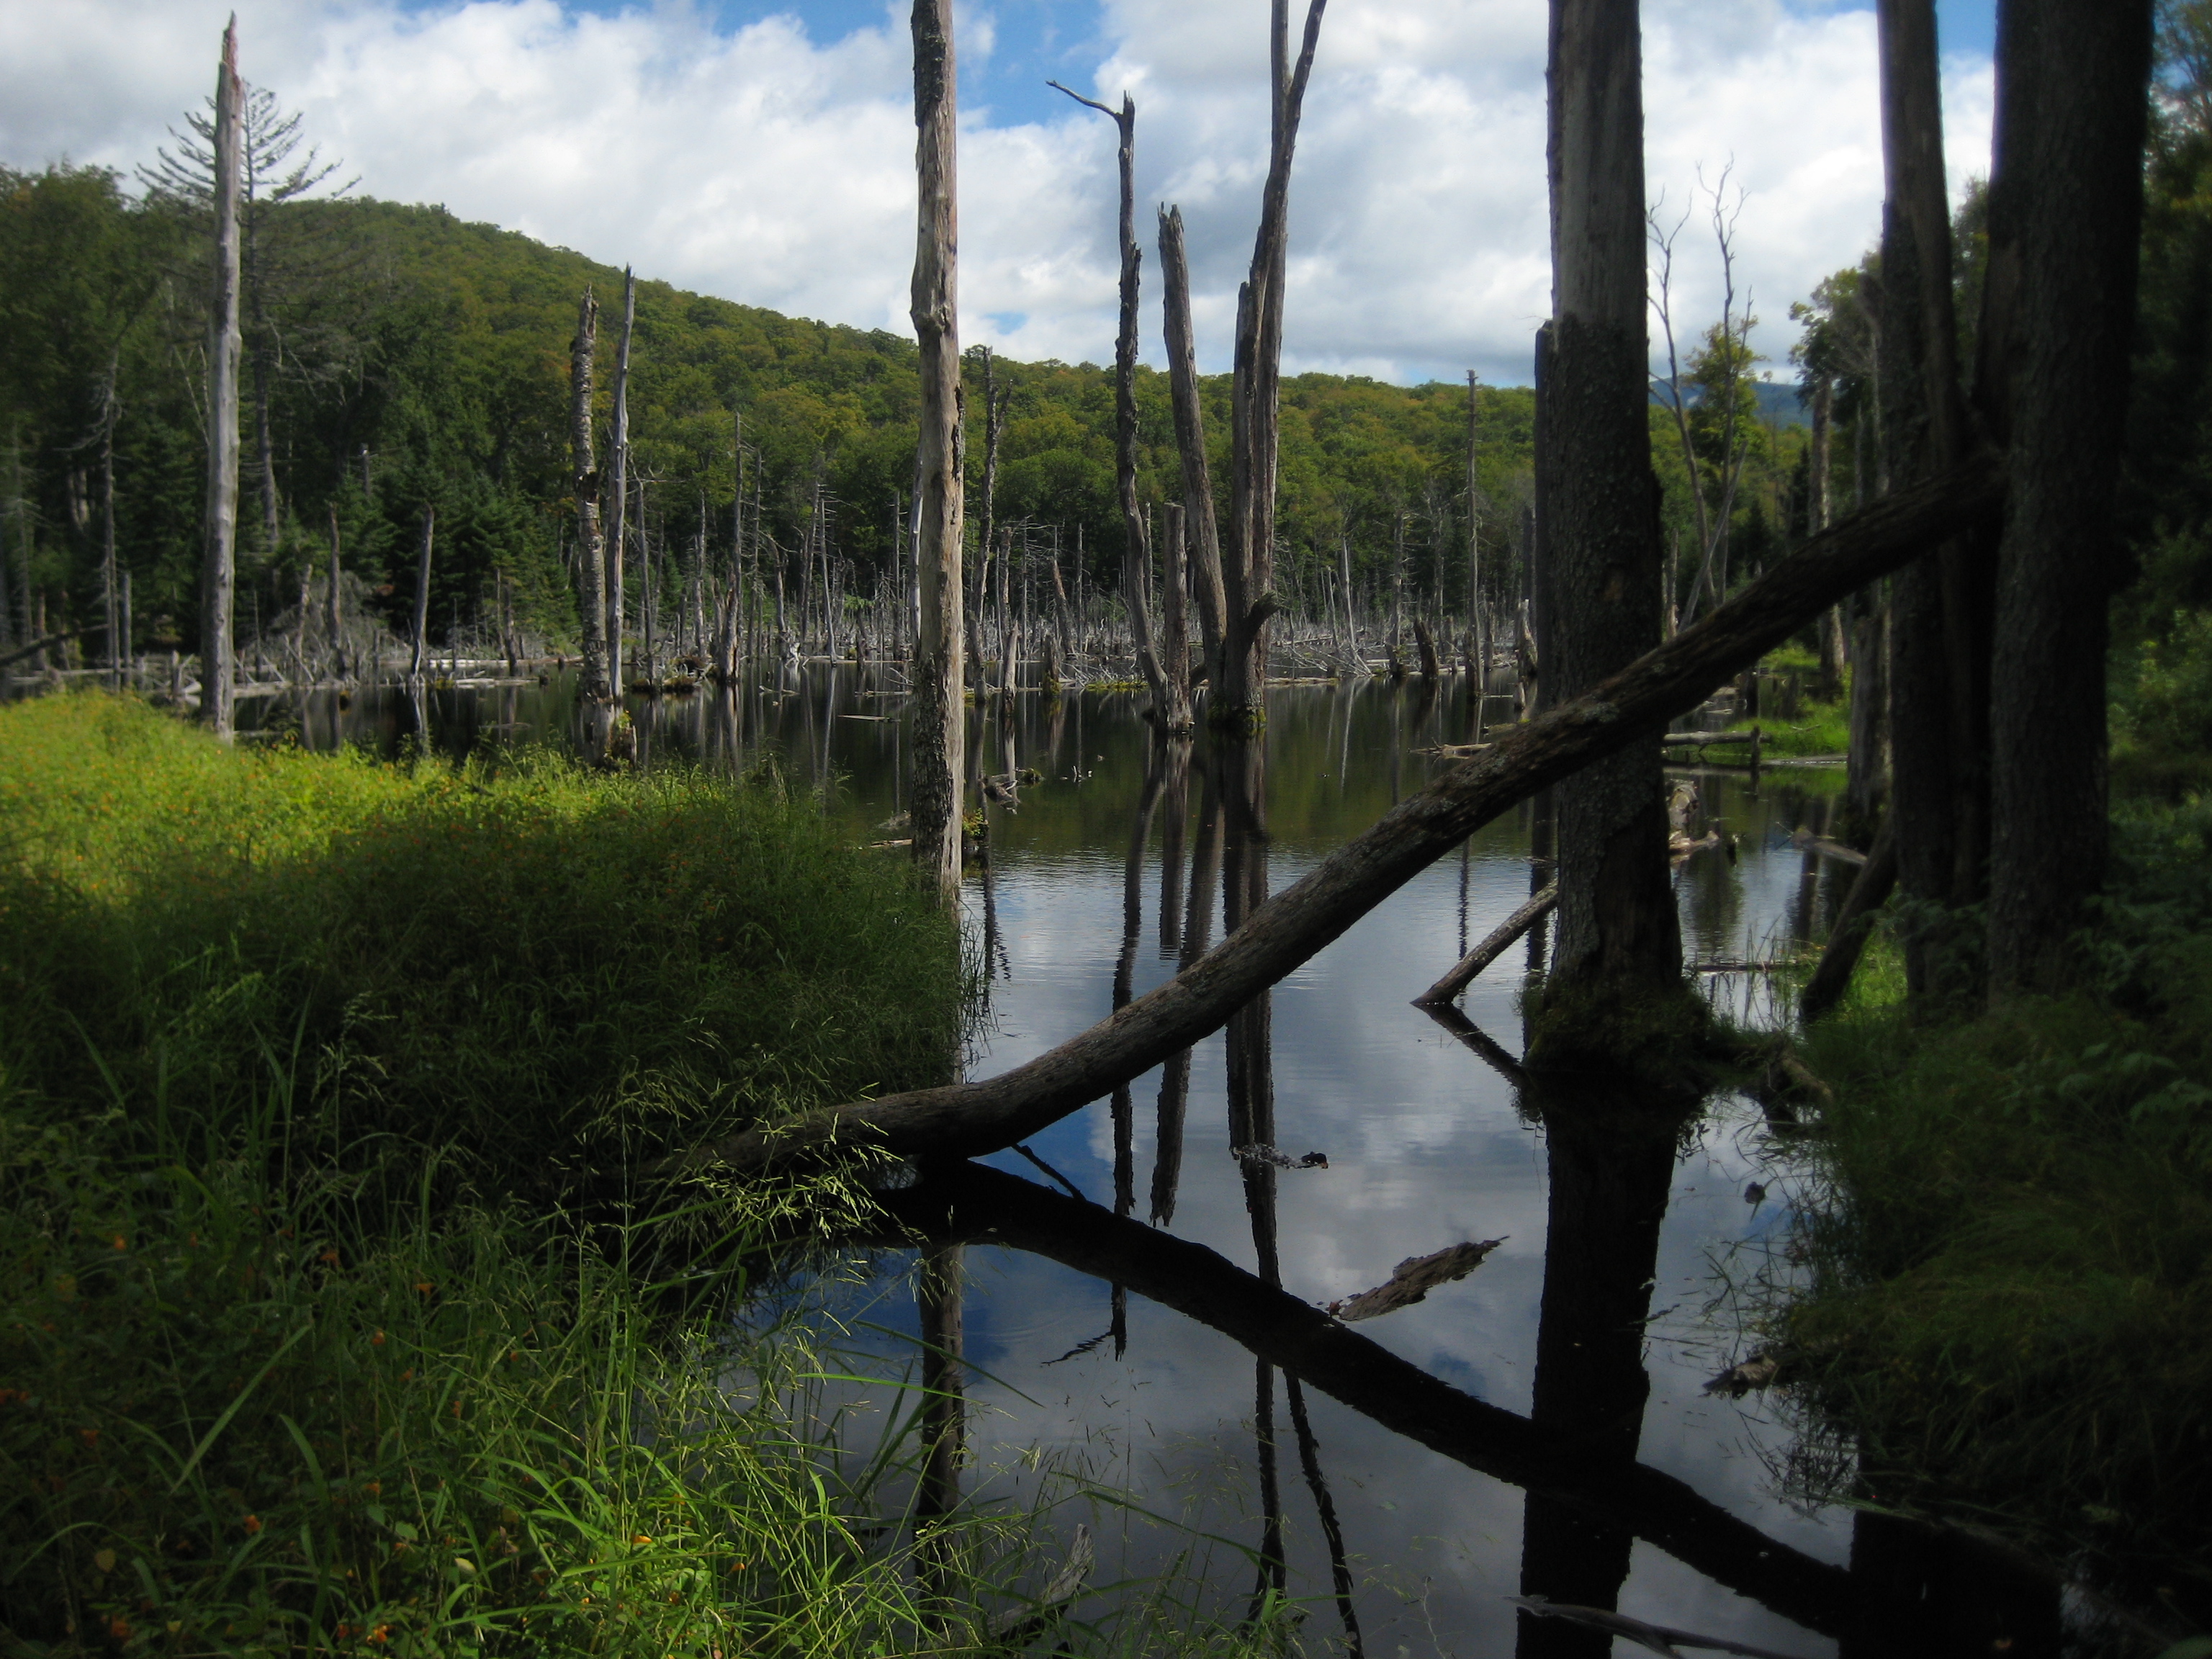 |
With beavers damming every usable spot in a river, the melt from winter snow flows steadily all summer, rather than a short deluge in spring. This keeps the rivers viable living places, for other fauna and flora, throughout dry periods of the year. With the arrival of Europeans, beavers were almost exterminated for their fur. It's only now, that beavers are returning to the highest ends of creeks, where they were last seen 100yrs ago. As long as you don't mind the trees on the lake shore being indiscriminately cut down by beavers (they don't always use the trees they cut down), they're just about the greatest things ever for the ecology, unless of course they're introduced where they aren't native. (see beaver as an introduced species. New Zealand has declared beavers a "hazardous substance".)
Beavers aren't terribly smart. Apparently, if you place speakers making the sound of running water, they'll build a dam. Here in Hailstorm Creek, they've built a dam, in relatively deep water, across a large mouth, when the water is already dammed at Annie Bay about 10km downstream. This dam won't increase the water depth behind it. This was a huge and ultimately futile undertaking something you'd expect from a goverment (like the war on drugs). and not something you'd expect from a creature who won't survive unless its efforts are productive.
What to do about the dam? I couldn't take a run up and try to get over this thing. I'd be stranded about 1/4 way across, like an upside down turtle, my paddle flailing in the air. I'd probably roll over and poke my eyes out on the stakes in the dam. I assumed the dam was full of voids and any attempt to stand on it would result in something giving way and I'd be up to my neck in the dam, my liver punctured by beaver chiselled stakes. There was a dry land portage beside the dam, but the kayak was too heavy to portage solo.
Not knowing the standard protocol for handling a beaver dam, I decided to go elsewhere for the day and headed back out. About half way back across the North Arm, I saw a couple in a canoe heading to Hailstorm and with alarm told them of the problem. They dismissed my concerns; people here know all about beavers. They expect to wake up in the morning with their trees cut down and a dam in their front yard. I guess it's like venomous snakes and spiders back where I'm from; you'd adjusted to living with them long ago. I turned around and followed them back. The woman stood on the dam, which turned out to be quite solid. She hauled their canoe through with her partner in it, and then my kayak with me in it. Nothing to it.
Table 1. Beaver dam blocking Hailstorm Creek
Figure 25. on the way in
This photo was taken on the way in, so here I'm on the outside of the dam, which the woman is standing on. The vegetation and rocks in the water in the foreground are not part of the dam. Note the morning fog hasn't cleared yet. | Figure 26. on the way out.
This photo was taken on the way back, so here I'm on the inside of the dam. (The photo on the left, which I took on the way in, was taken on the other side of the dam, off to the left of this photo.) Note: there are plenty of people around and the sky is clearing for the first time. |
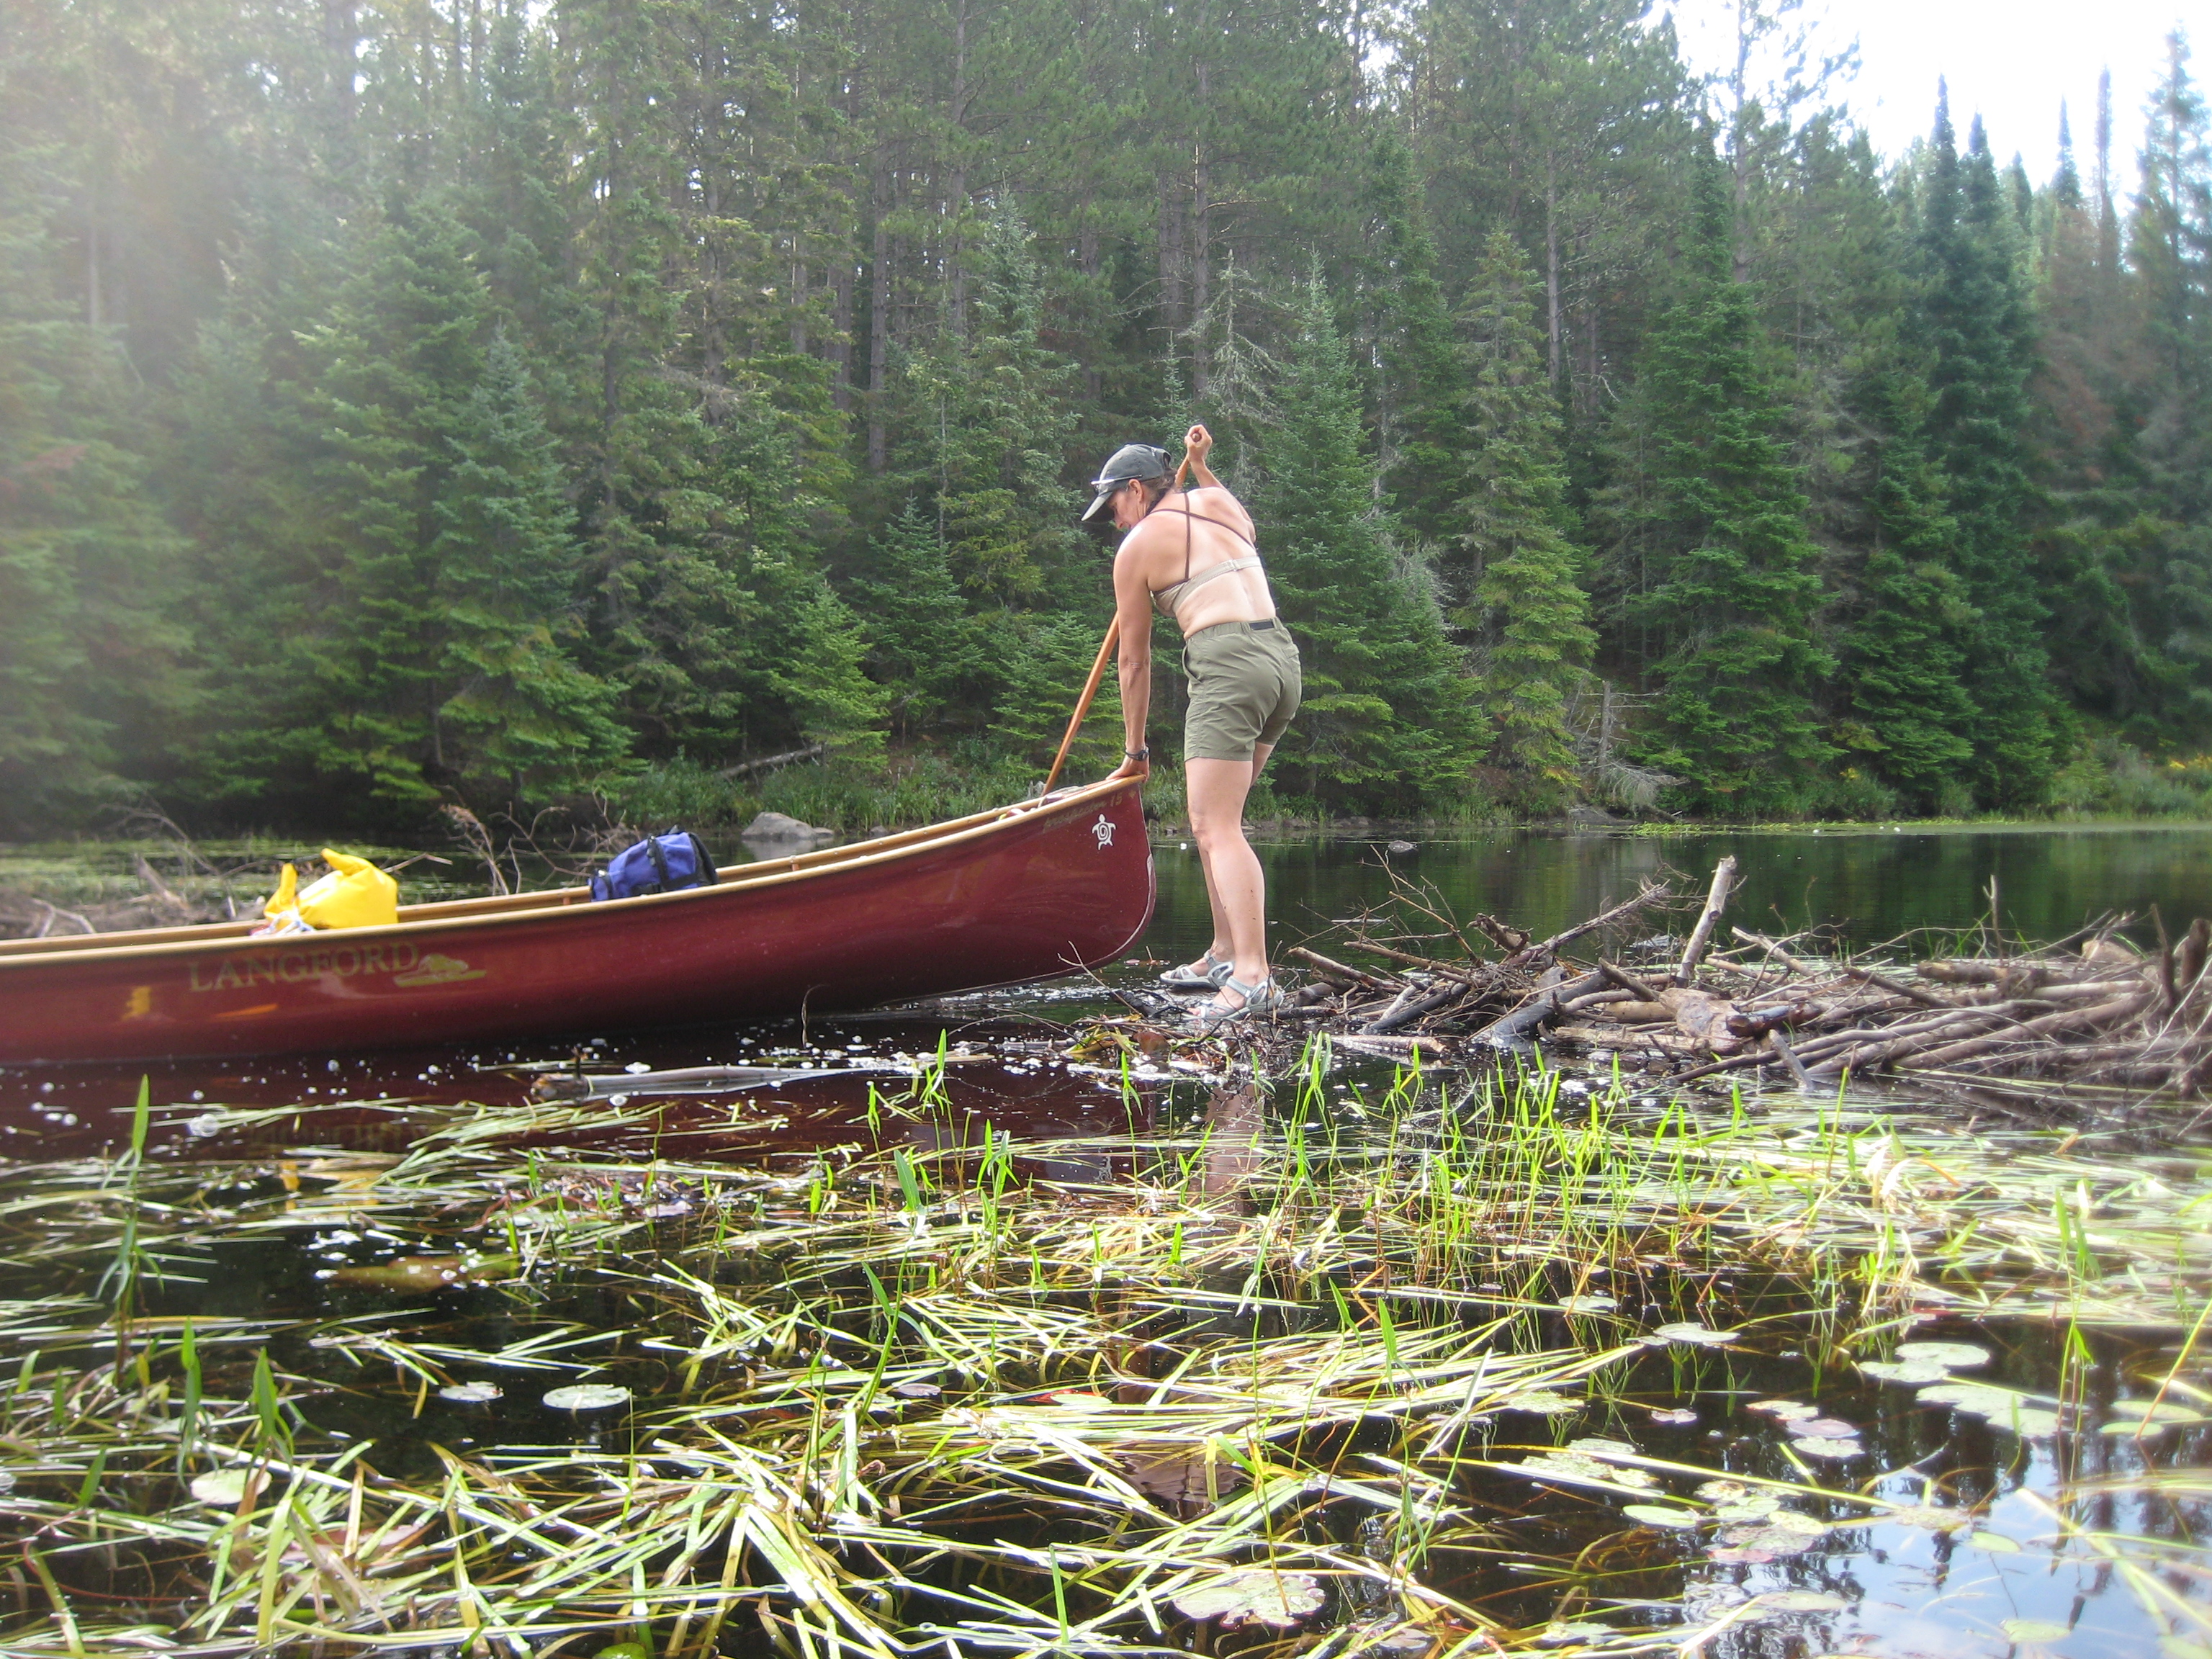
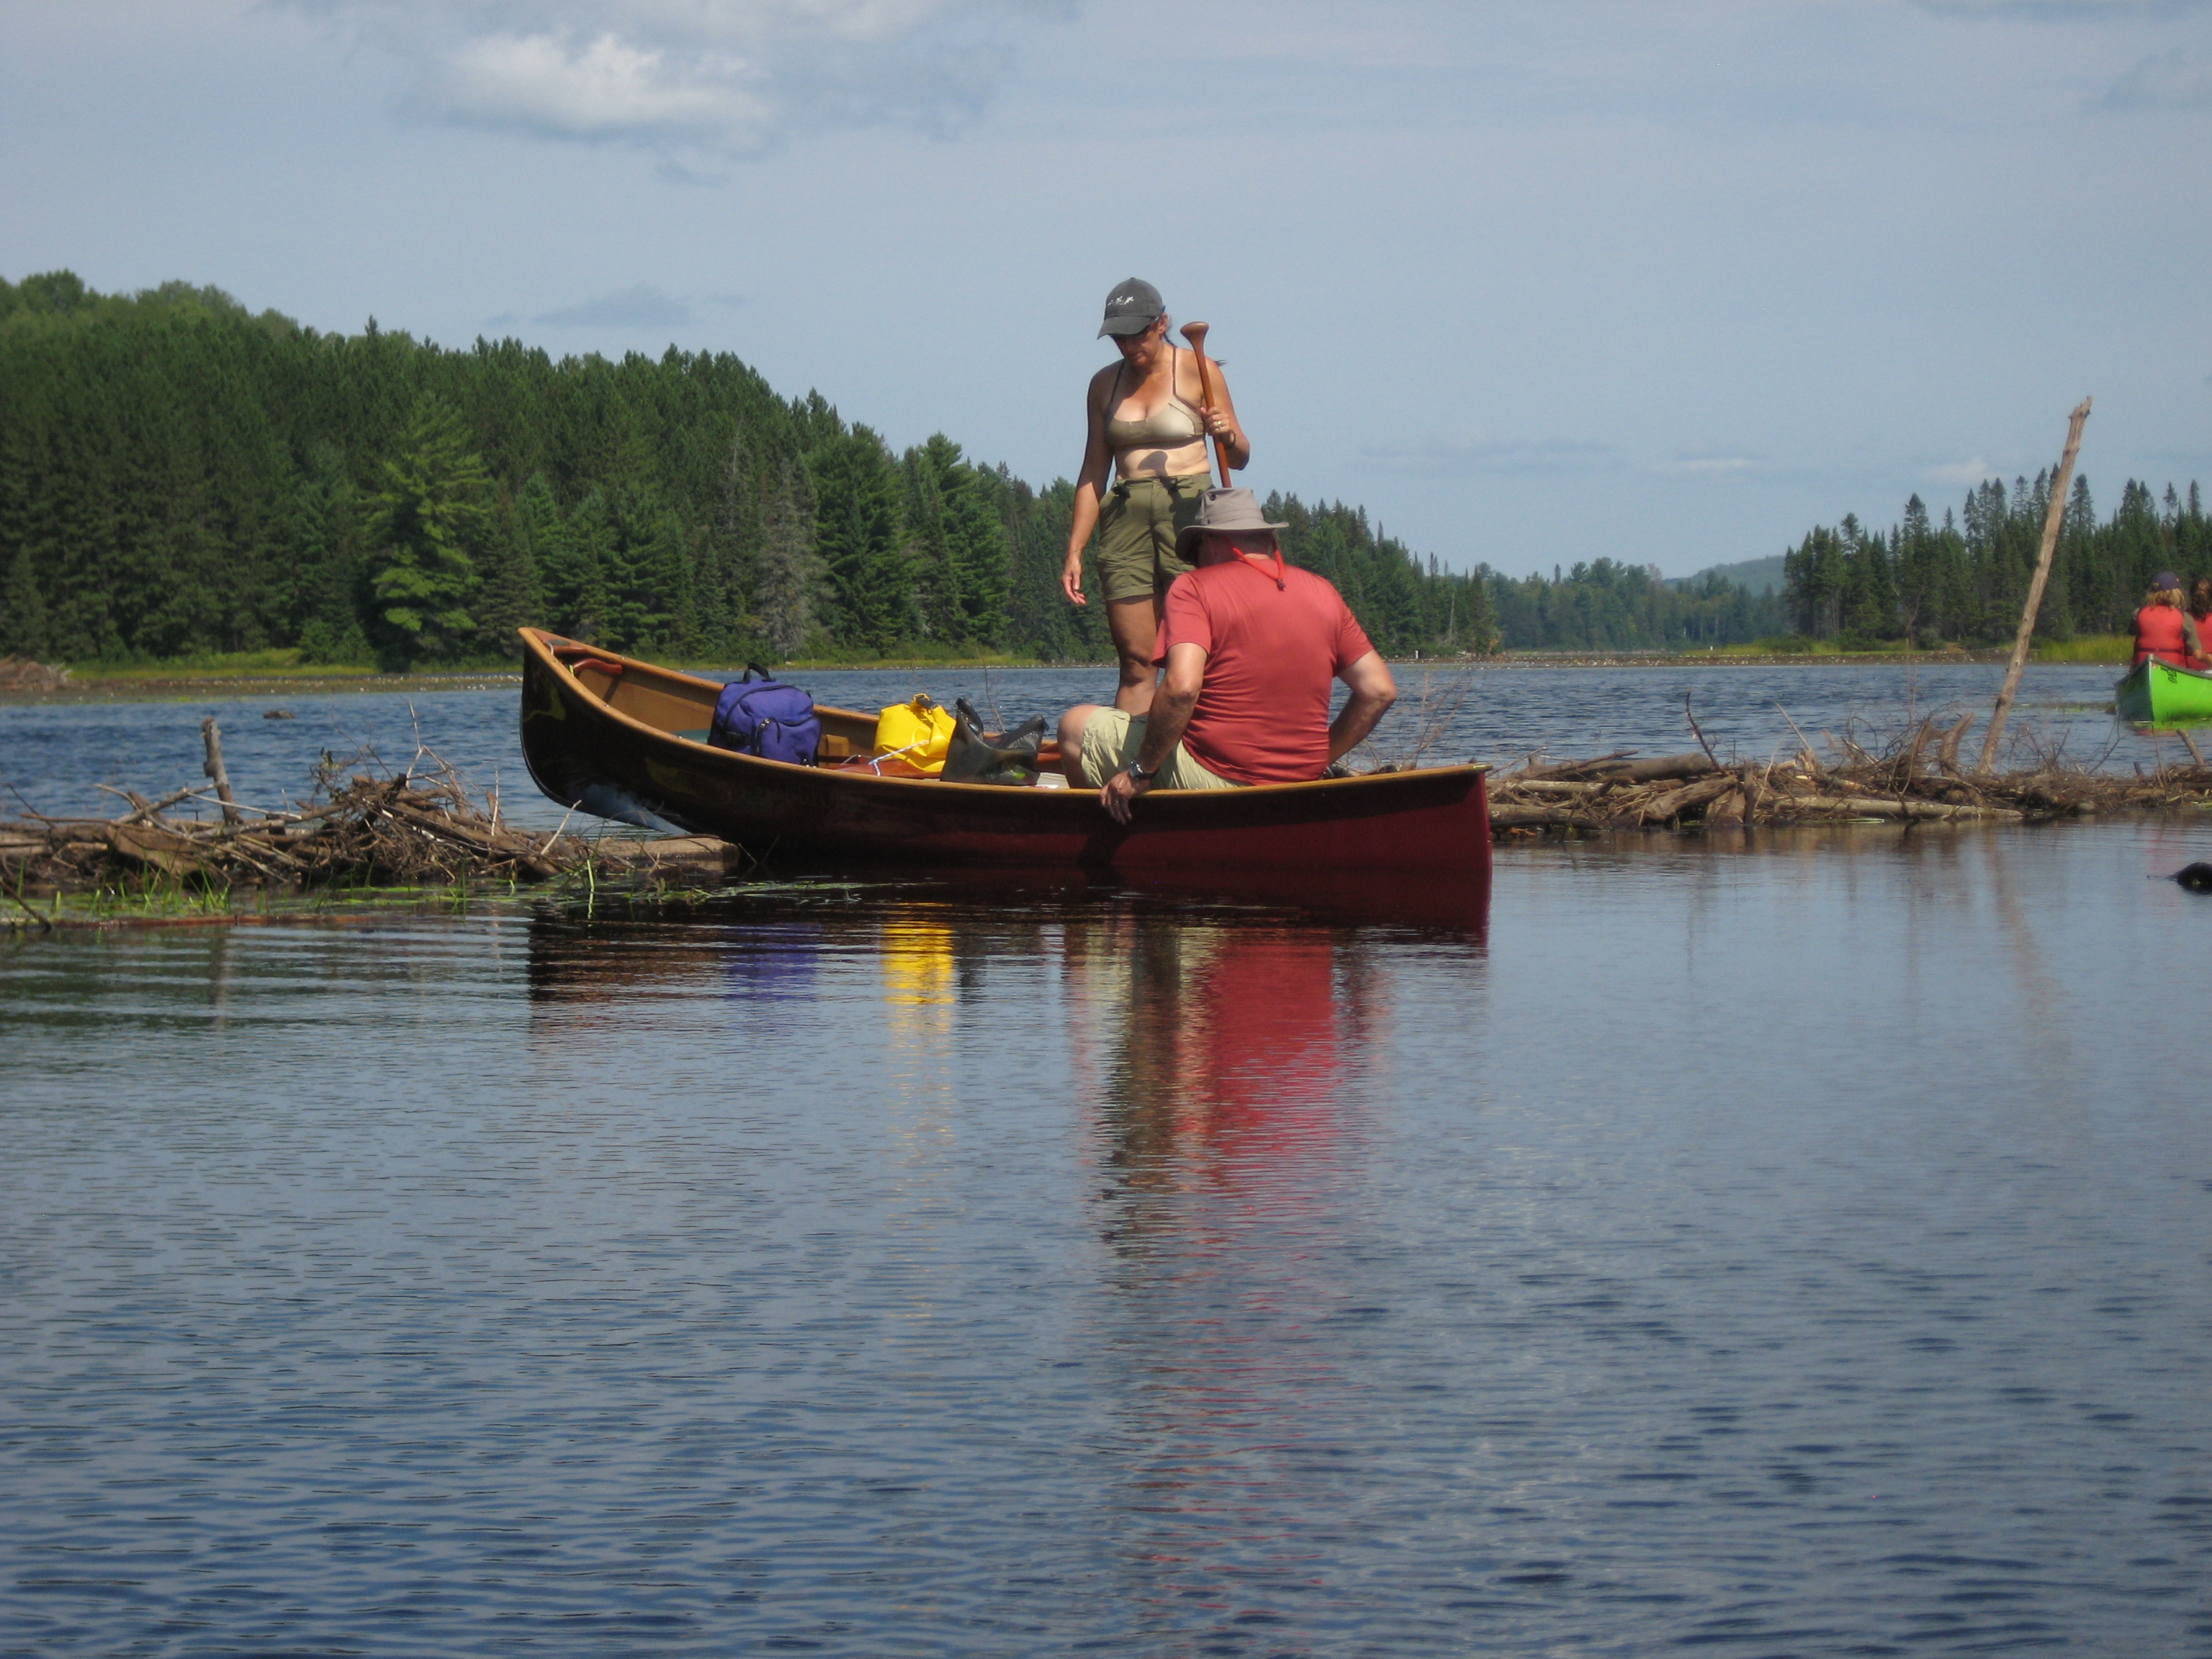
Once inside the dam, I was stuck there till they wanted to leave. This turned out not to be a problem; we were both paddling about the same speed and both wanted to go to the end. On my last trip here, I was paddling a canoe solo and my steering was limited by wind. I didn't go the whole way in, as I thought I may not be able to get out again (I was like a photon in a black box). Back then there was no-one else around and was afraid of being stuck. This time I had a kayak (I could steer) and I would see 3 other canoes in Hailstorm Creek, who could help me if I was in trouble. I was intent on getting to the end of Hailstorm Creek, a goal that eluded me last trip. Consequently I took most of my photos as I was returning.
Here's a family using the portage in the outwards direction later in the day. They aren't lifting their rented canoe; they're dragging it over the rocks, tearing the arse out of it. What do they care? It's not their canoe. (Still a canoe is heavy and difficult to portage over a convex surface.)
Figure 27. Portage of a canoe at Hailstorm Creek (Lake Opeongo, Algonquin Park)
 |
Portage of a canoe at Hailstorm Creek. This was later in the day, on the way out. The dam is to the left and I'm outside the dam. The portage is well worn. It must have been here for most of the 9 years since my last trip.
Once in Hailstorm creek, the shallow water has lots of lilies and these flowers
Figure 28. Flowers in Hailstorm Creek (Lake Opeongo, Algonquin Park)
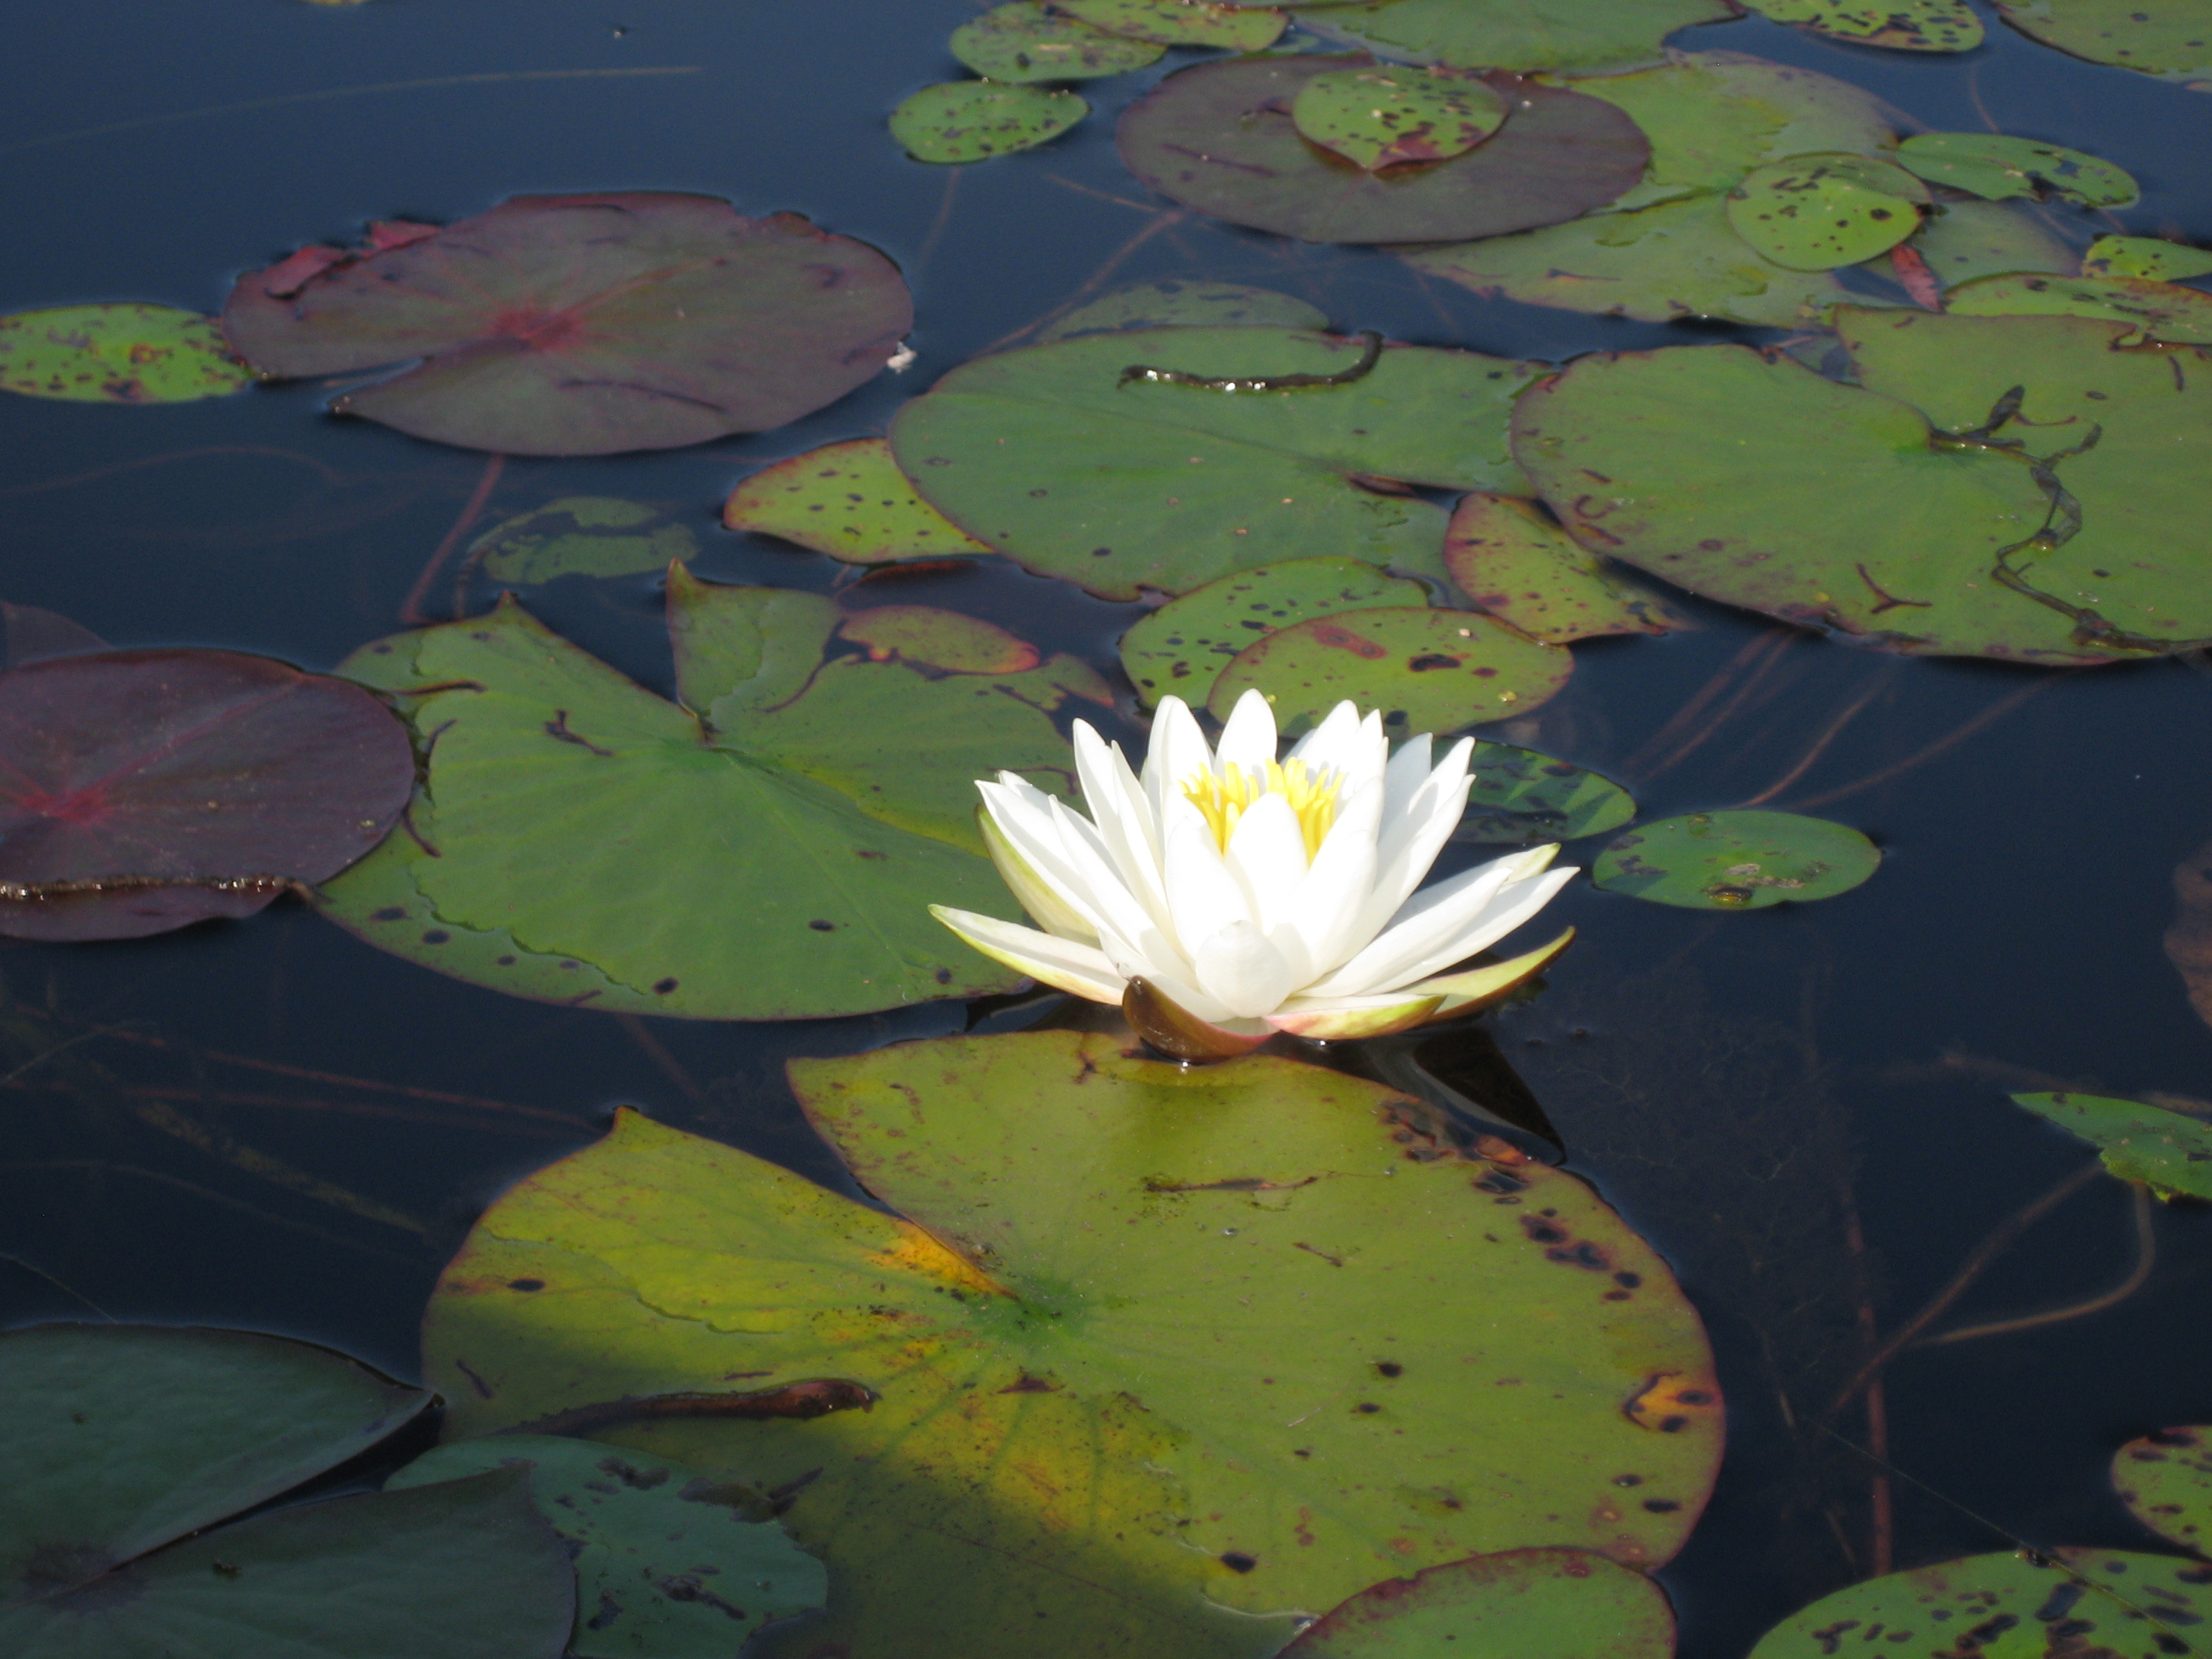 |
Flowers in Hailstorm Creek. They're always found with the lilies. I don't know if they're the flower of the lily. The flowers are in calendars and well known. However I haven't been able to find their botanical name.
The flowers are always found amongst lilies.
Figure 29. Lilies in Hailstorm Creek (Lake Opeongo, Algonquin Park)
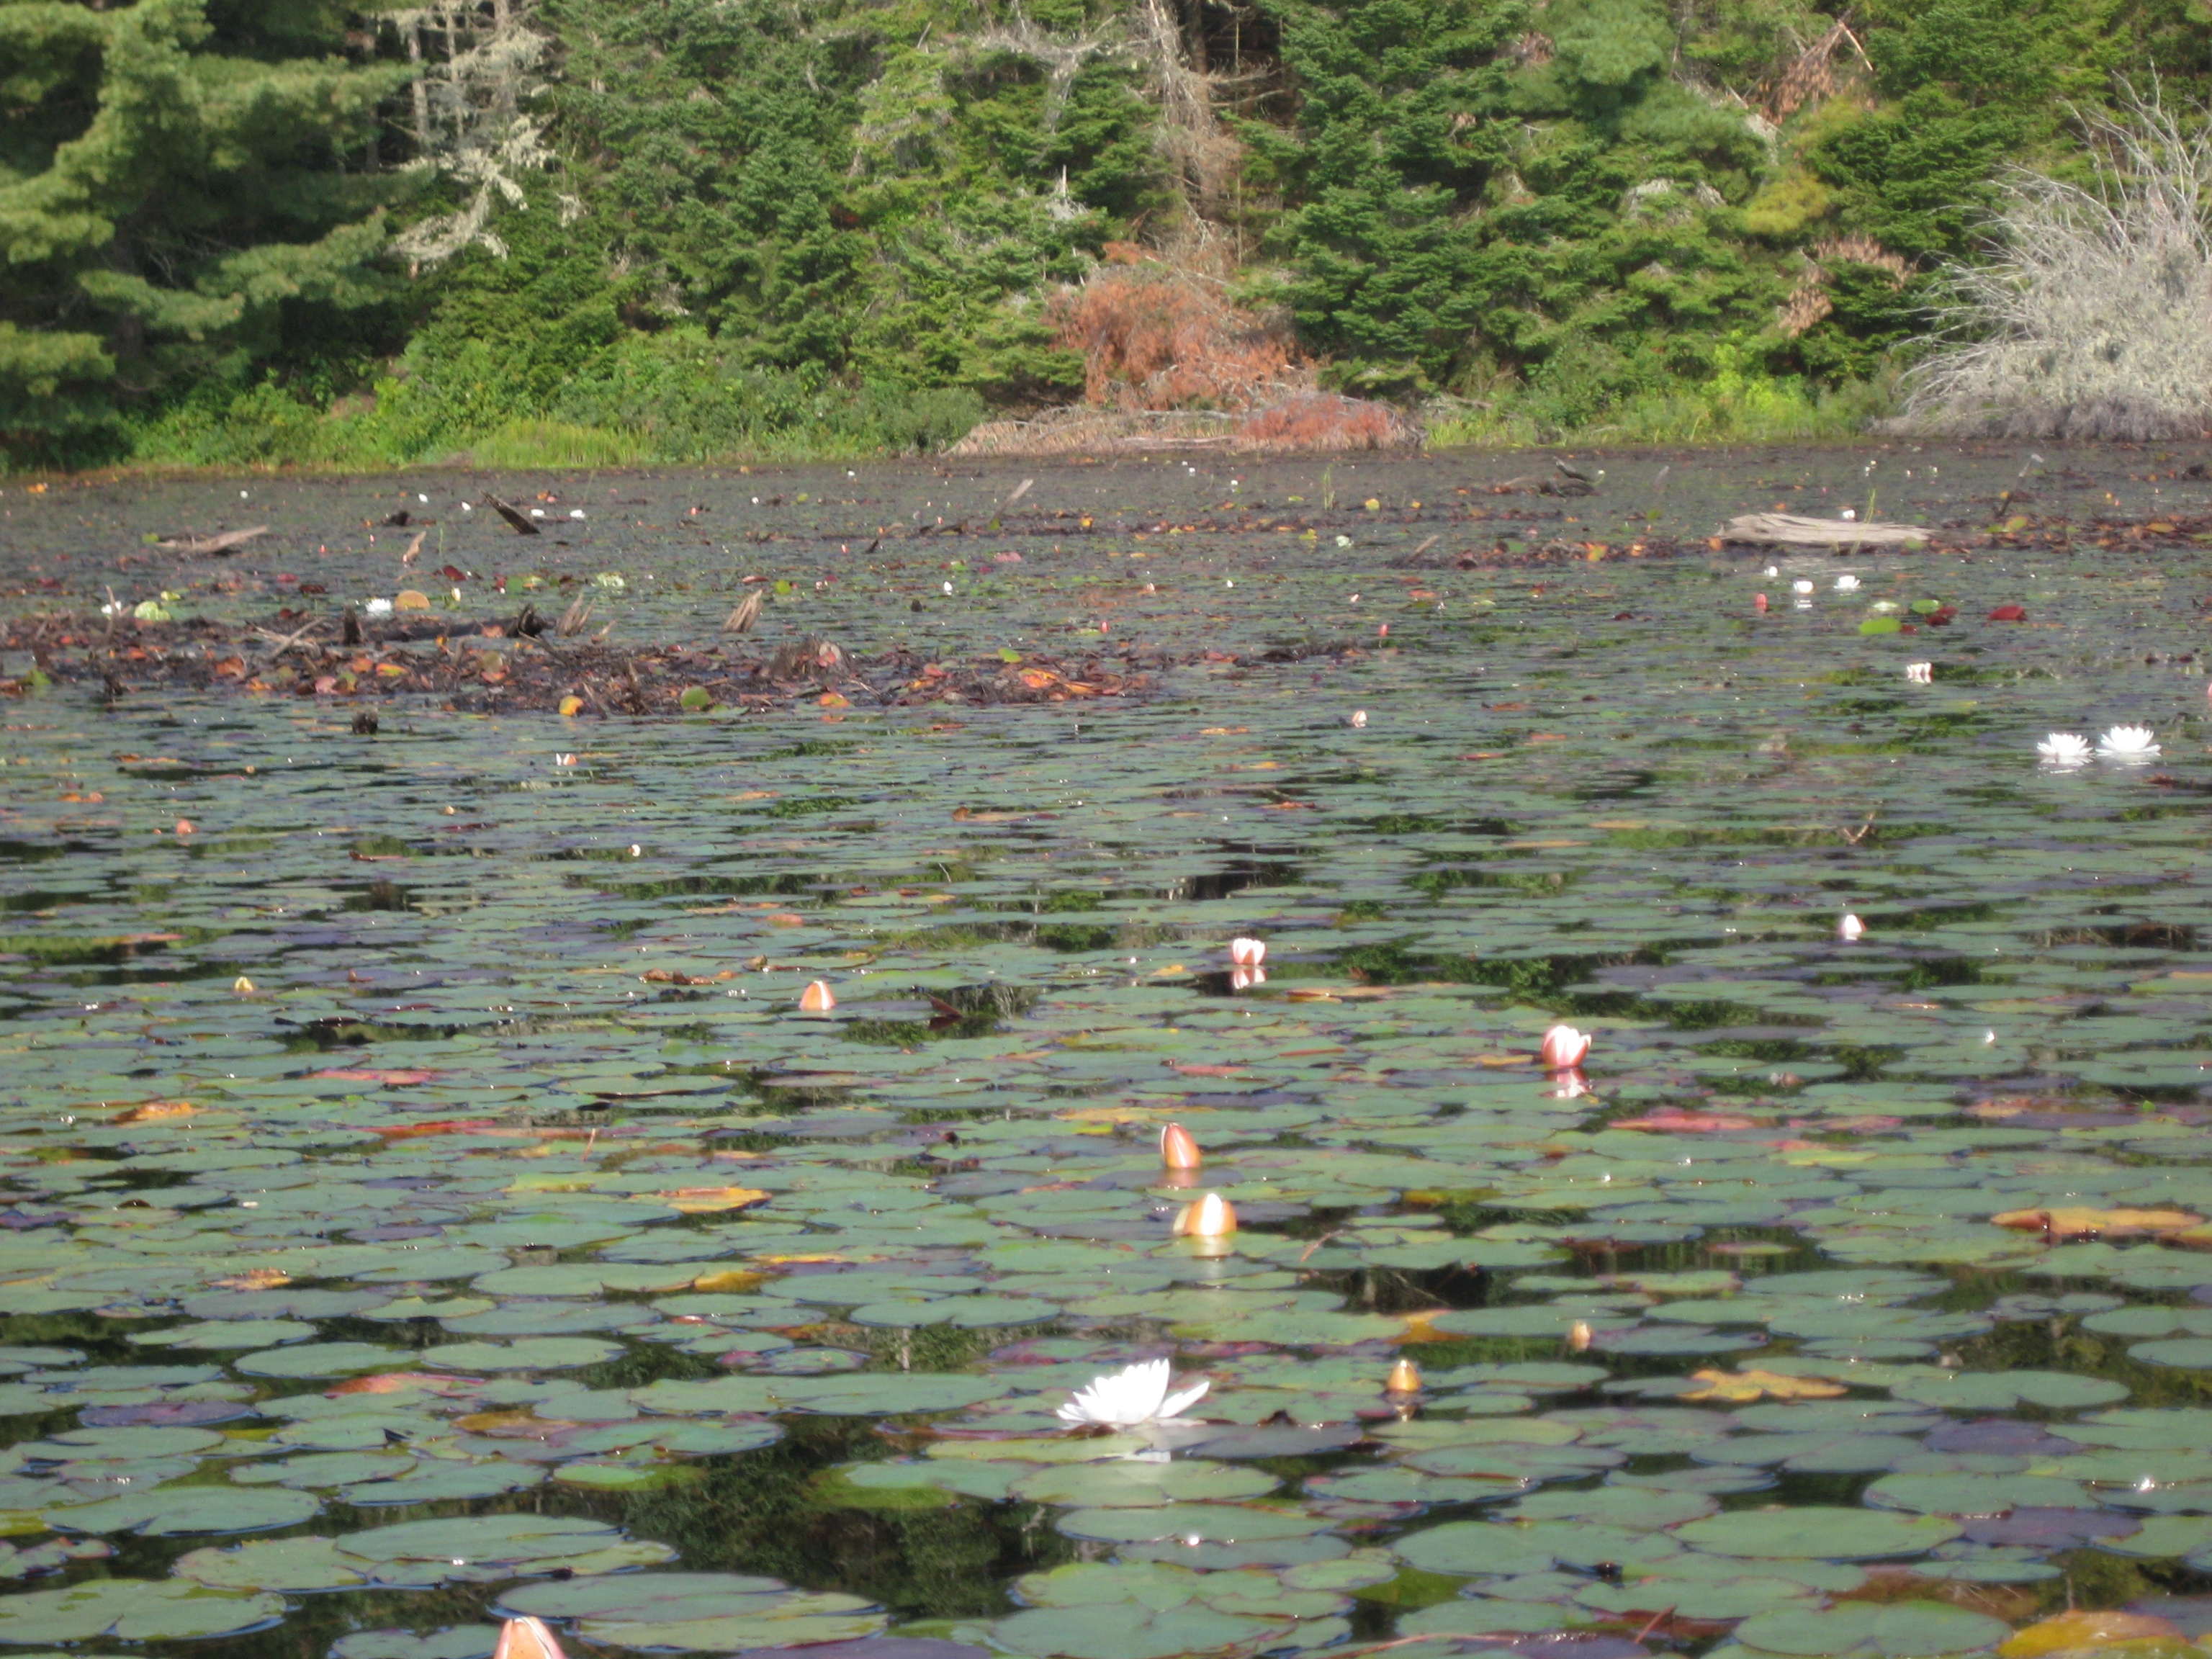 |
Lilies in Hailstorm Creek.
There were about half a dozen beaver lodges at the grass/lily junction.
Table 2. Beaver Lodges
Figure 30. Beaver Lodge
Beaver Lodge. This one is outside the beaver dam. | Figure 31. Beaver Lodge
This one appears to be abandonned (it's not in good repair). | ||
Figure 32. Beaver Lodge
Beaver Lodge. | Figure 33. Beaver Lodge
Different view of photo 1556 (to left). | ||
Figure 34. Beaver Lodge
Beaver Lodge. | Figure 35. Beaver Lodge
Different view of photo 1570 (to left). |
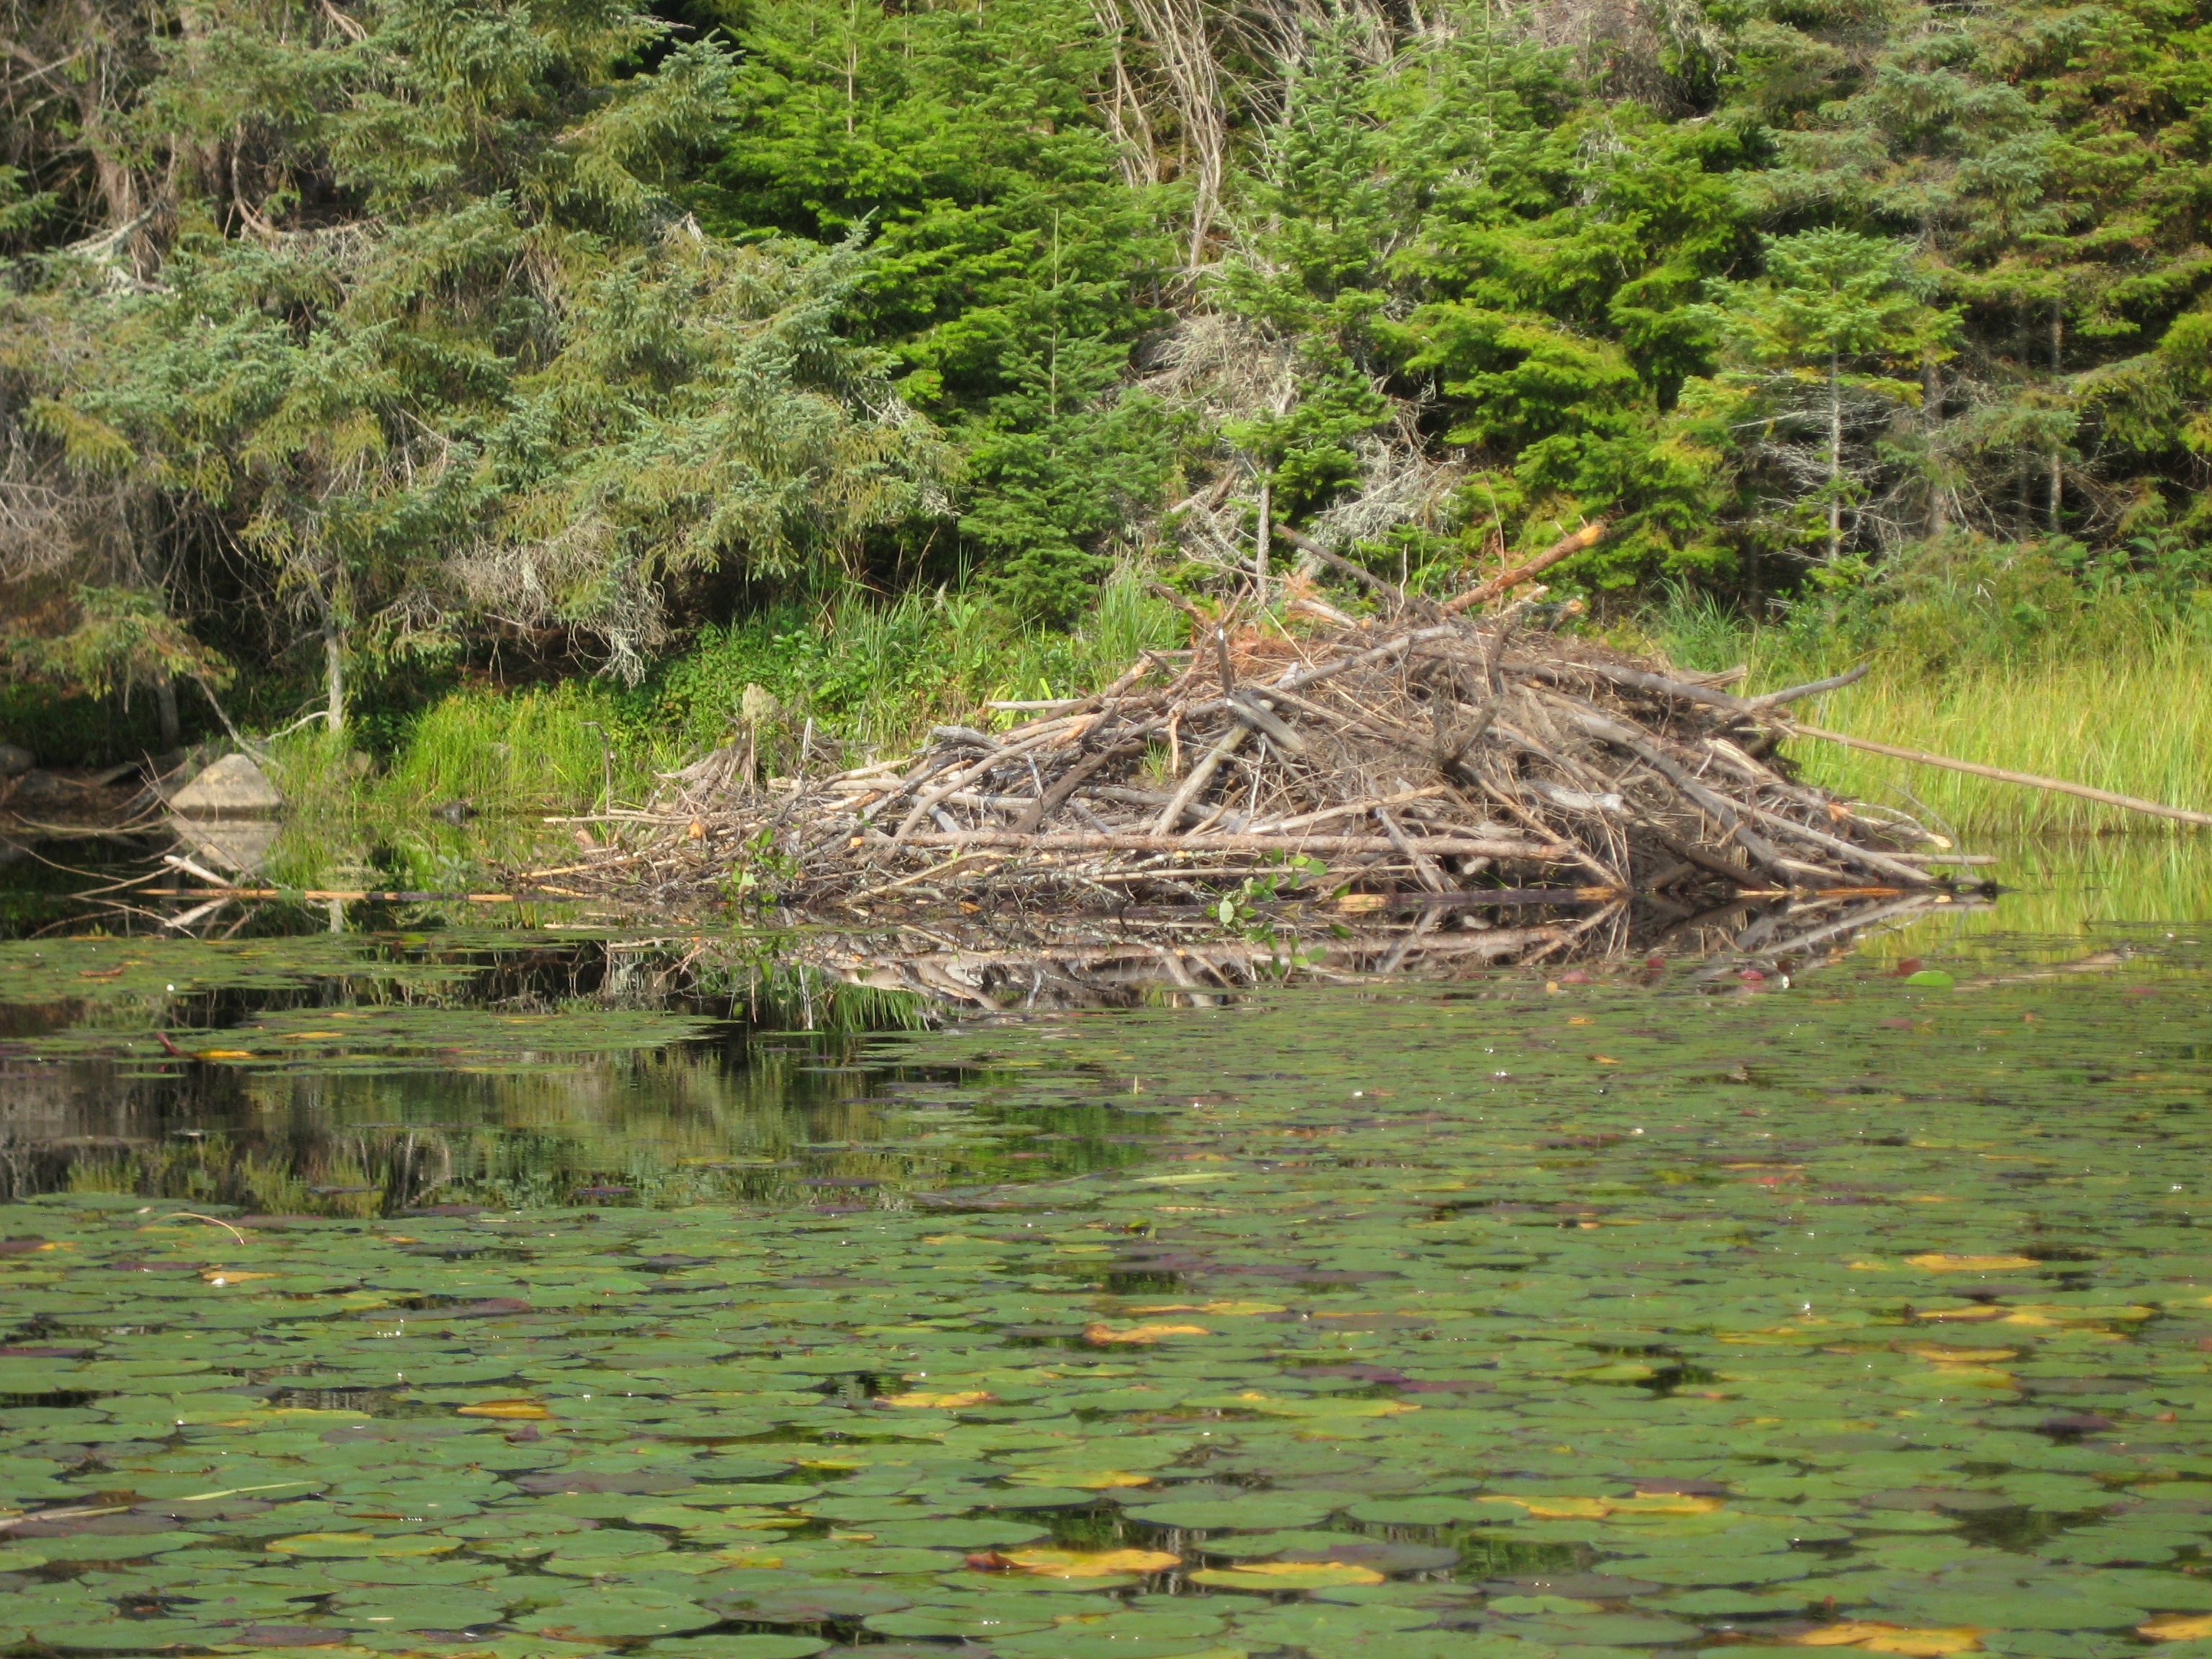

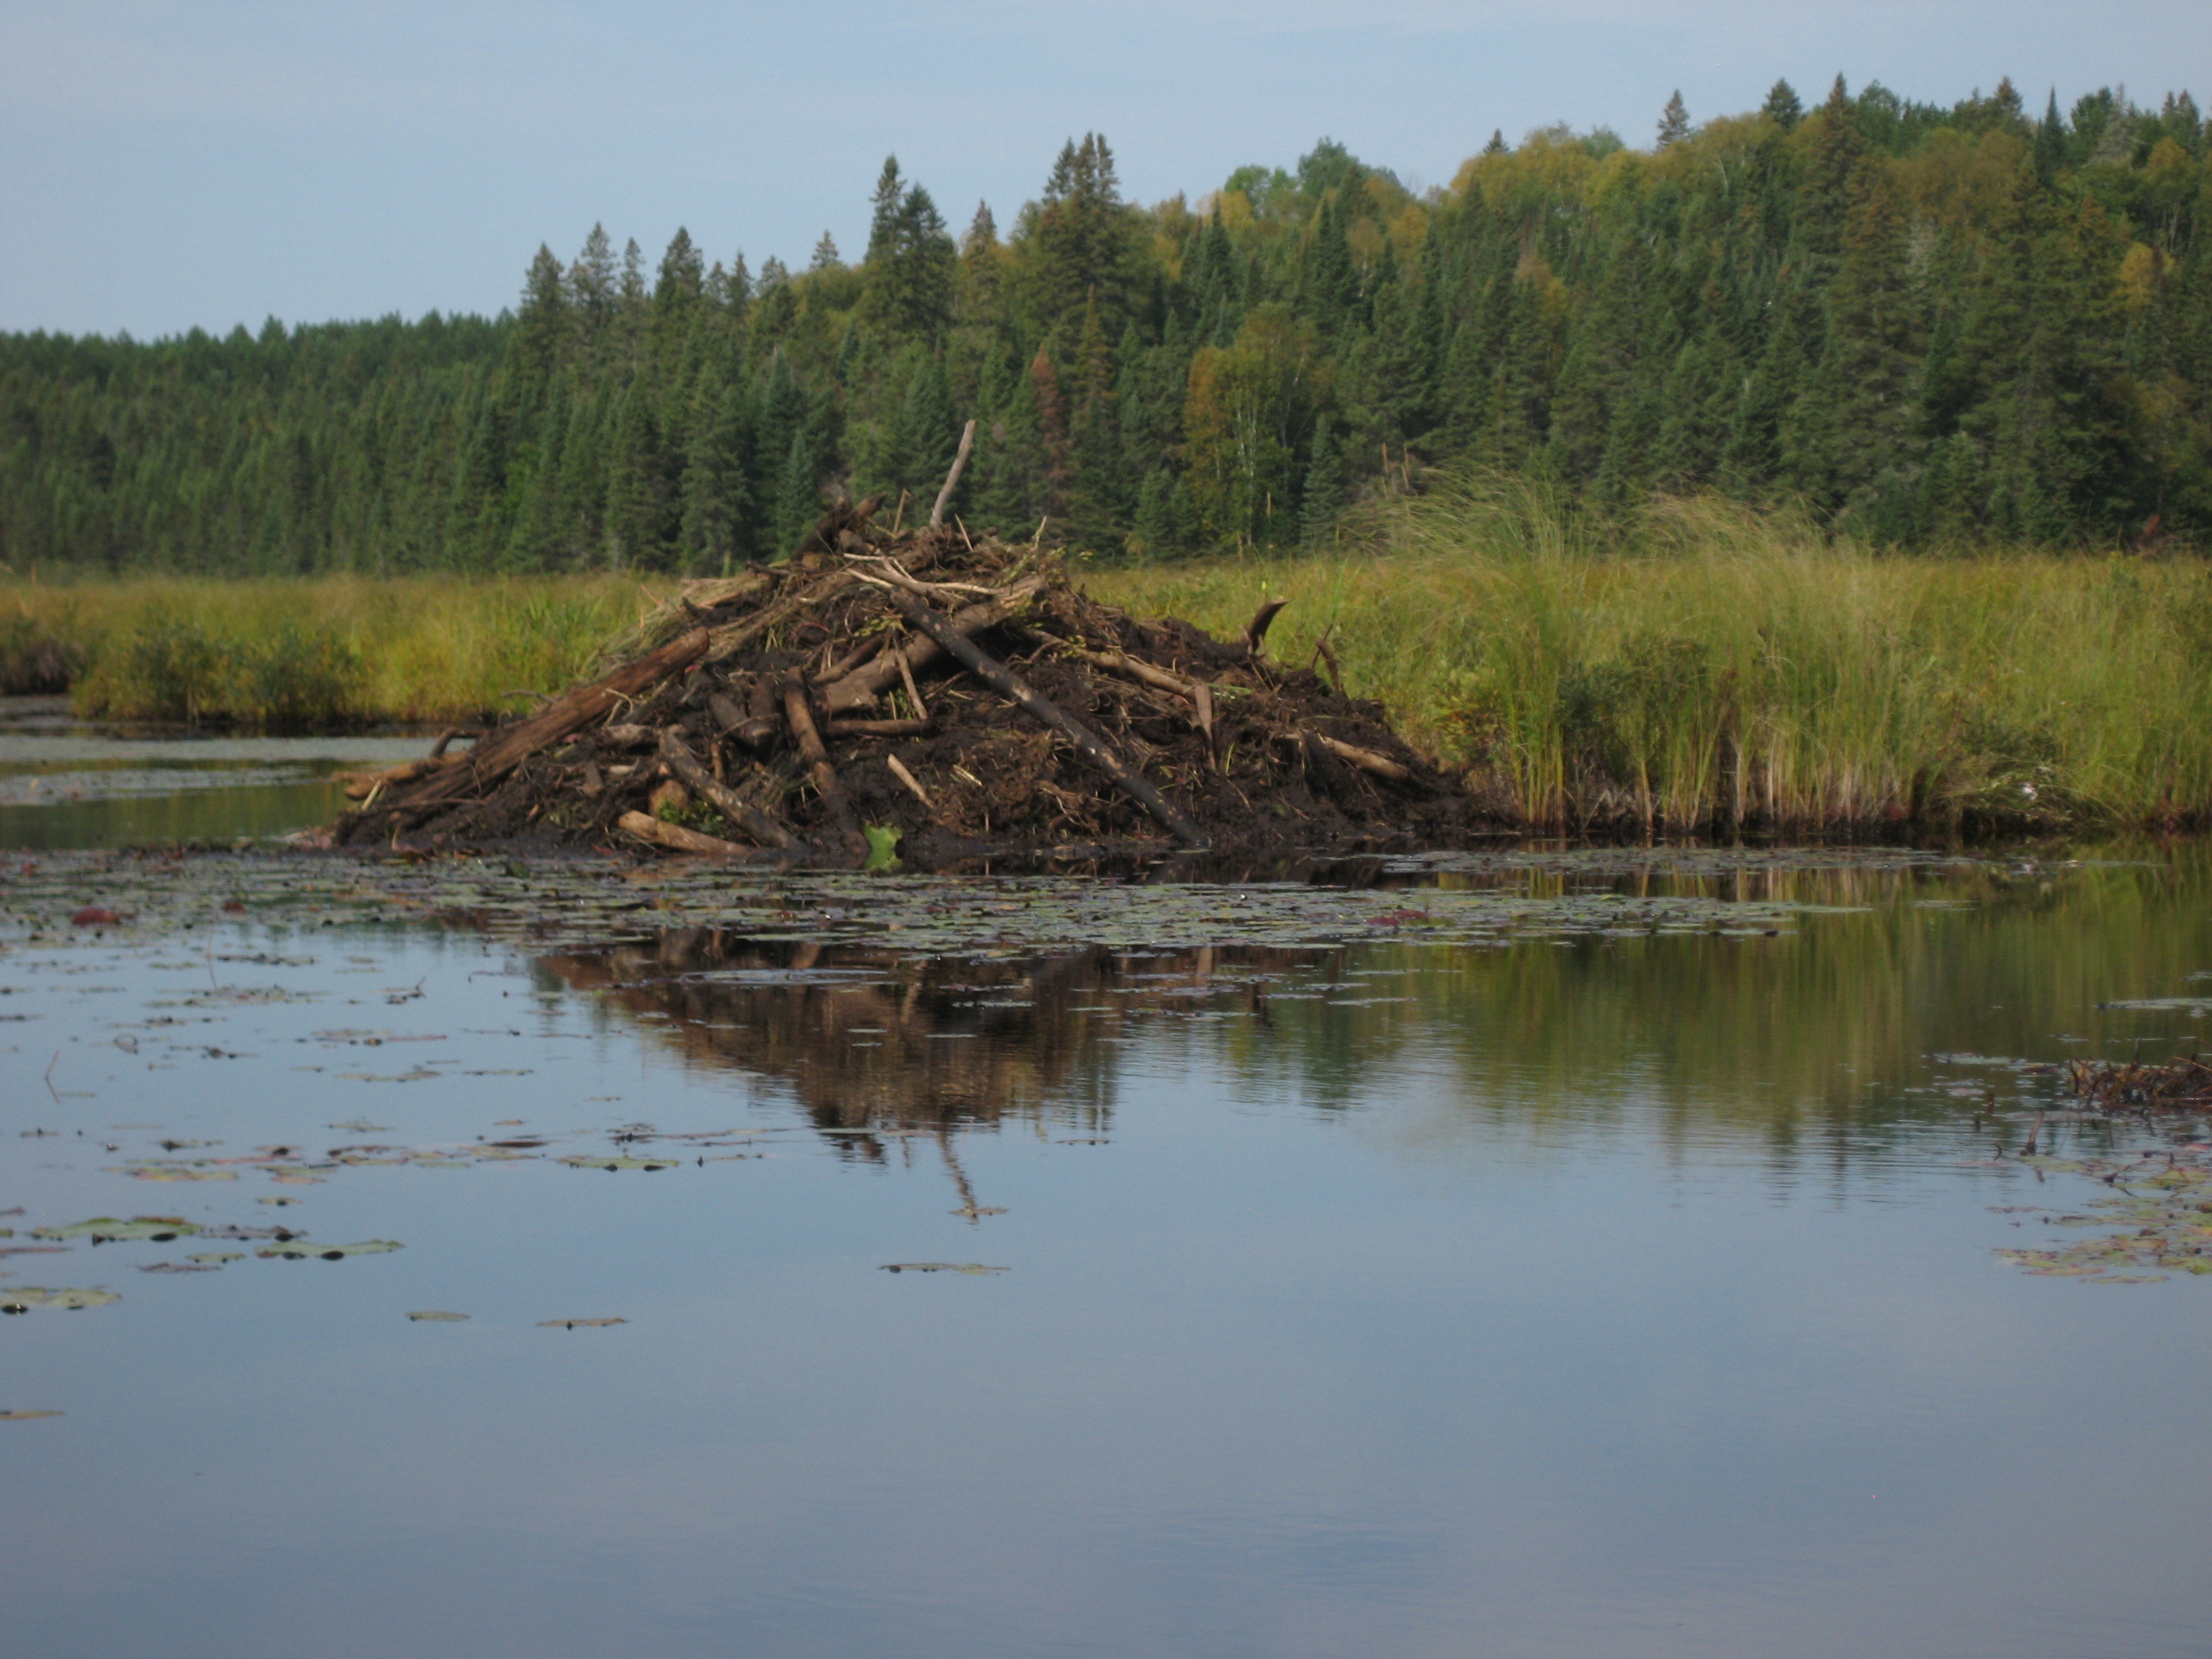
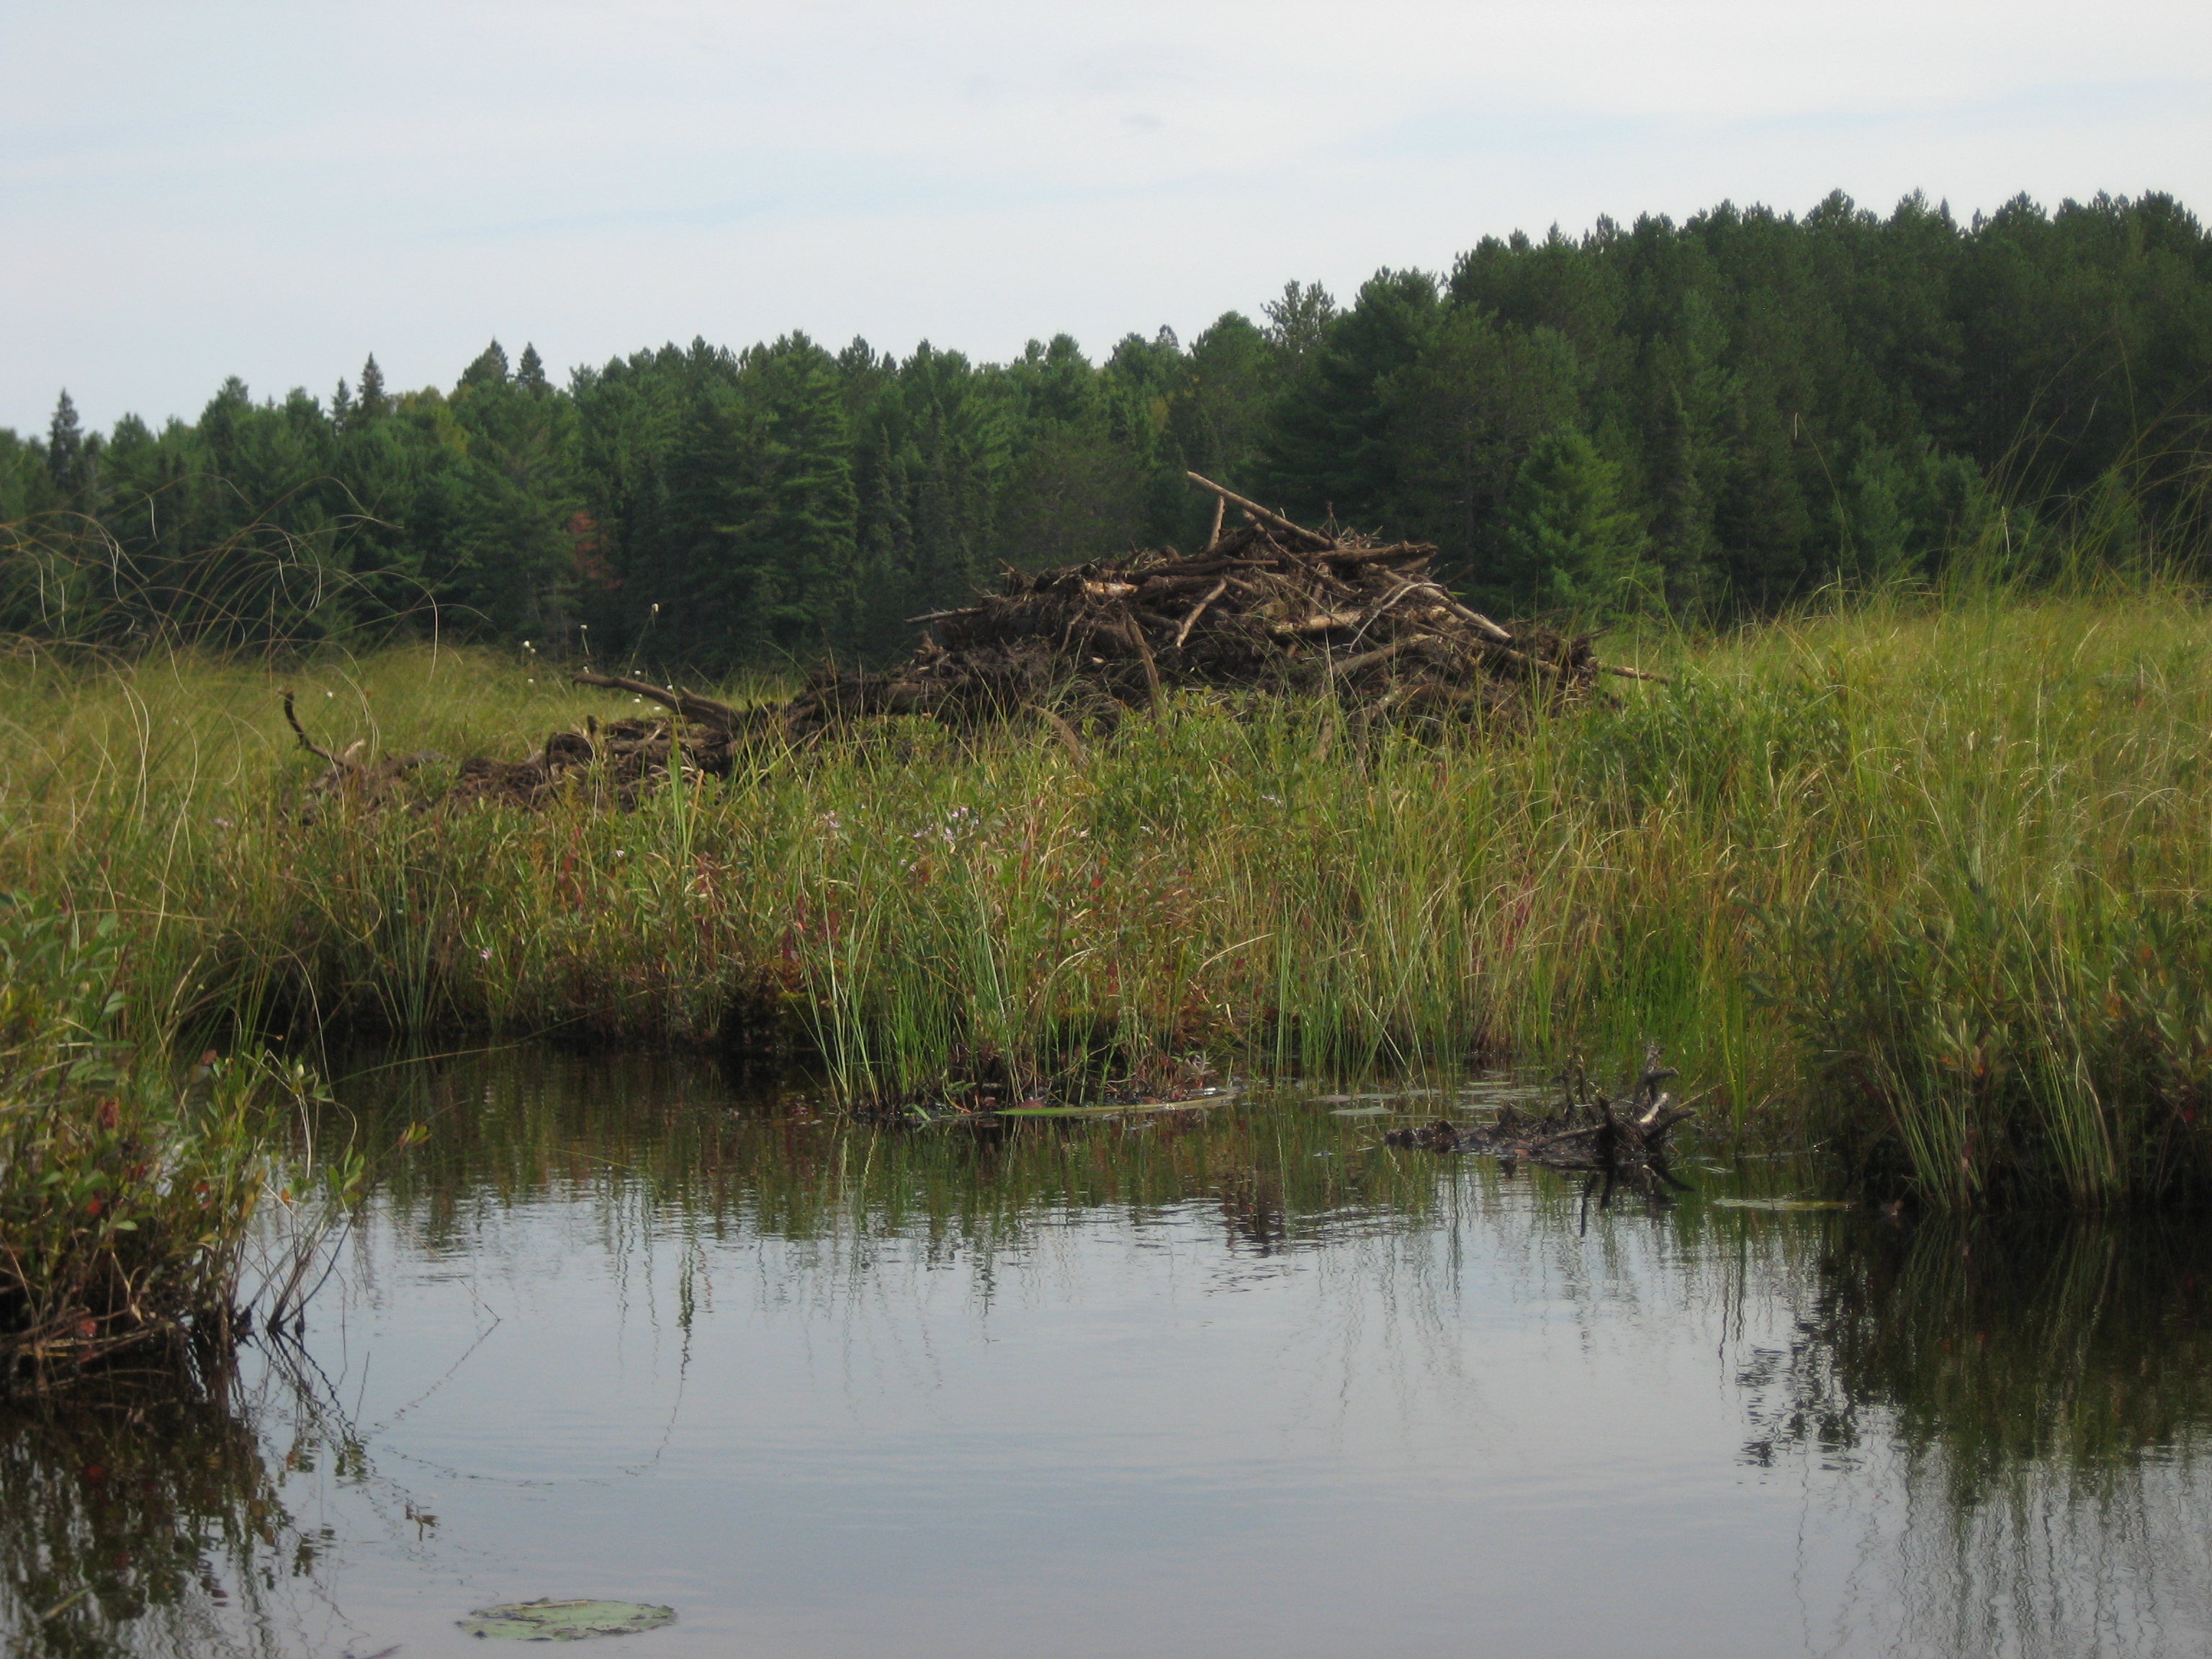

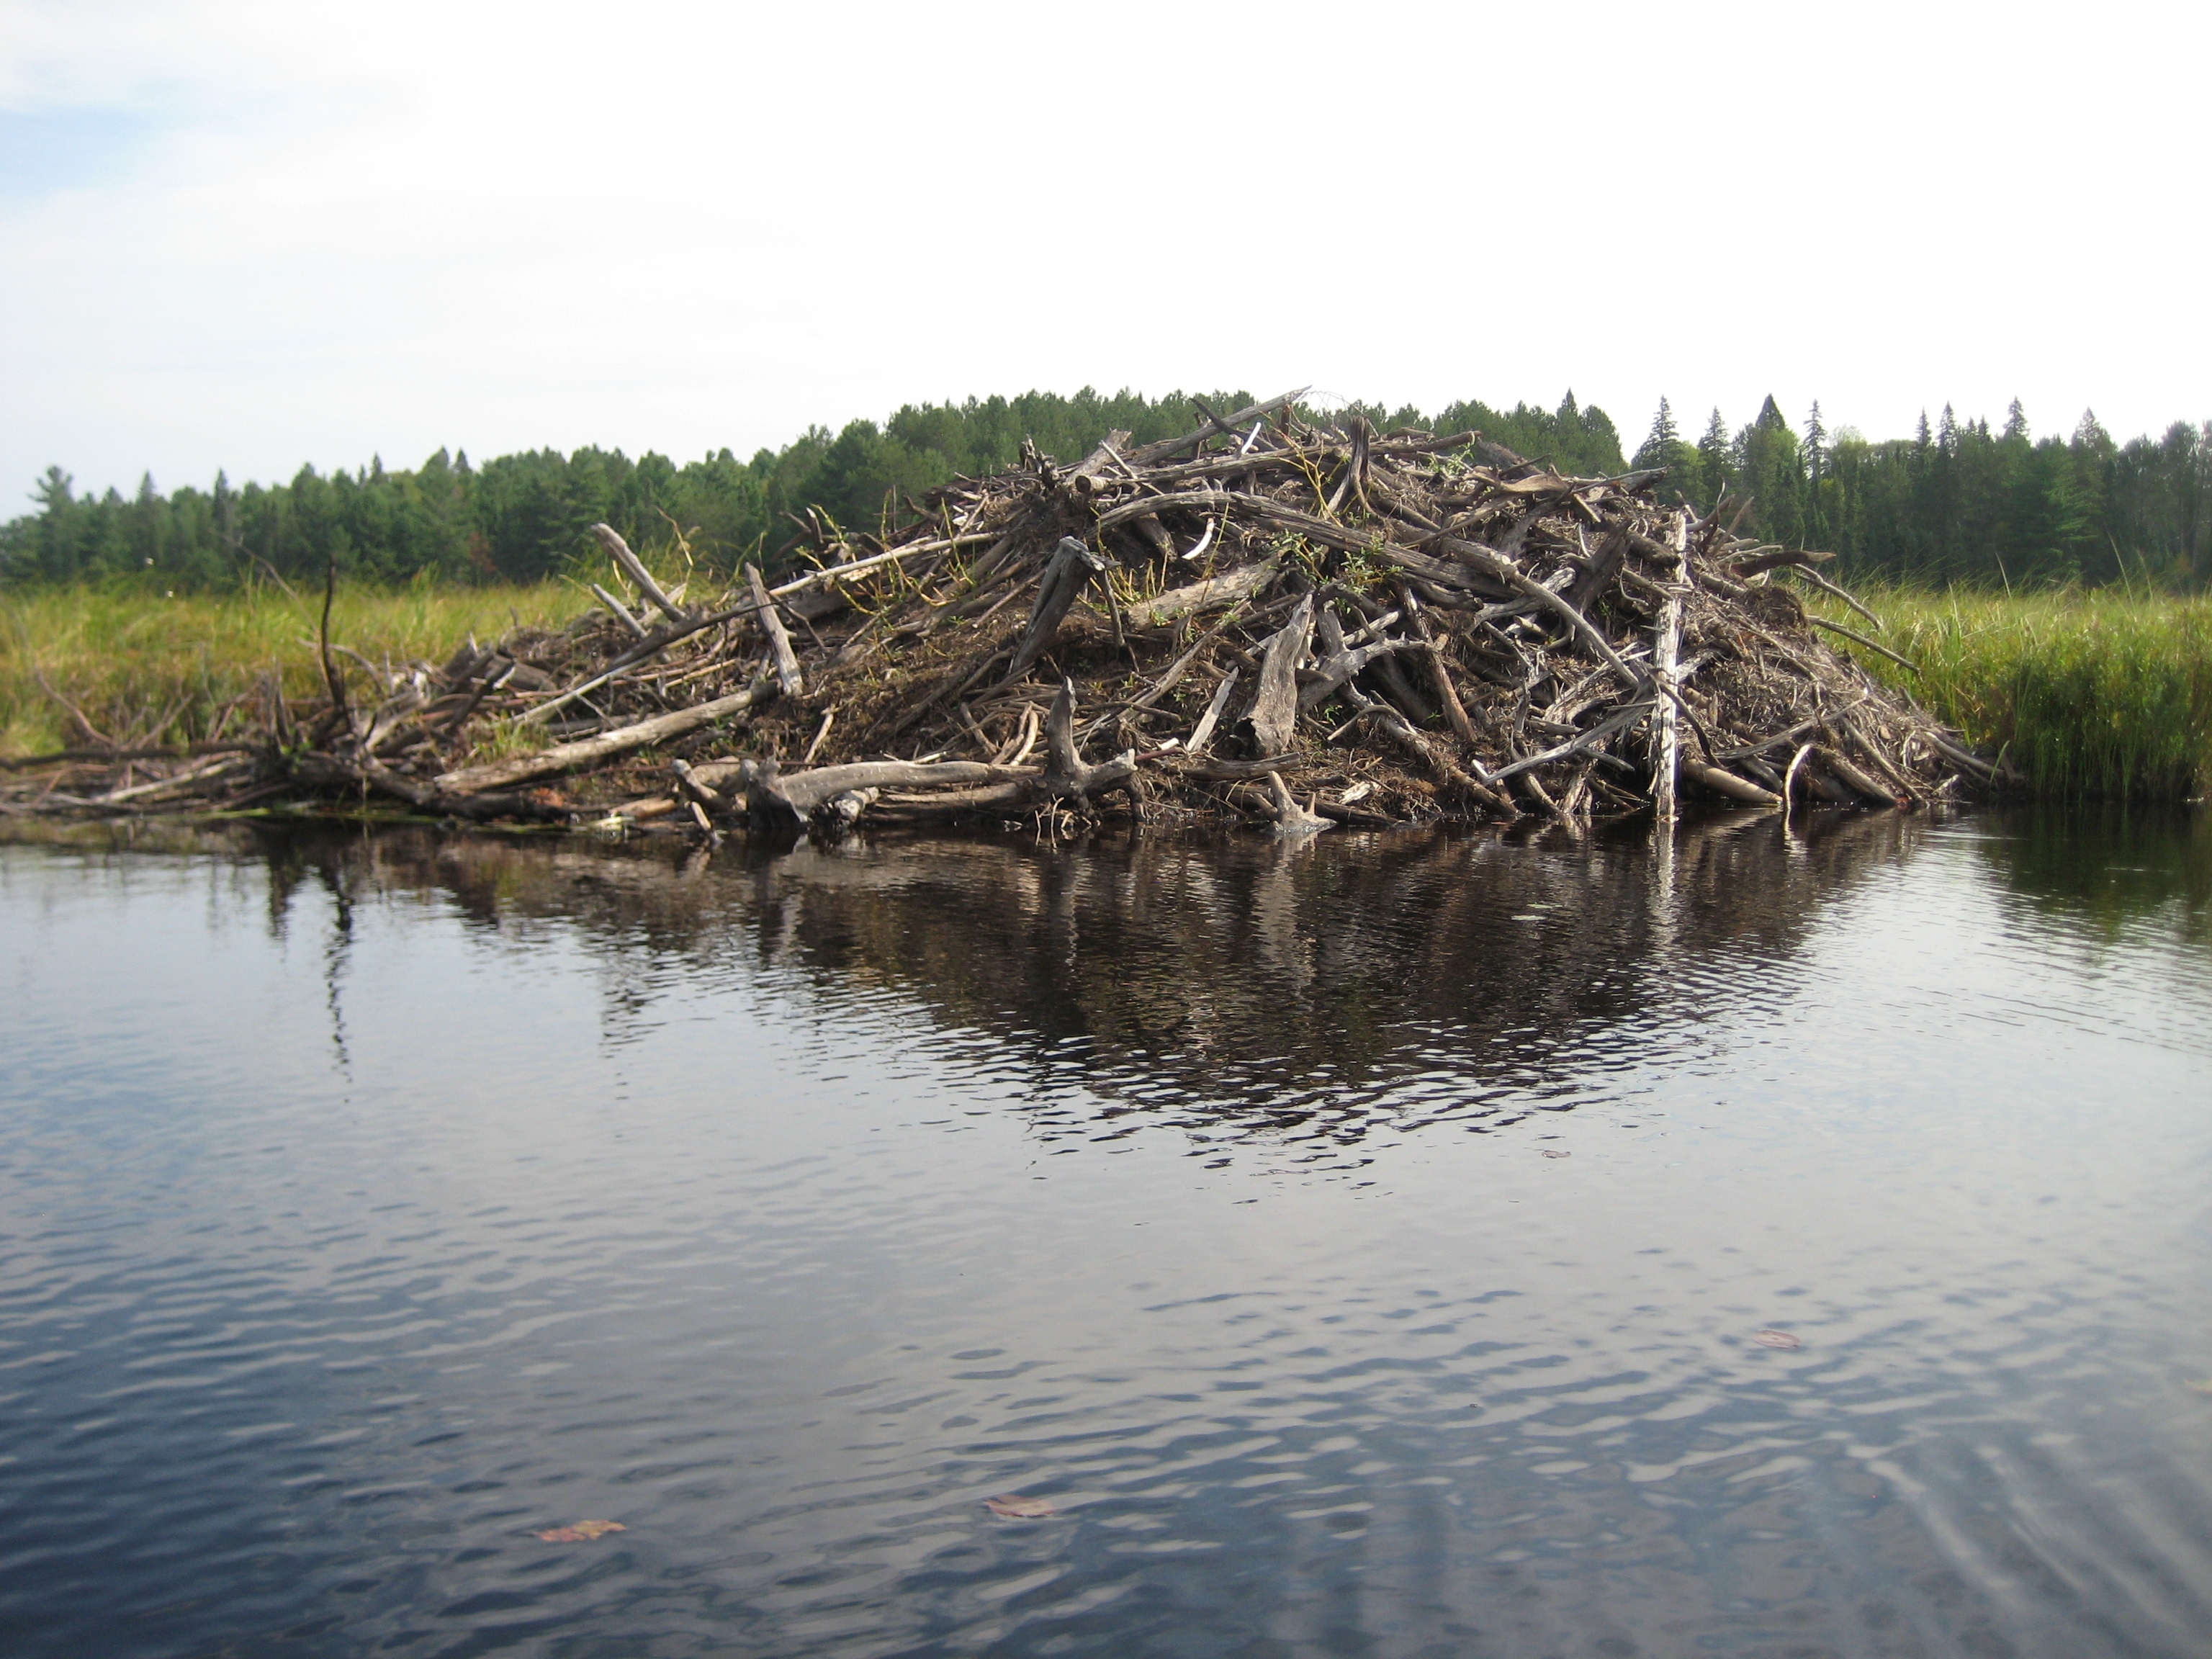
Here I've reached the wall of grass at the end of Hailstorm creek
Figure 36. Wall of grass at the end of Hailstorm Creek (Lake Opeongo, Algonquin Park)
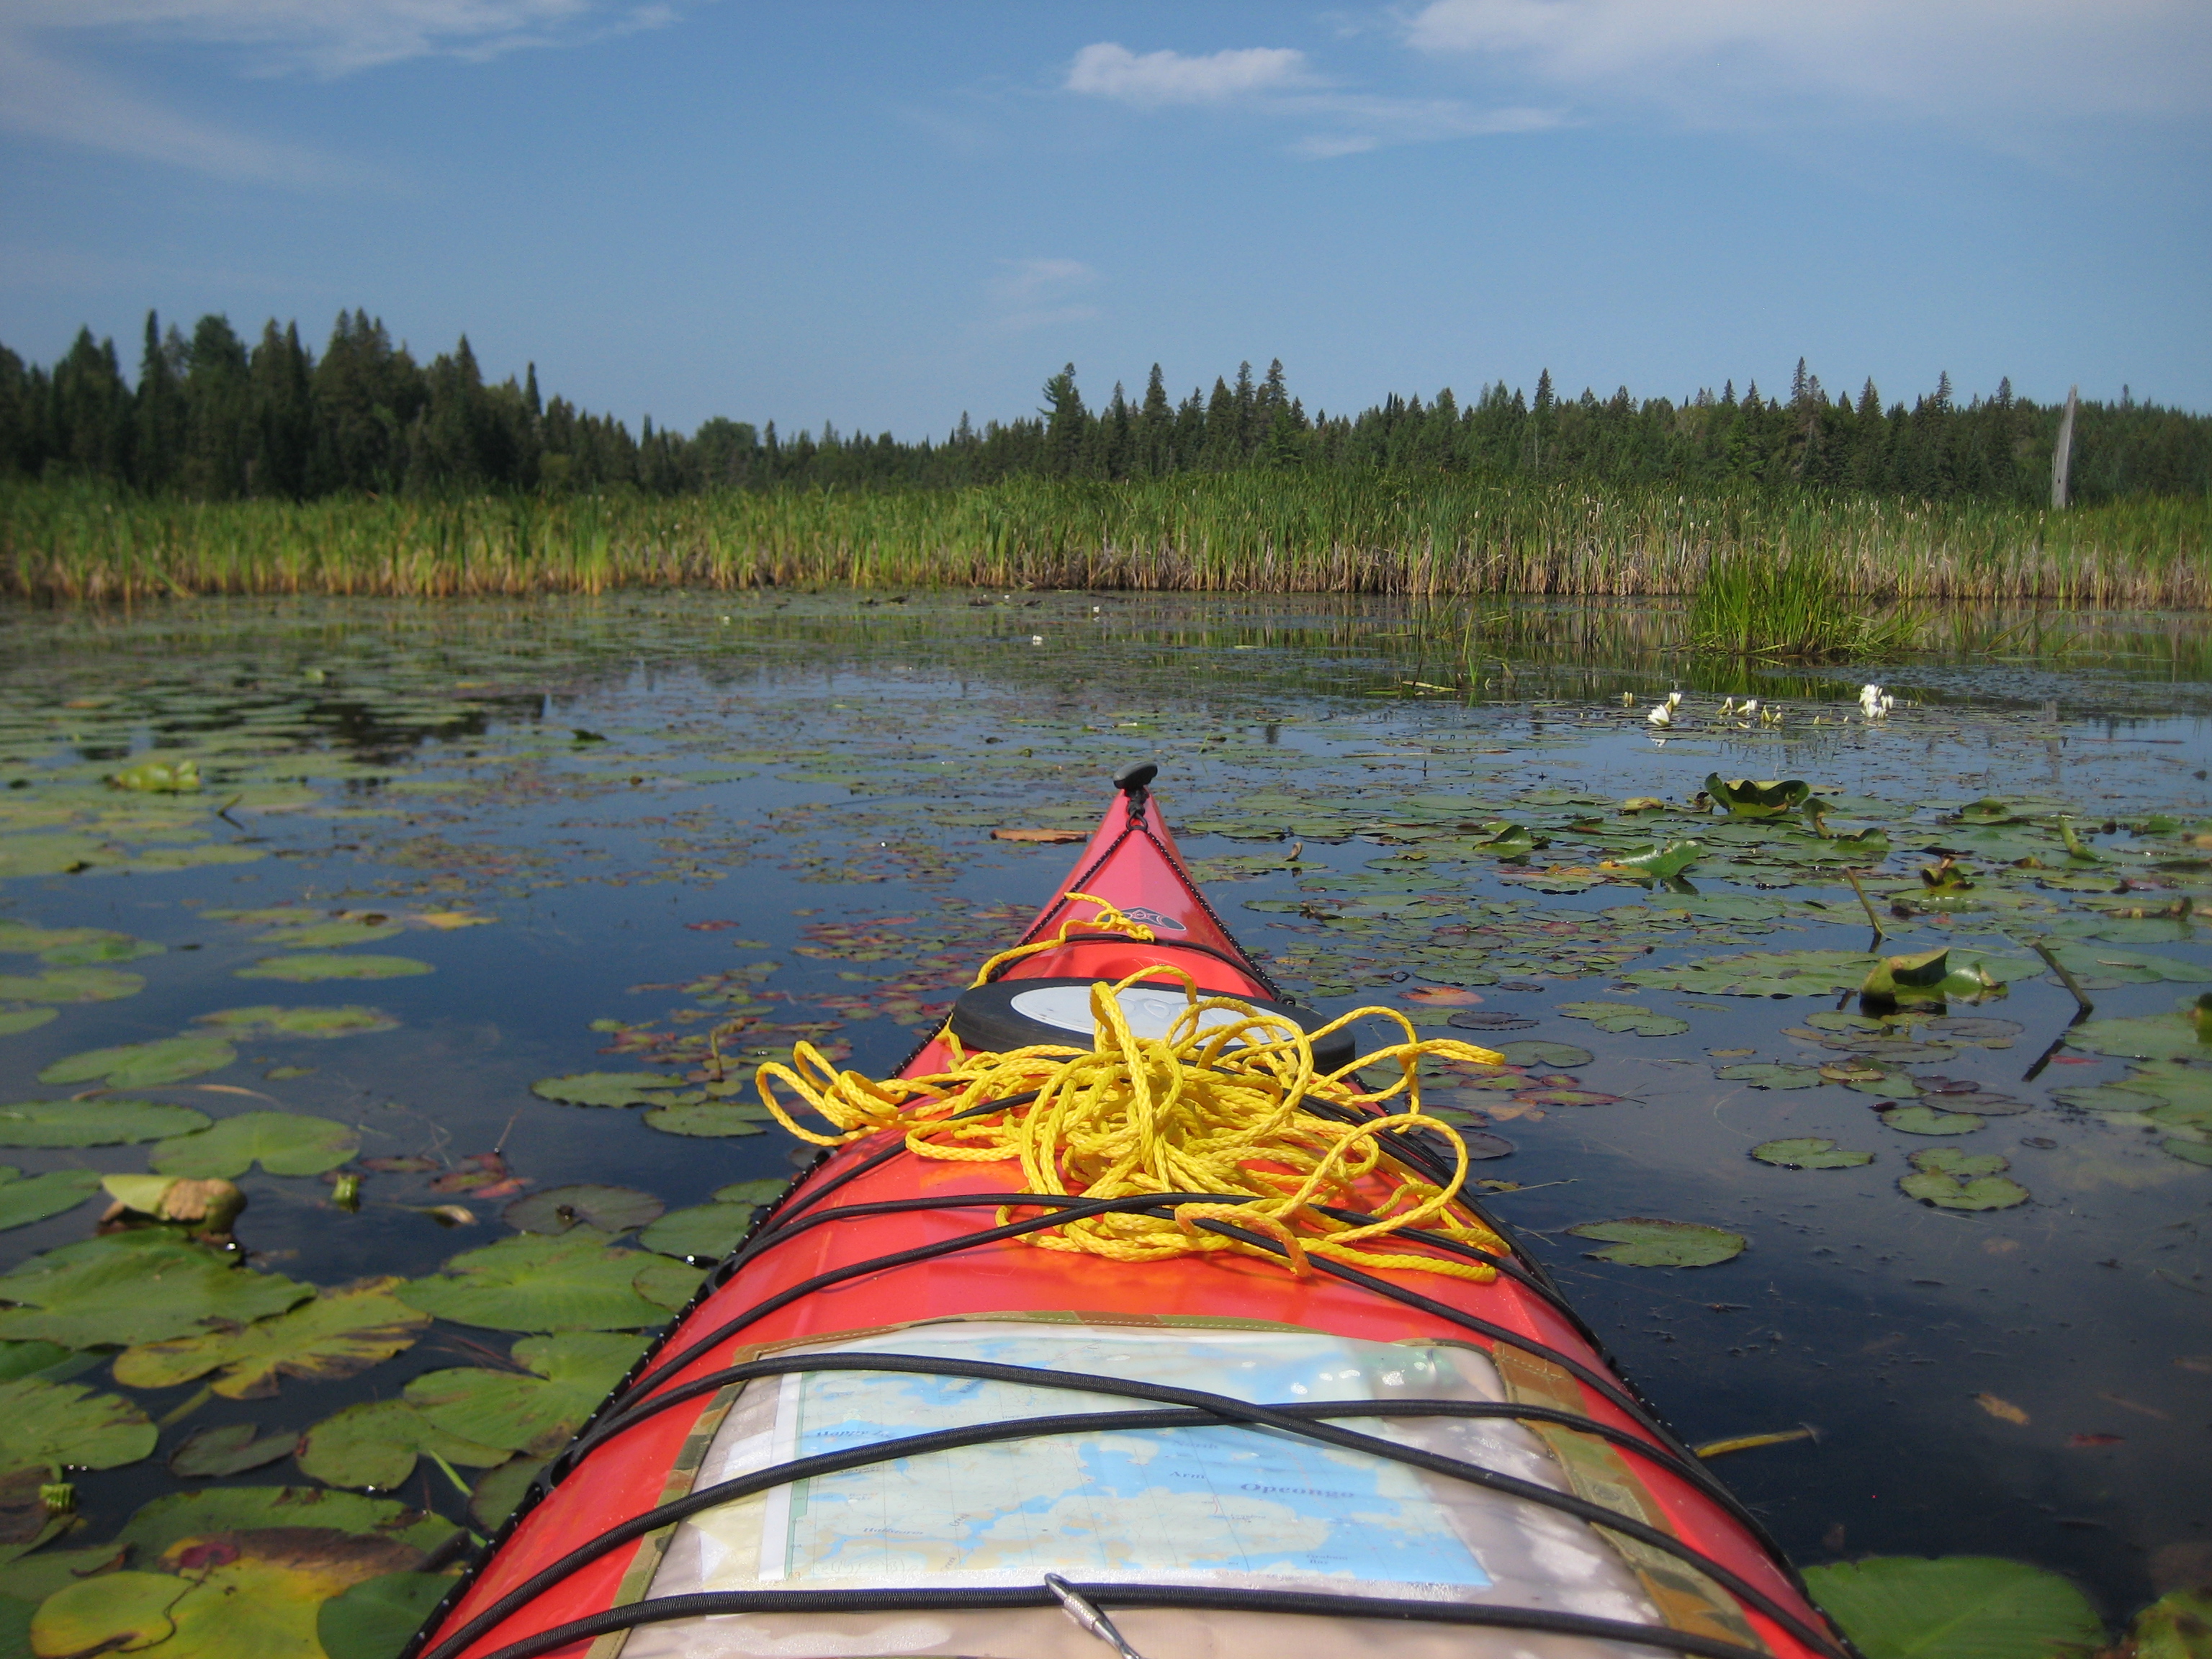 |
Wall of grass at the end of Hailstorm Creek.
Figure 37. Joe in kayak at the furthest navigable point of Hailstorm Creek (Lake Opeongo, Algonquin Park)
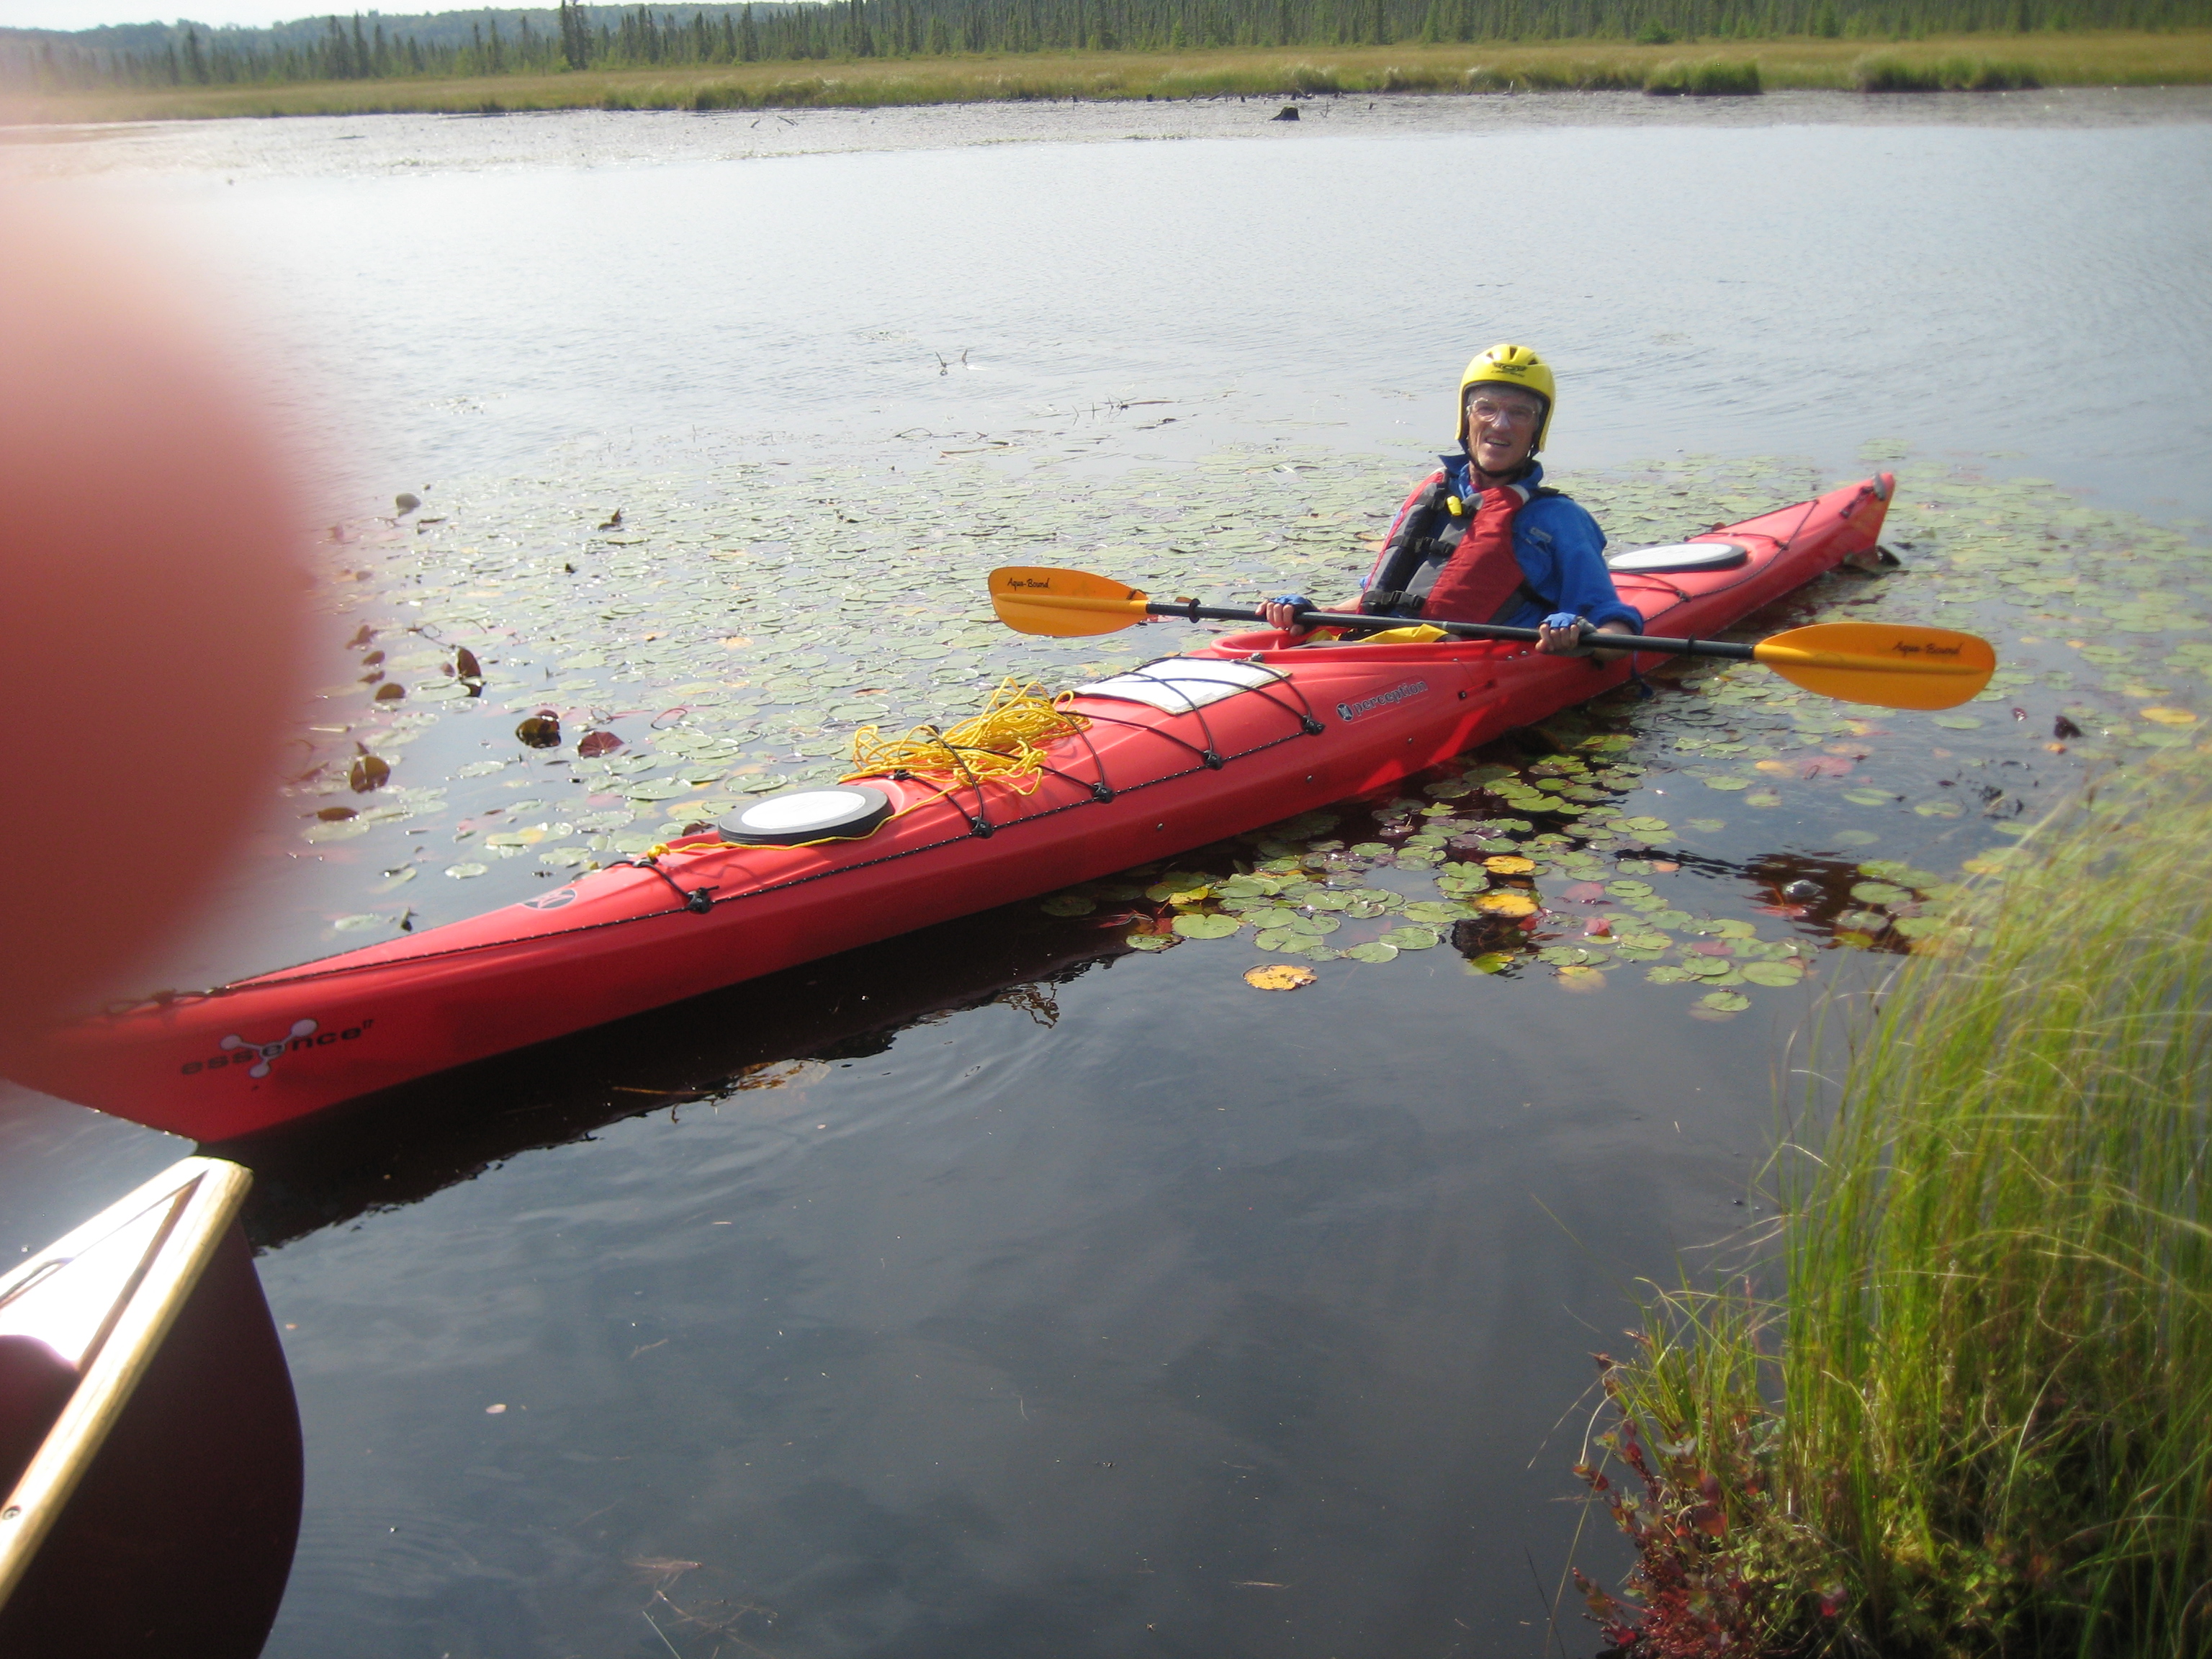 |
Joe at the end of Hailstorm Creek. This was the only photo of myself on the trip. The guy had several $k of cameras and lenses with him, so I assumed he knew how to take a photo. I carefully passed the camera to him over water. He took 4 photos. In every one of them, the kayak was not centered, his canoe was showing and his thumb was over the lens. When I checked his photos in the viewer in sunlight, I couldn't see the problems with the photos. A couple of $k in equipment does not a photographer make.
Note: bicycle gloves for my computer programmer's hands.
Figure 38. Old lumberjack building, Hailstorm Creek (Lake Opeongo, Algonquin Park)
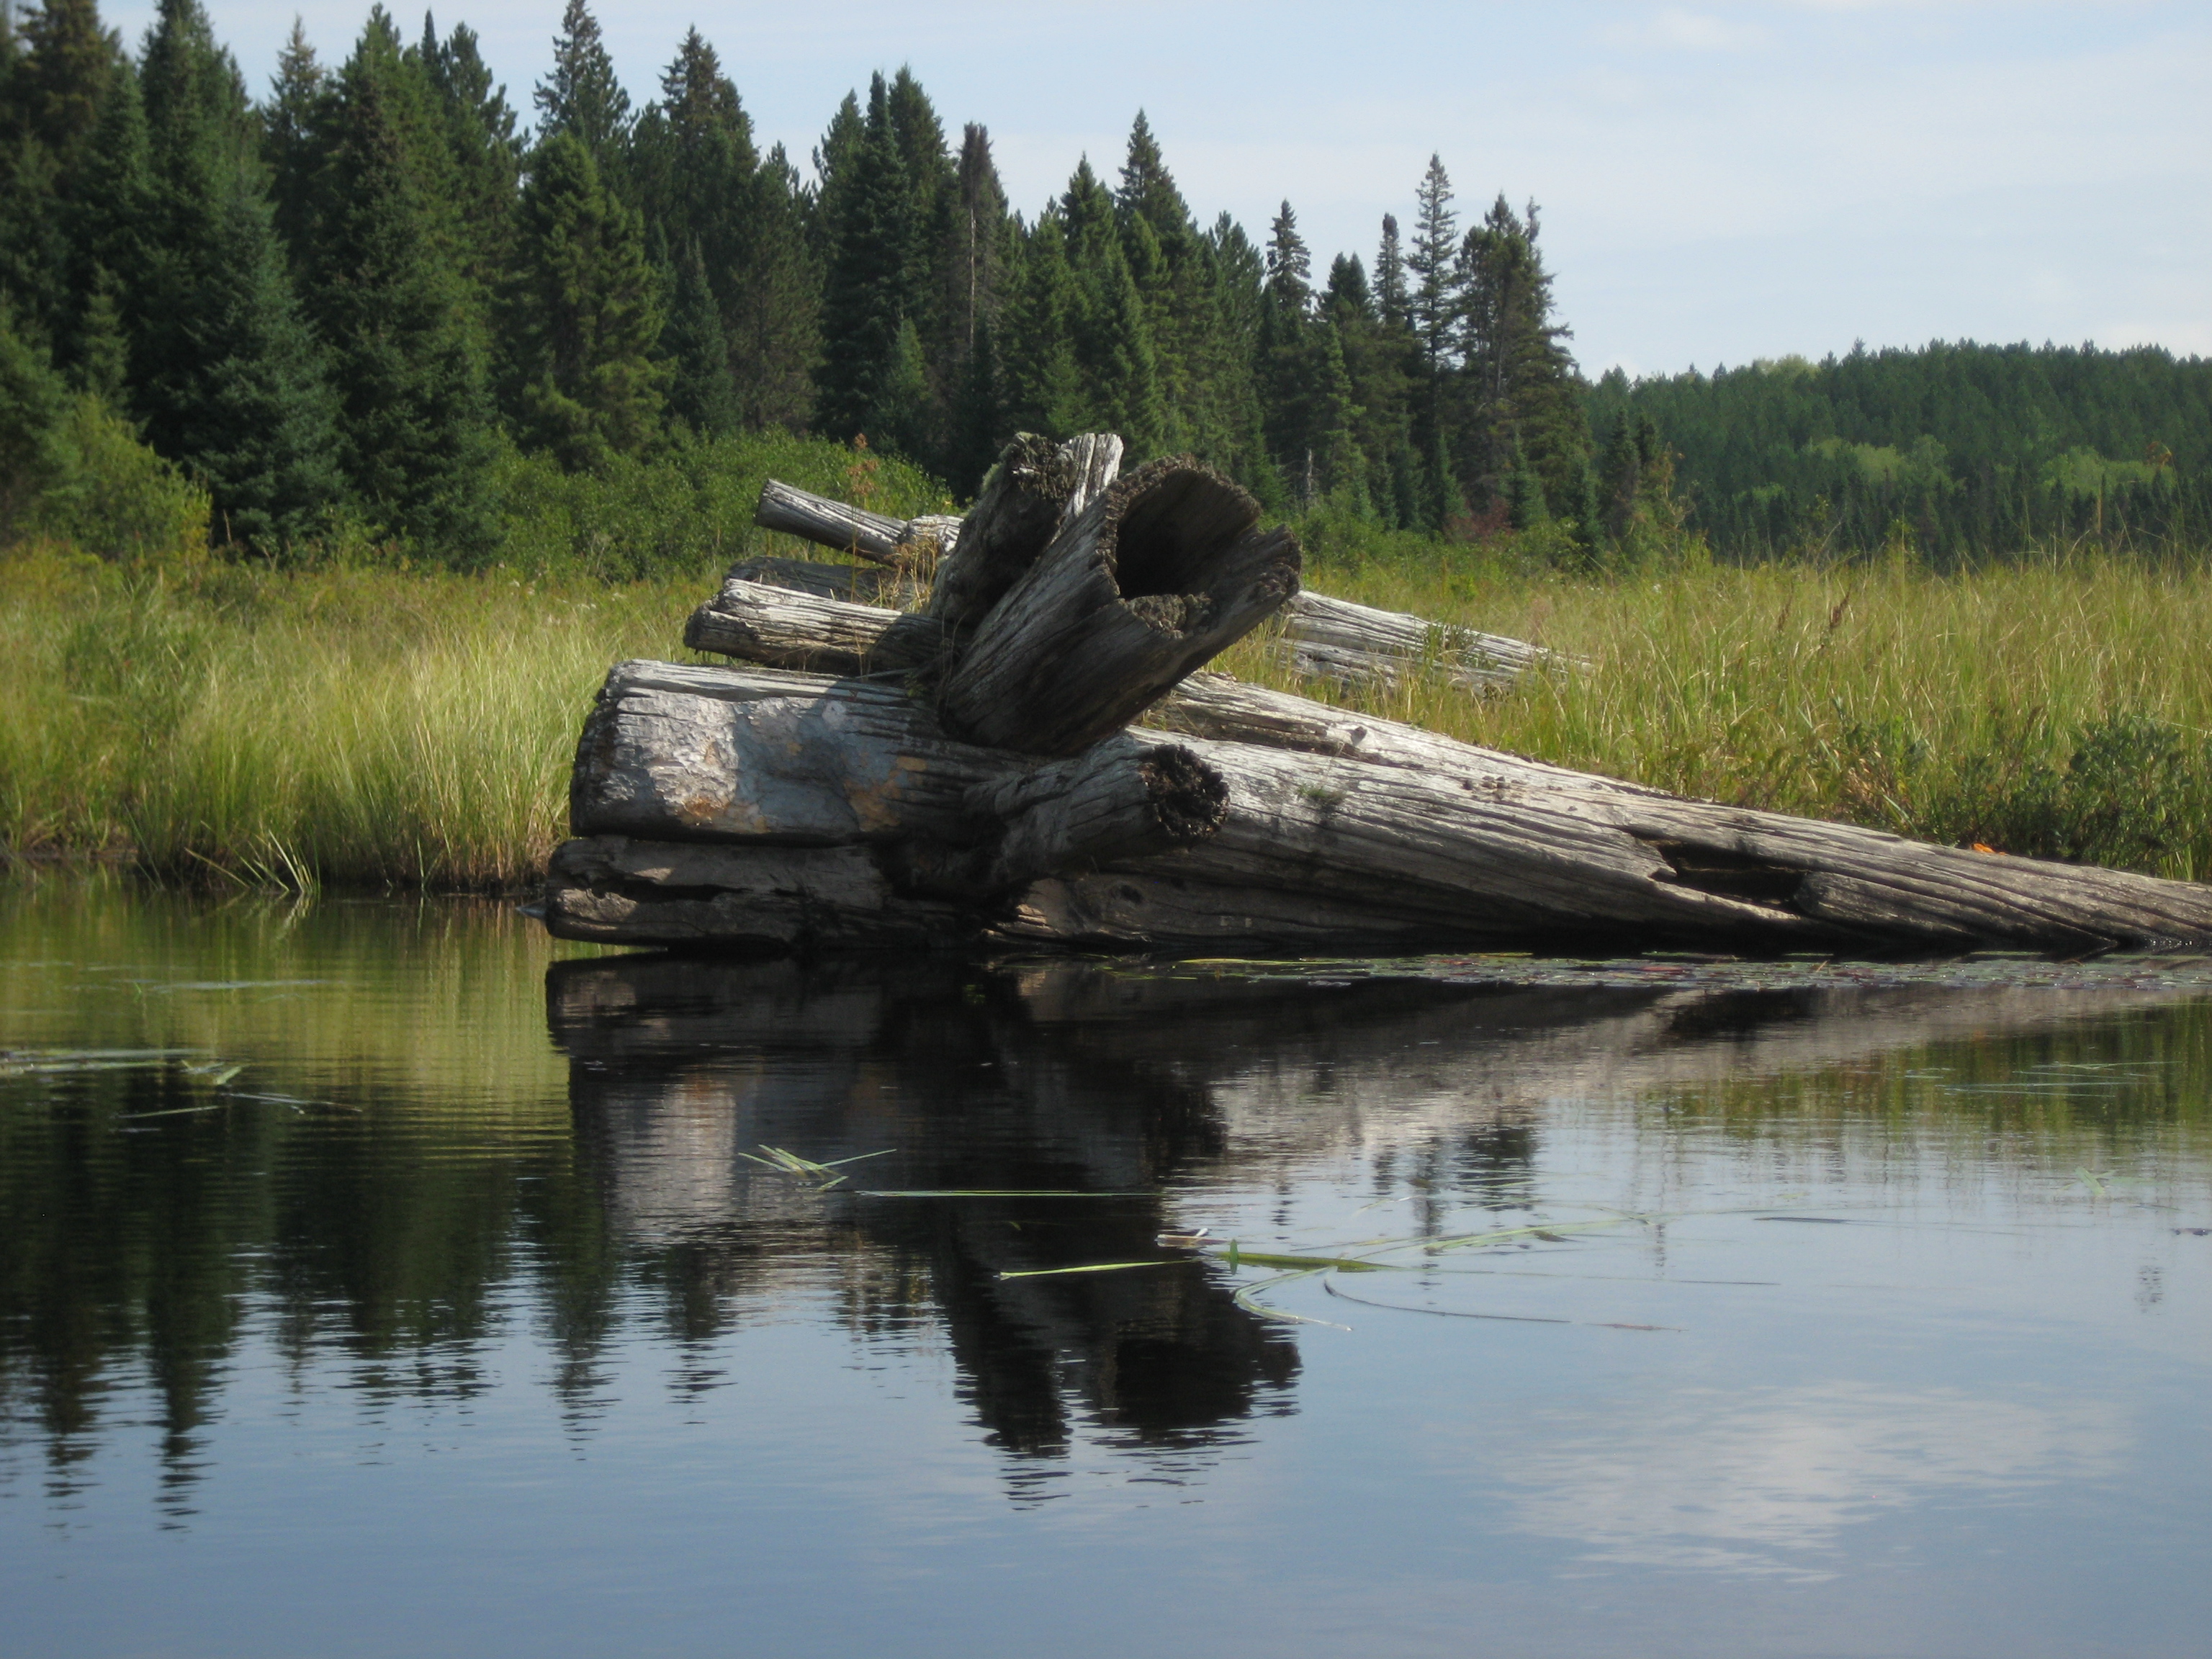 |
Old lumberjack building. I couldn't figure out what this was. How did the trees get entangled like this? It turns out it's the remains of a building from the lumberjack days. Presumably the lumberjacks lived and worked here on the lake and took advantage of the winter ice to move the logs to the river at the bottom of Annie Bay. The building is below current water level. Presumably the building was built when the water was lower, before the dam was put in at the bottom of Annie Bay.
On the way back I heard a wolf howl. I didn't recognise it, but the couple with me did. They said it was rare to hear this. To me it sounded too deep to be a wolf. It was more of a loud grunt like I'd expect from a moose. The other parties coming through the beaver dam on the way out had heard it too.
In Hailstorm creek, nothing you see in the foreground is solid. It's floating plant material upto a metre thick. Depending on the direction, this extends for 100s of metres before you reach solid ground, which is covered with thick vegetation. There is no dirt anywhere. Well almost anywhere. Here's the 5m high (unofficially named) Turtle Hill, the only dry ground accessible from the water inside Hailstorm Creek.
Figure 39. Turtle Hill in Hailstorm Creek (Lake Opeongo, Algonquin Park)
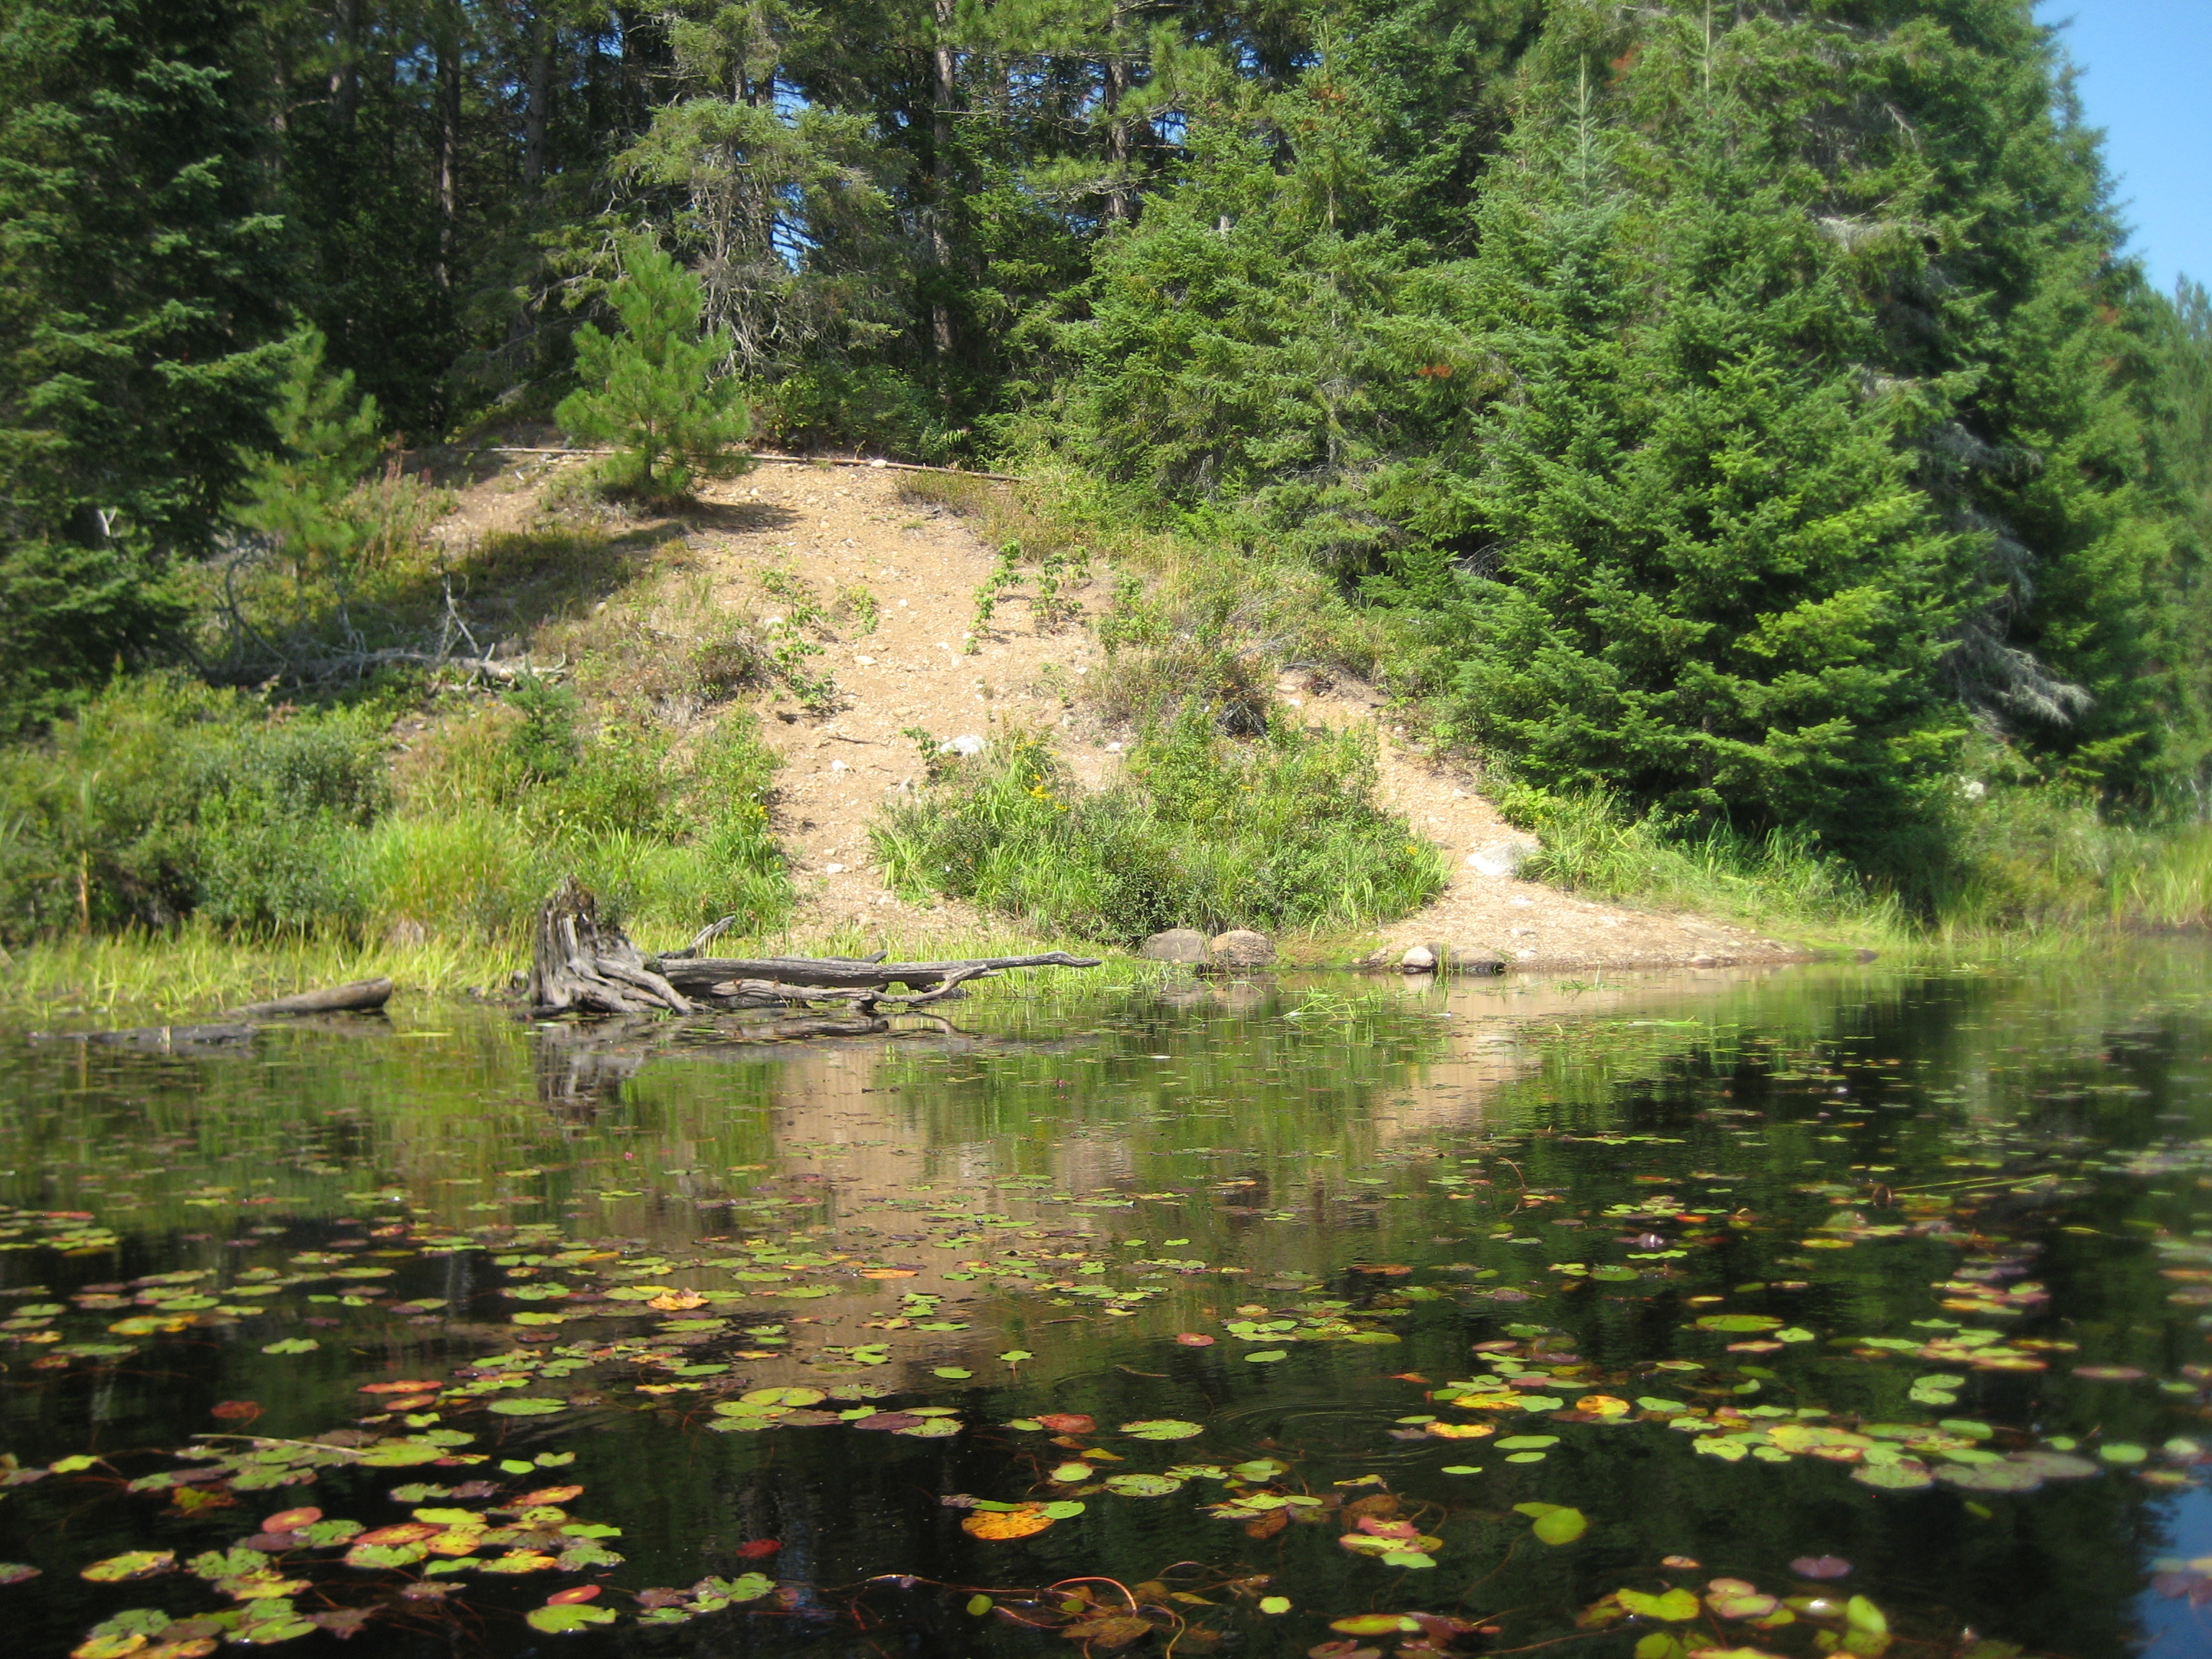 |
Turtle Hill in Hailstorm Creek
I'd been here last time, but didn't particularly notice the hill and I don't think I got out. I'd assumed the streak of dirt was from wilderness seekers looking for a place to get out, and scrambling up the slope for view of Hailstorm Creek. My beaver knowledgable companions told me that this being the only dry ground around, it was used by turtles to bury their eggs. Sure enough the slope was dotted in these conical depressions.
Figure 40. turtle nest hole, Turtle Hill, Hailstorm Creek (Lake Opeongo, Algonquin Park)
 |
turtle nest hole
Apparently wolves and other critters (presumably including humans back in the lumberjack era), eat most of the eggs. I didn't see any turtles this trip, but did see one last time. He was happy to float in the water next to me, till the water taxi buzzed us.
Here's the view from the top of Turtle Hill.
Figure 41. View of Hailstorm Creek from Turtle Hill (Lake Opeongo, Algonquin Park)
 |
View of Hailstorm Creek from Turtle Hill. The dark green in the background is trees on solid ground. The light green flat vegetation in front of it is metre thick floating vegetation. It's relatively solid; if you stand on it you sink upto about your knees. The non-reflective areas on the water are not mud flats at low tide (this is a river connected to a lake and there is no tide); they are lily pads and other vegetation anchored to the bottom. The depth of the water under the lily pads is upto 1m. You can paddle through the lily pads, although not with ease. However if you have a big meander to negotiate, it's worth paddling through the lily pads.
As you can see from the clouds, it was perfect kayaking weather; no rain and little sun.
This was my only view with a [3-D] perspective in the whole trip. The rest of my time I was confined to the [2-D] surface of the lake. I had not thought what it must be like to spend a life at sea.
At turtle hill, I picked up some hitchhikers - sandflies, reminding me that living in a swamp is not for the evolutionarily weak.
Some parts of the creek are quite wide, forming bays. Here's an island in the middle of the creek (on the way back).
Figure 42. island in the creek, Hailstorm Creek (Lake Opeongo, Algonquin Park)
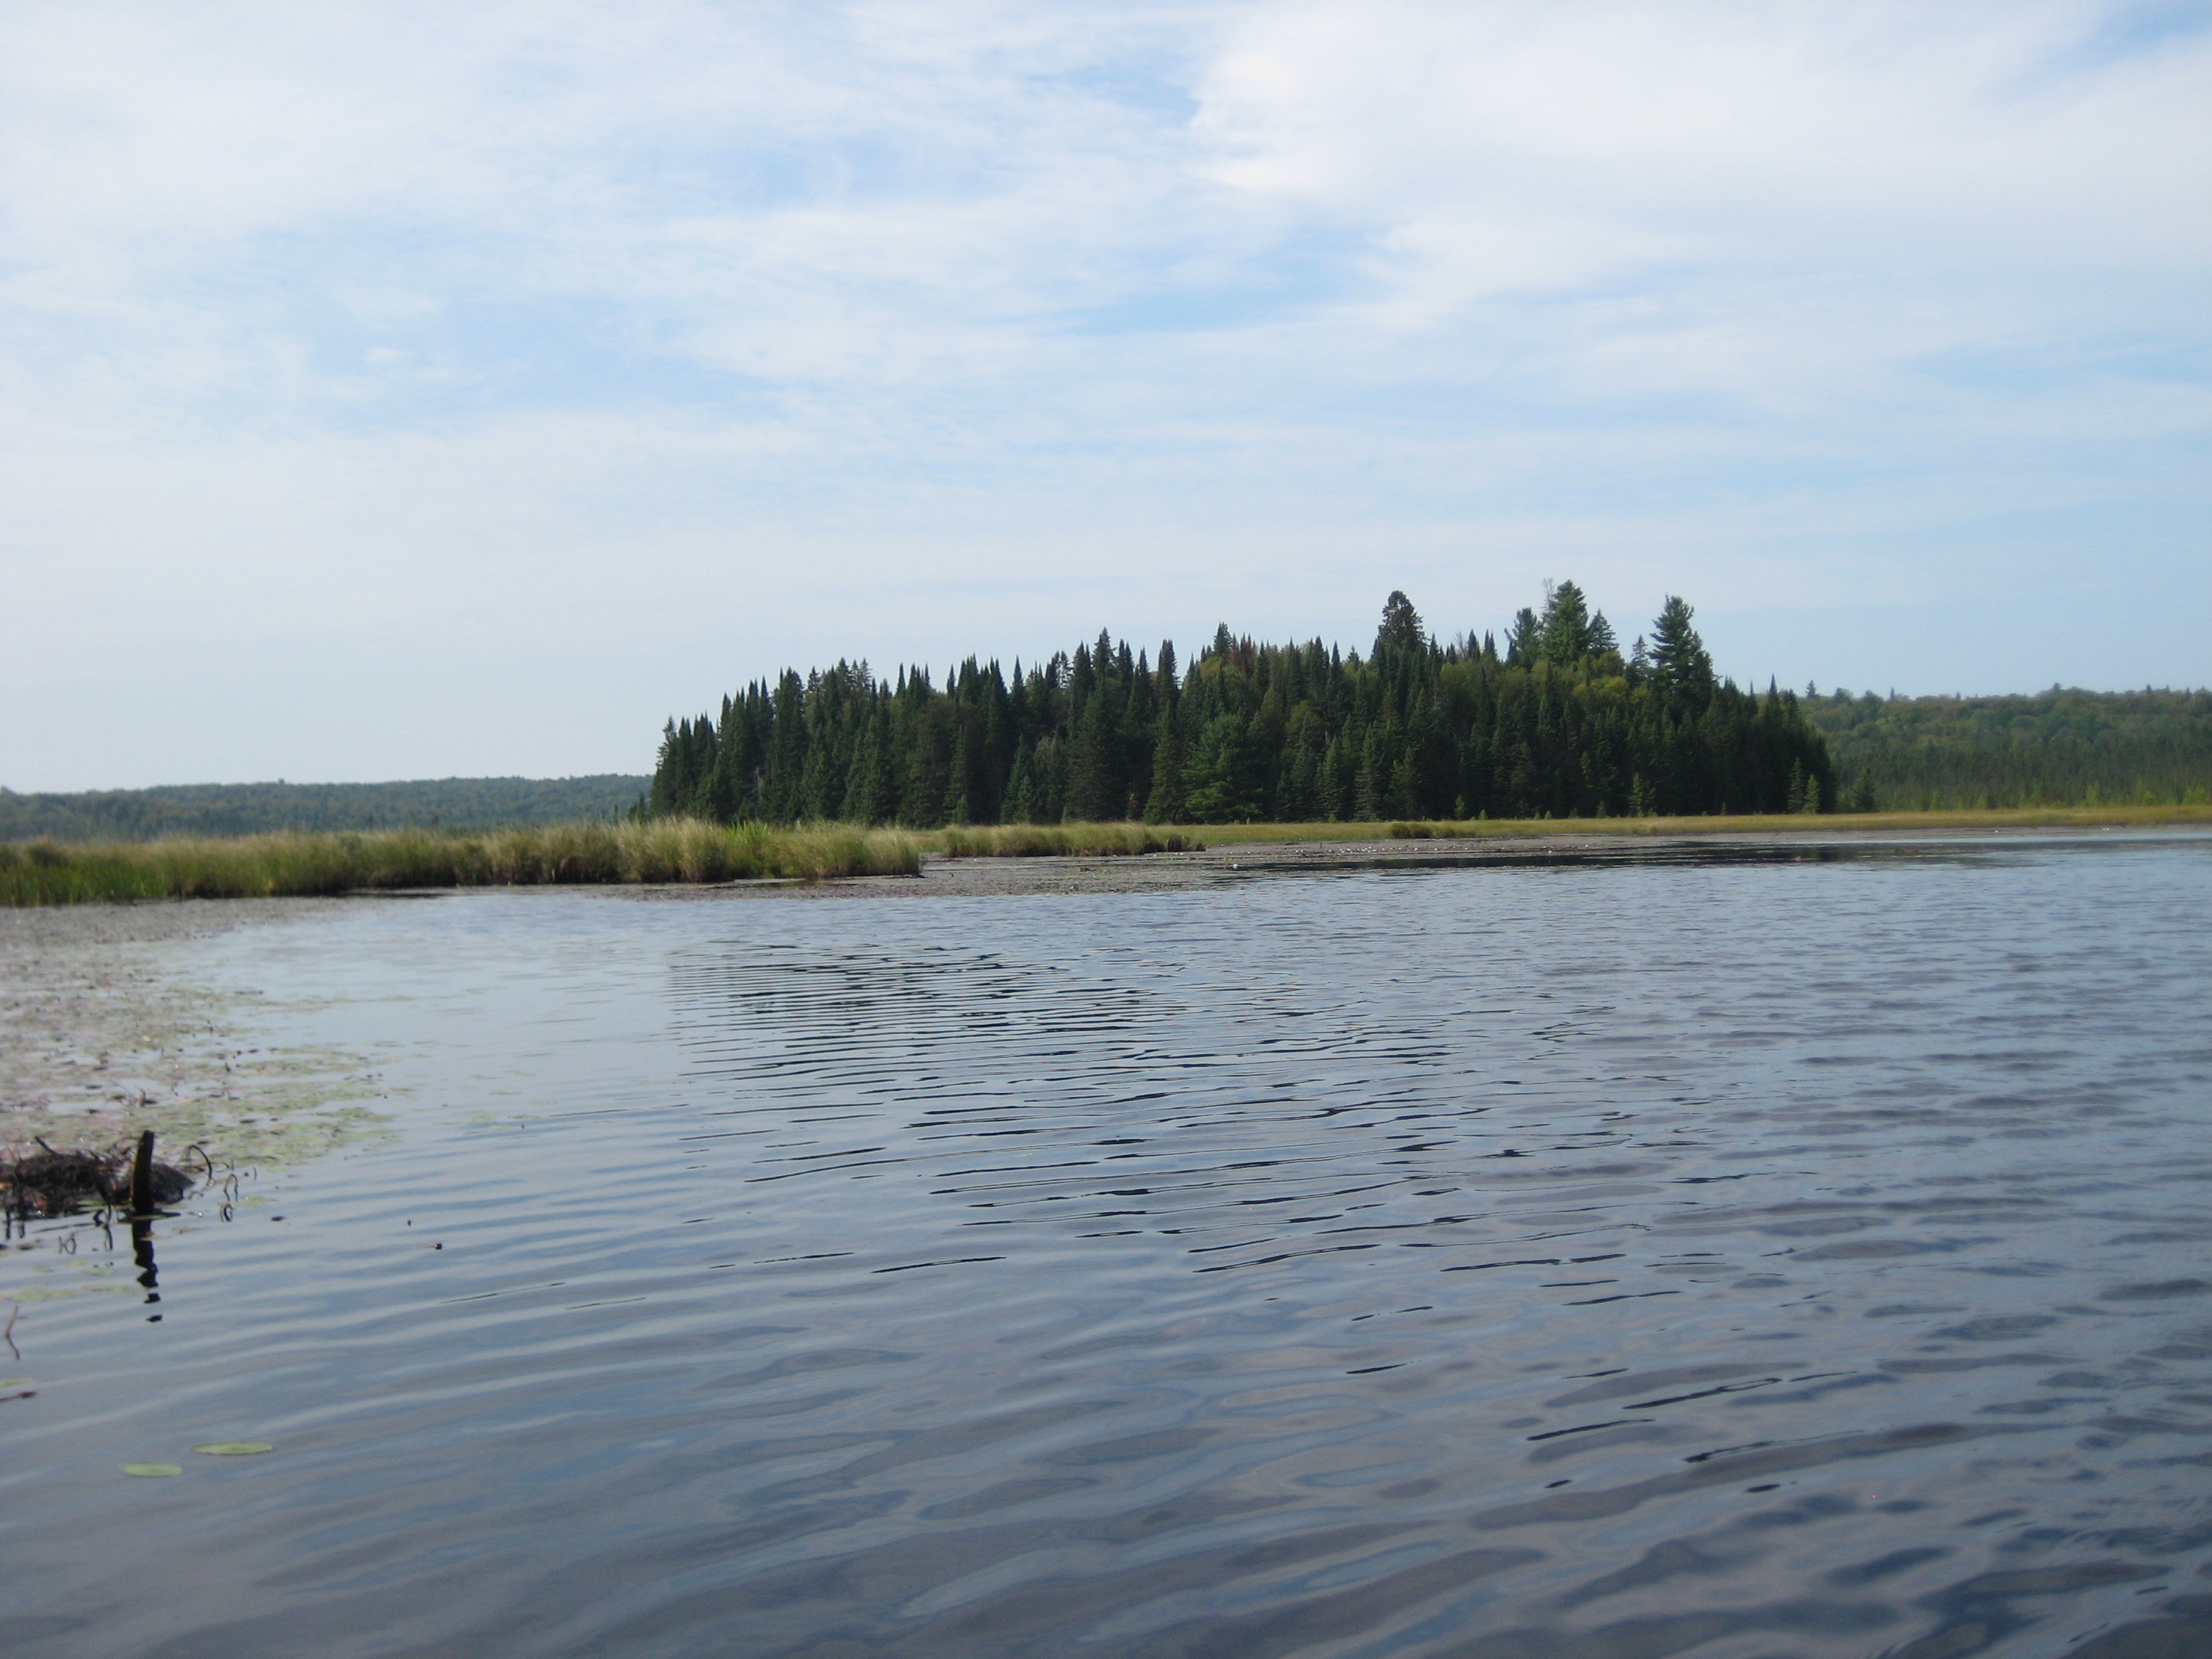 |
island in the creek
Figure 43. Outside the beaver dam, looking back at the water lilies and the meandering river. Hailstorm Creek (Lake Opeongo, Algonquin Park)
 |
Outside the beaver dam, looking back at the water lilies and the meandering river.
The clouds were clearing.
With Hailstorm Creek being only on the other side of North Arm, my trip was relatively short and I arrived back at the campsite mid-afternoon.
Growing up in Sydney and often visiting the beaches, I noticed that the shape of the beach (the sand profile) changed after a storm. Sometimes the beach was flat and gently sloping, and sometimes the sand was pushed back towards the land into a steep bank. I wasn't at the beach often enough to remember which profile was caused by a storm, and I couldn't figure out a mechanism for the change in profile that would allow me to remember what happened in each circumstance. This was in the pre-wikipedia days, when you had to accept that most of your questions would never be answered. Now the whole thing is probably explained on the internet, but back then I'd consigned the matter to the "never to be explained" box and forgot about it.
But 50yrs later, over the course of the afternoon, with multiple trips from my campsite to the granite sand beach and back, just walking around admiring my environs, I noticed that sometimes the beach was uniformly gently sloping
Figure 44. Gently sloping granite sand beach (North Arm, Lake Opeongo, Algonquin Park).
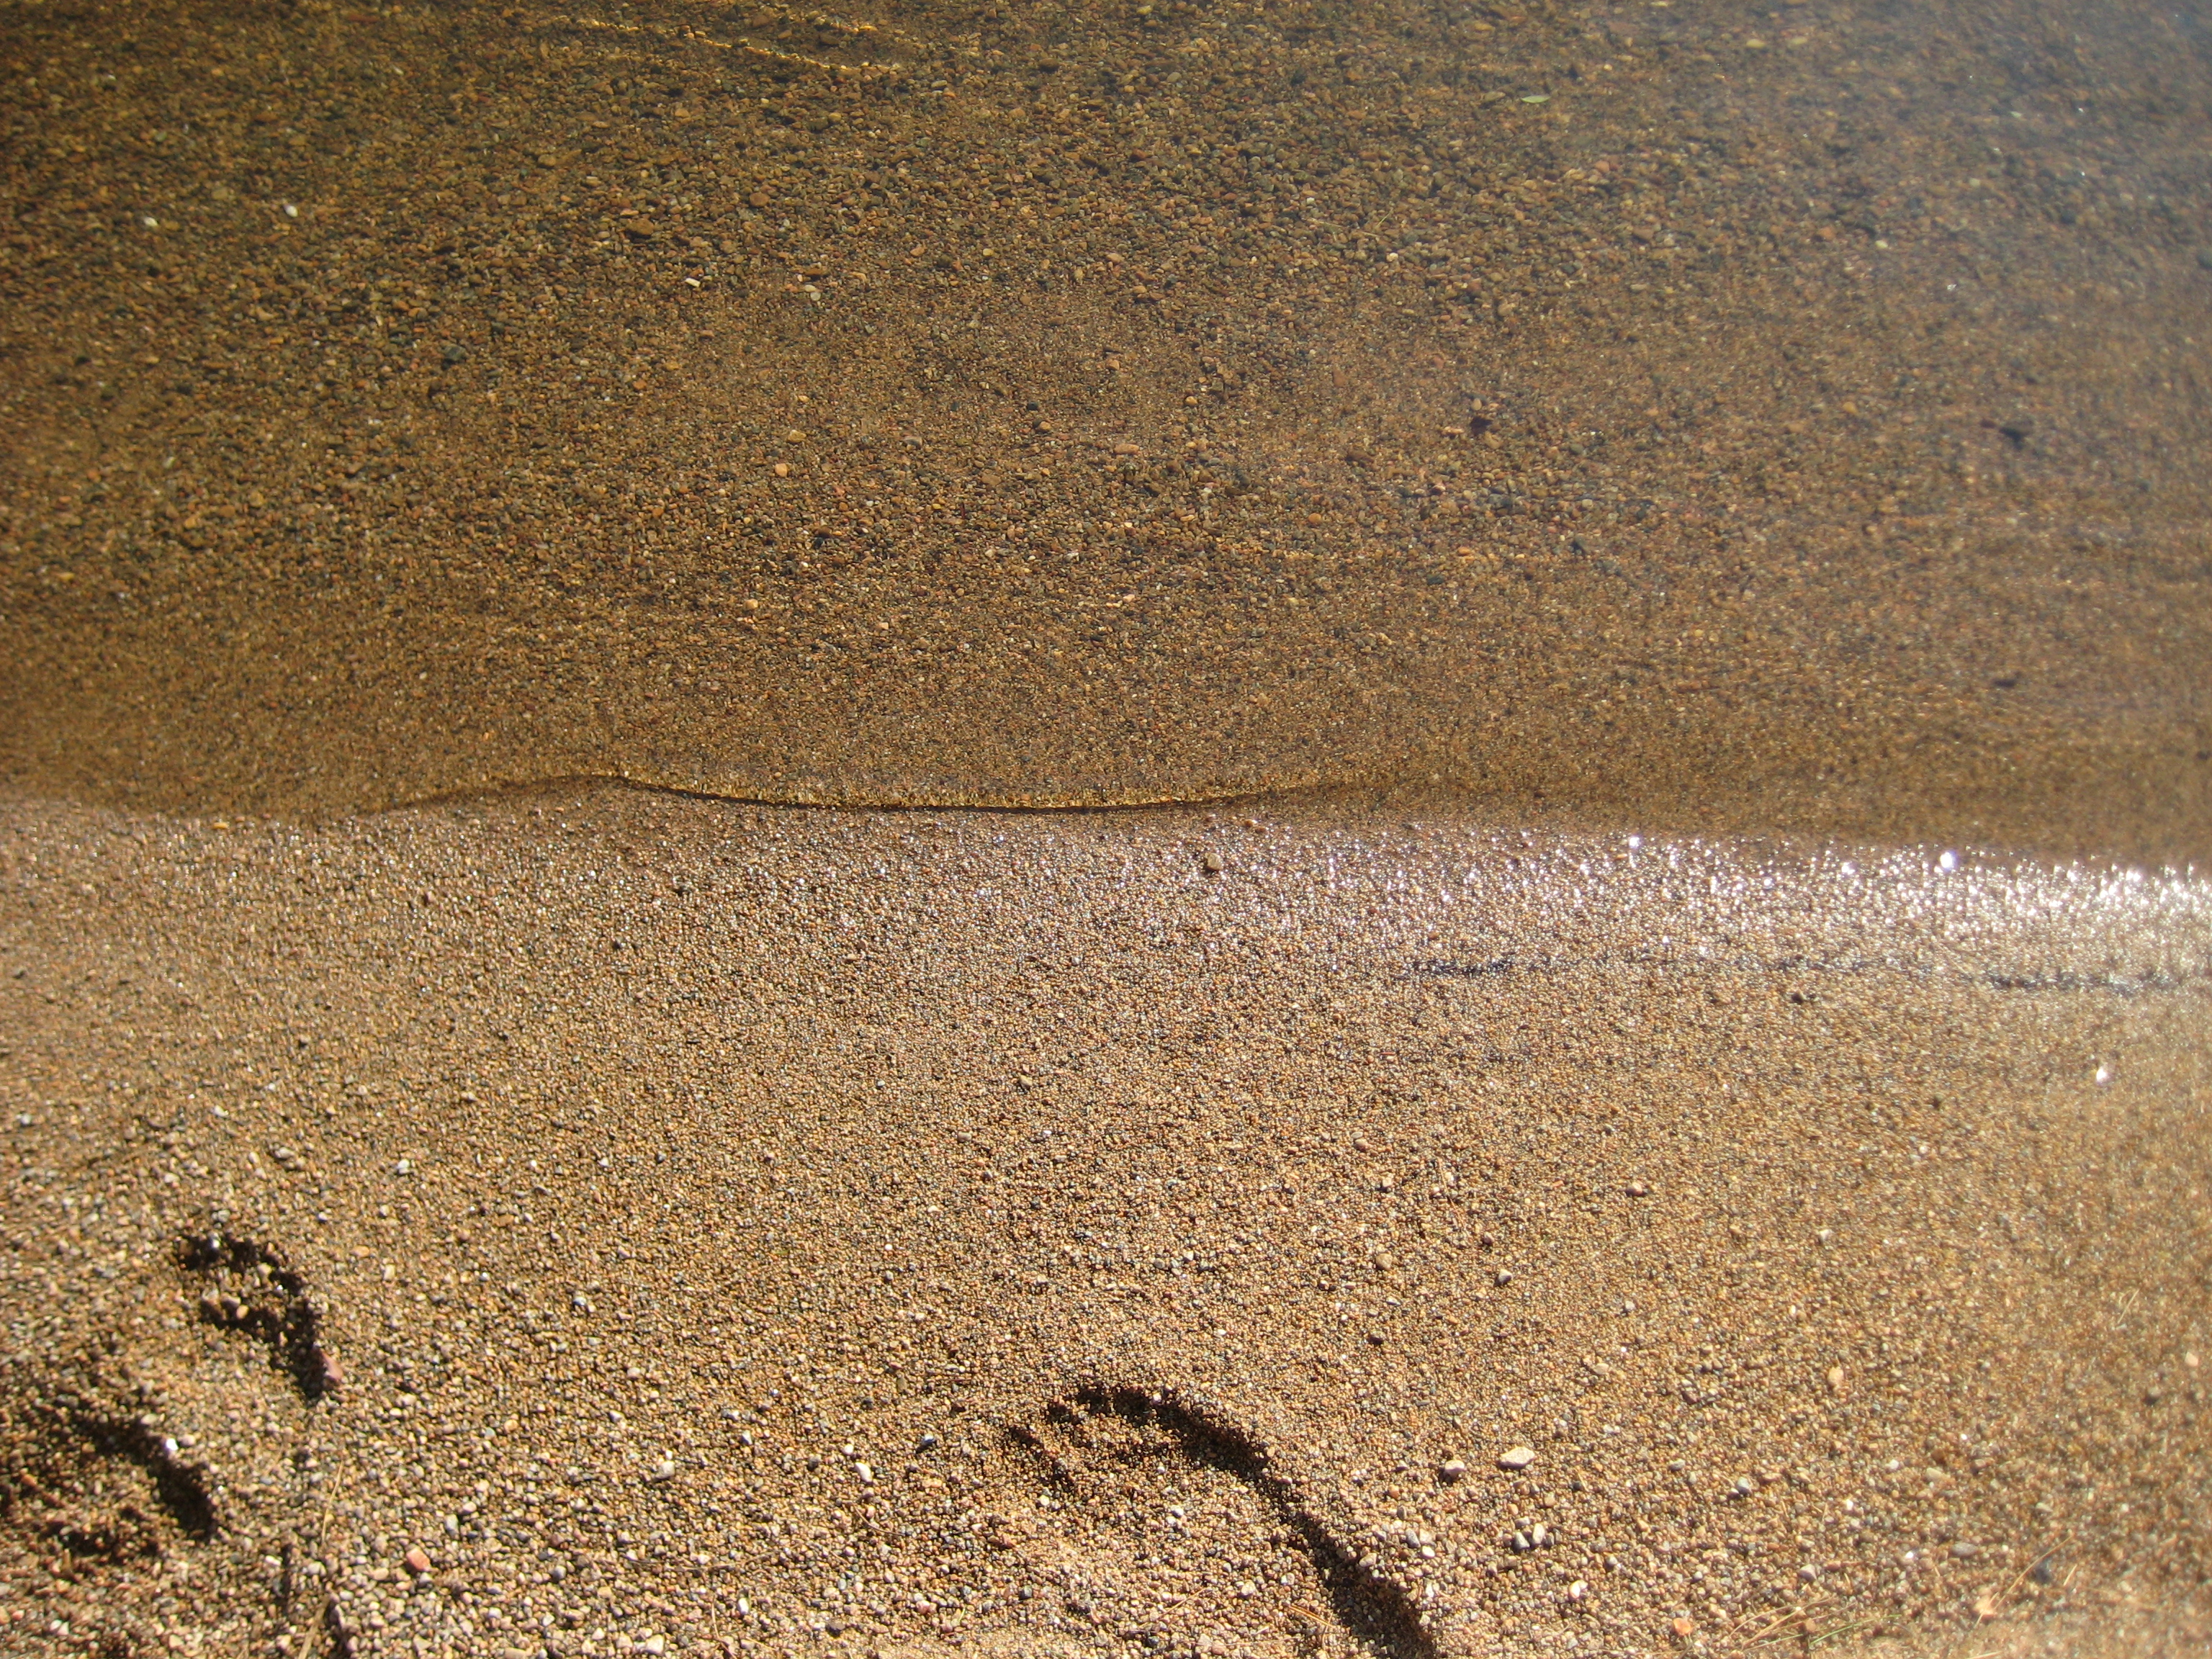 |
Gently sloping granite sand beach.
and sometimes it built up into a steep bank.
Figure 45. 1-2cm bank at edge of beach. (North Arm, Lake Opeongo, Algonquin Park)
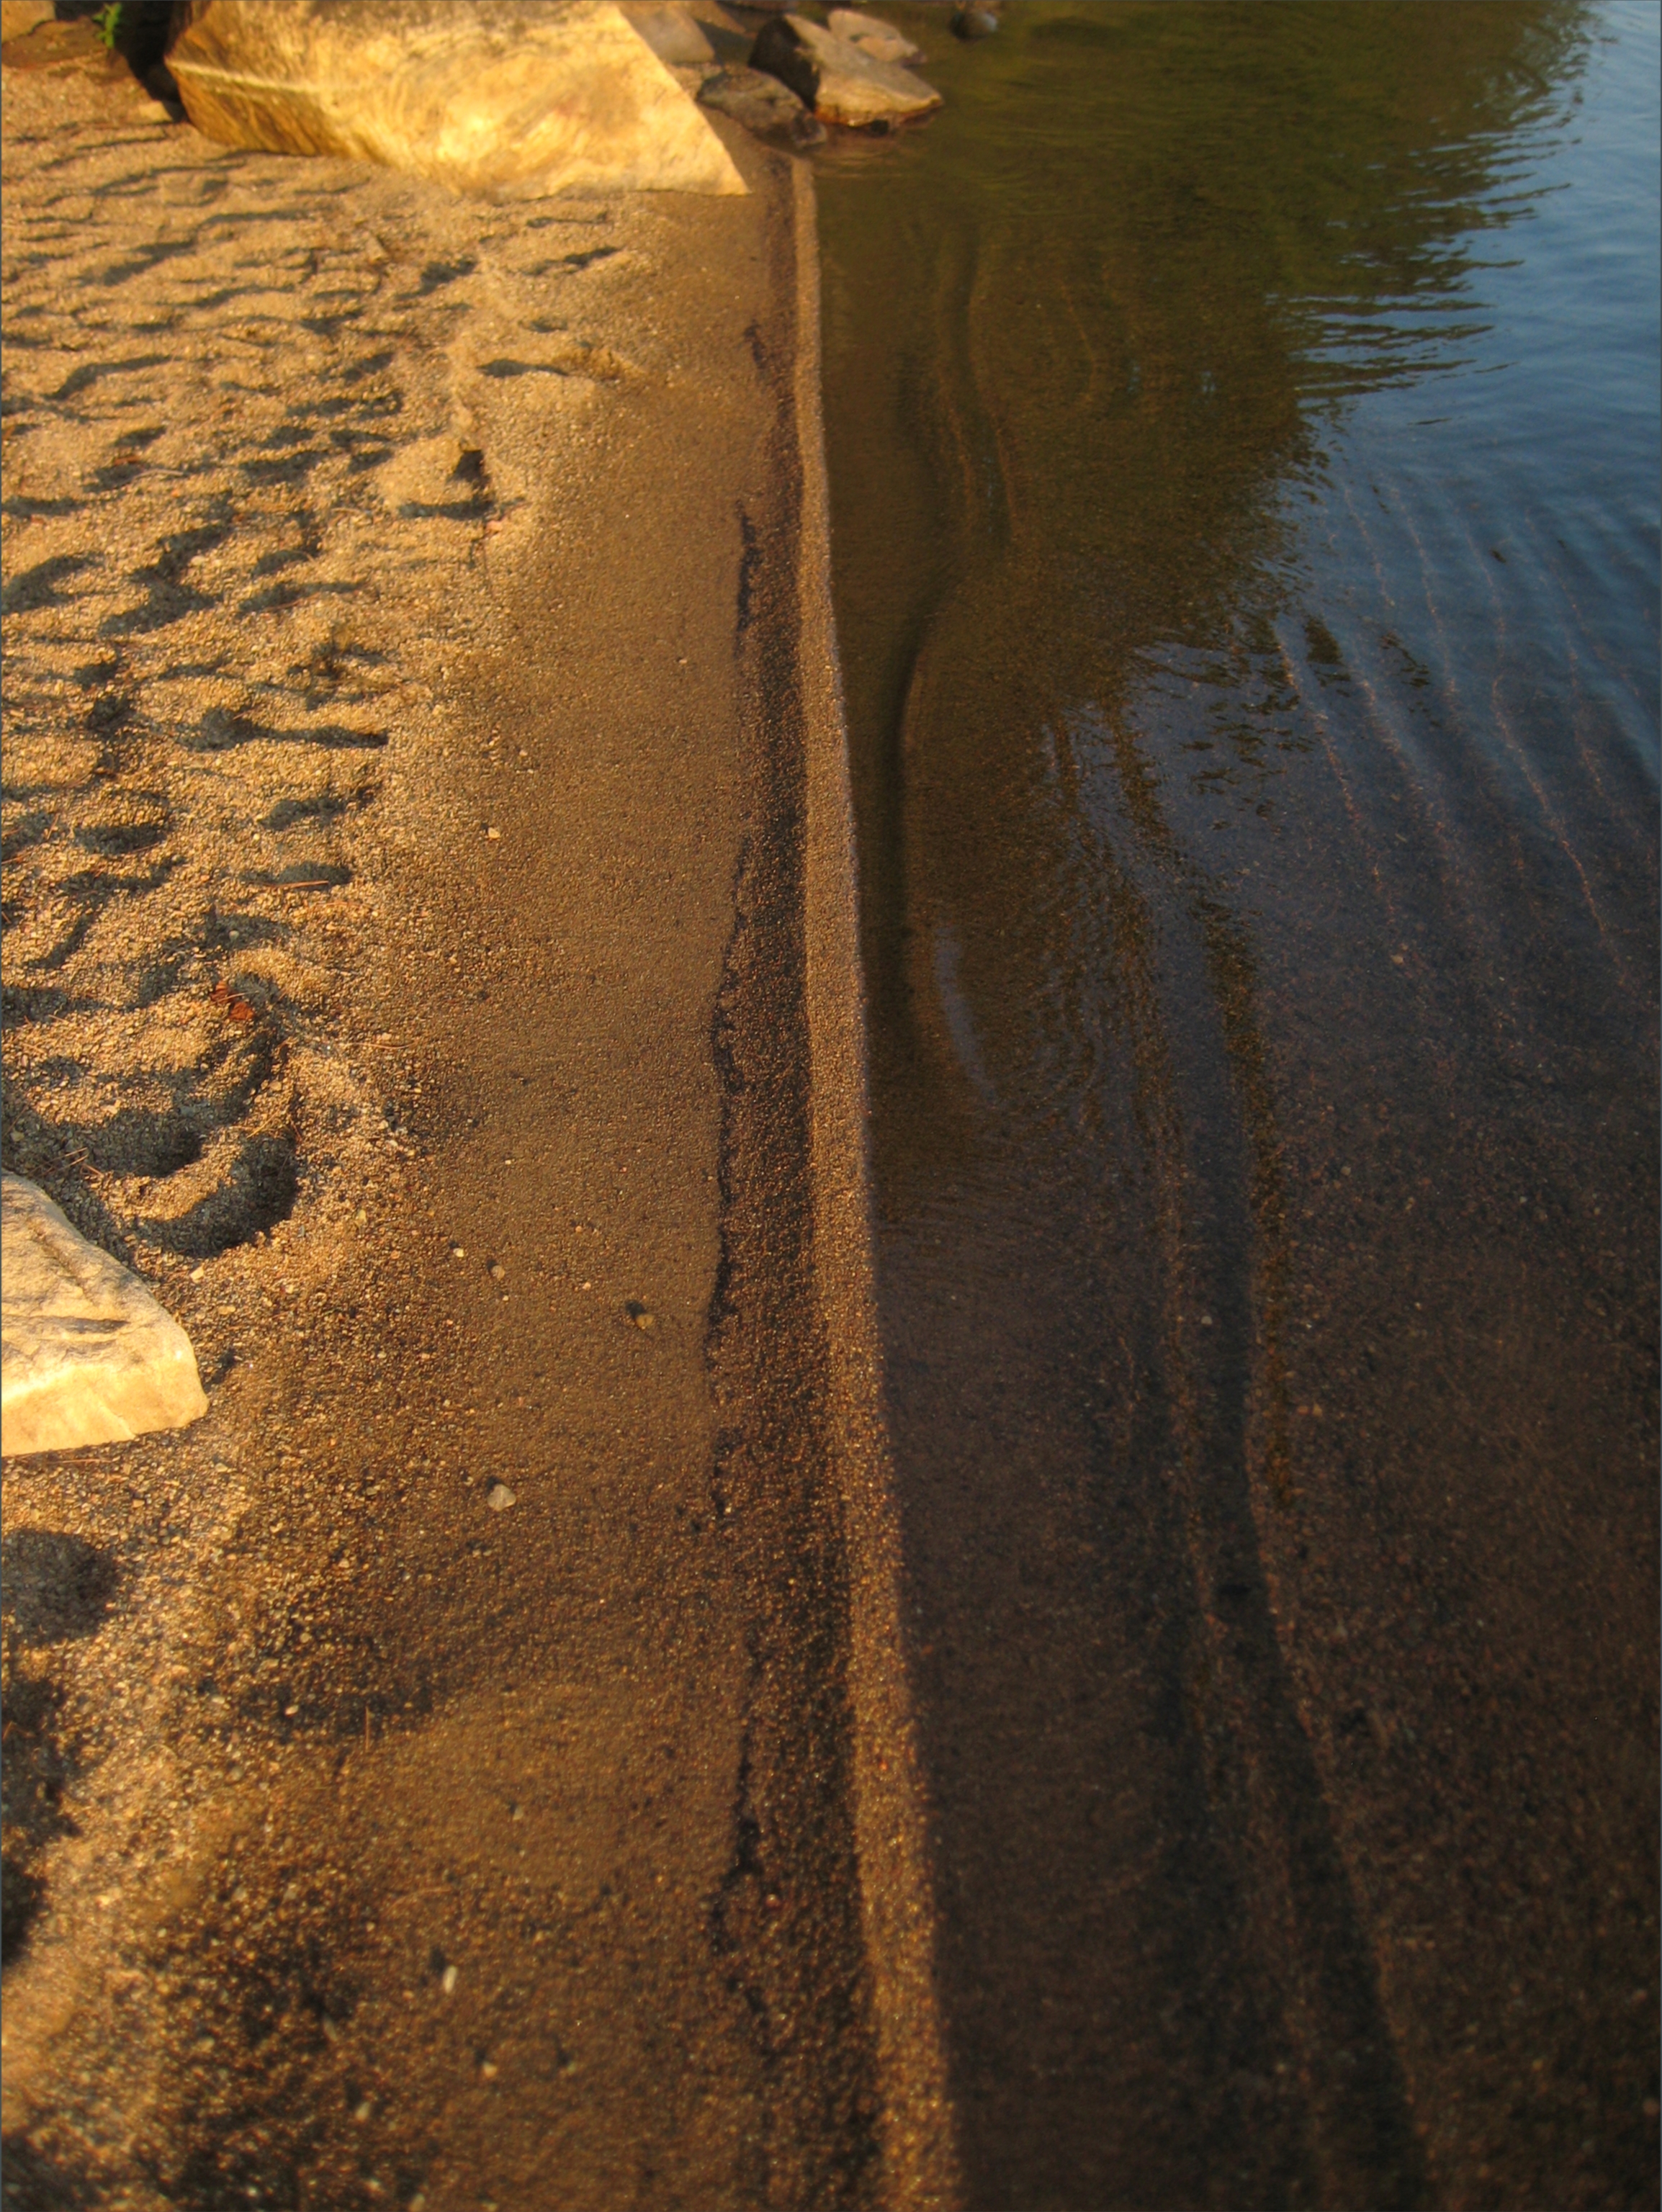 |
1-2cm bank at edge of beach.
Looking through my photos afterwards, I noticed intermediate forms.
Figure 46. beach edge in intermediate form (North Arm, Lake Opeongo, Algonquin Park)
 |
intermediate form.
Sure the bank was only 1-2cm high, but it took only a few iterations before I recognised that I was seeing a scaled down version of the banks of beach sand, from my childhood. My heart leapt; the explanation might be at hand. If only it would happen again and if only I could figure out what caused it, before whatever was causing it stopped. It had already happened several times in a relatively short interval. What could it be? The rhythm of the afternoon had been quiet with no obvious change. The cause had to be subtle.
I had not seen this beach reshaping in either of my trips to this lake. What if this was some rare natural phenomenon that required an exceptional combination of circumstances that would be unlikely to repeat in my lifetime? I would be thwarted and left knowing that I'd seen the effect but once. Knowledge and understanding would be beyond my grasp. A window would have opened for a moment, giving me a fleeting glimpse, only to close without understanding.
This was going to be difficult. I sat at the beach edge, determined to pit my patience against the vagarities of nature. At that moment, the granite sand had a well formed, 1cm steep bank. Just then, the stillness of the afternoon was shattered by the roar of the water taxi, delivering seekers of peace and tranquility (and their canoe) to the quiet distant parts of the popular North Arm. I watched the wake approach parallel to the shore. The wake washed over the beach, the first wave, acting like the bar of an Etch-a-Sketch (R), erasing the bank, leaving the granite beach as smooth as a baby's bottom. Remarkably in only a matter of minutes, my patience and determination had already paid off. Hmm. Well how long did it take for the bank to reform? After the wake had subsided, I was left with the gentle (1cm) wind driven waves doing their 1cm crash onto the granite sand. From the first wave, the wind driven waves were rebuilding the bank and in a short time (15min?) the bank was the same height as the wind driven waves. Shortly thereafter, the now empty water taxi roared back, its wake erasing the just formed bank. Presumably if the water taxi waves had been constant, a higher bank would have formed further back on the beach, with its top matching the height of the water taxi waves.
I expect at (tidal) ocean beaches, the position of the bank would vary through the tidal cycle.
Huygen's Principle says
every point to which a luminous disturbance reaches becomes a source of a spherical wave; the sum of these secondary waves determines the form of the wave at any subsequent time.
This principle is usually explained by selecting points on a plane wave and showing each of them radiating circles of waves, with the circles combining to make a new plane wave e.g. refraction on an aperture.
While sitting at the beach, watching the 1cm breeze driven plane waves coming in over the glassy water, I noticed that the reflected waves included dozens of circles, eventually combining with the plane wave. The circles looked just like the diagrams used to explain Huygen's principle. What was happening?
- The water/sand junction, although straight, was composed of sand grains of differing sizes. Whereever the incoming wave hit a particularly large sand grain, a noticable circular wave was reflected from that spot. There was a large sand grain/pebble about every cm.
- The water was glassy flat, even though carrying the breeze waves (see the photos immediately above e.g. "1-2cm bank at edge of beach"). The circular reflected waves were small in amplitude, compared to the plane waves, but easily visible against the glassy surface.
The circular reflected waves were visible for only an instant, before merging into the outgoing plan wave and were only visible with the correct angle of the sun. I took about 30 photos of reflected waves without being able to catch the circles on camera. Here's some photos which unfortunately aren't particularly illuminating.
Figure 47. reflection from large scale, irregular features (North Arm, Lake Opeongo, Algonquin Park)
 |
reflection from large scale, irregular features. I expect everyone's seen this and it doesn't show the circles forming into a plane wave.
Figure 48. Huygens circles at middle left at sand/water interface (North Arm, Lake Opeongo, Algonquin Park)
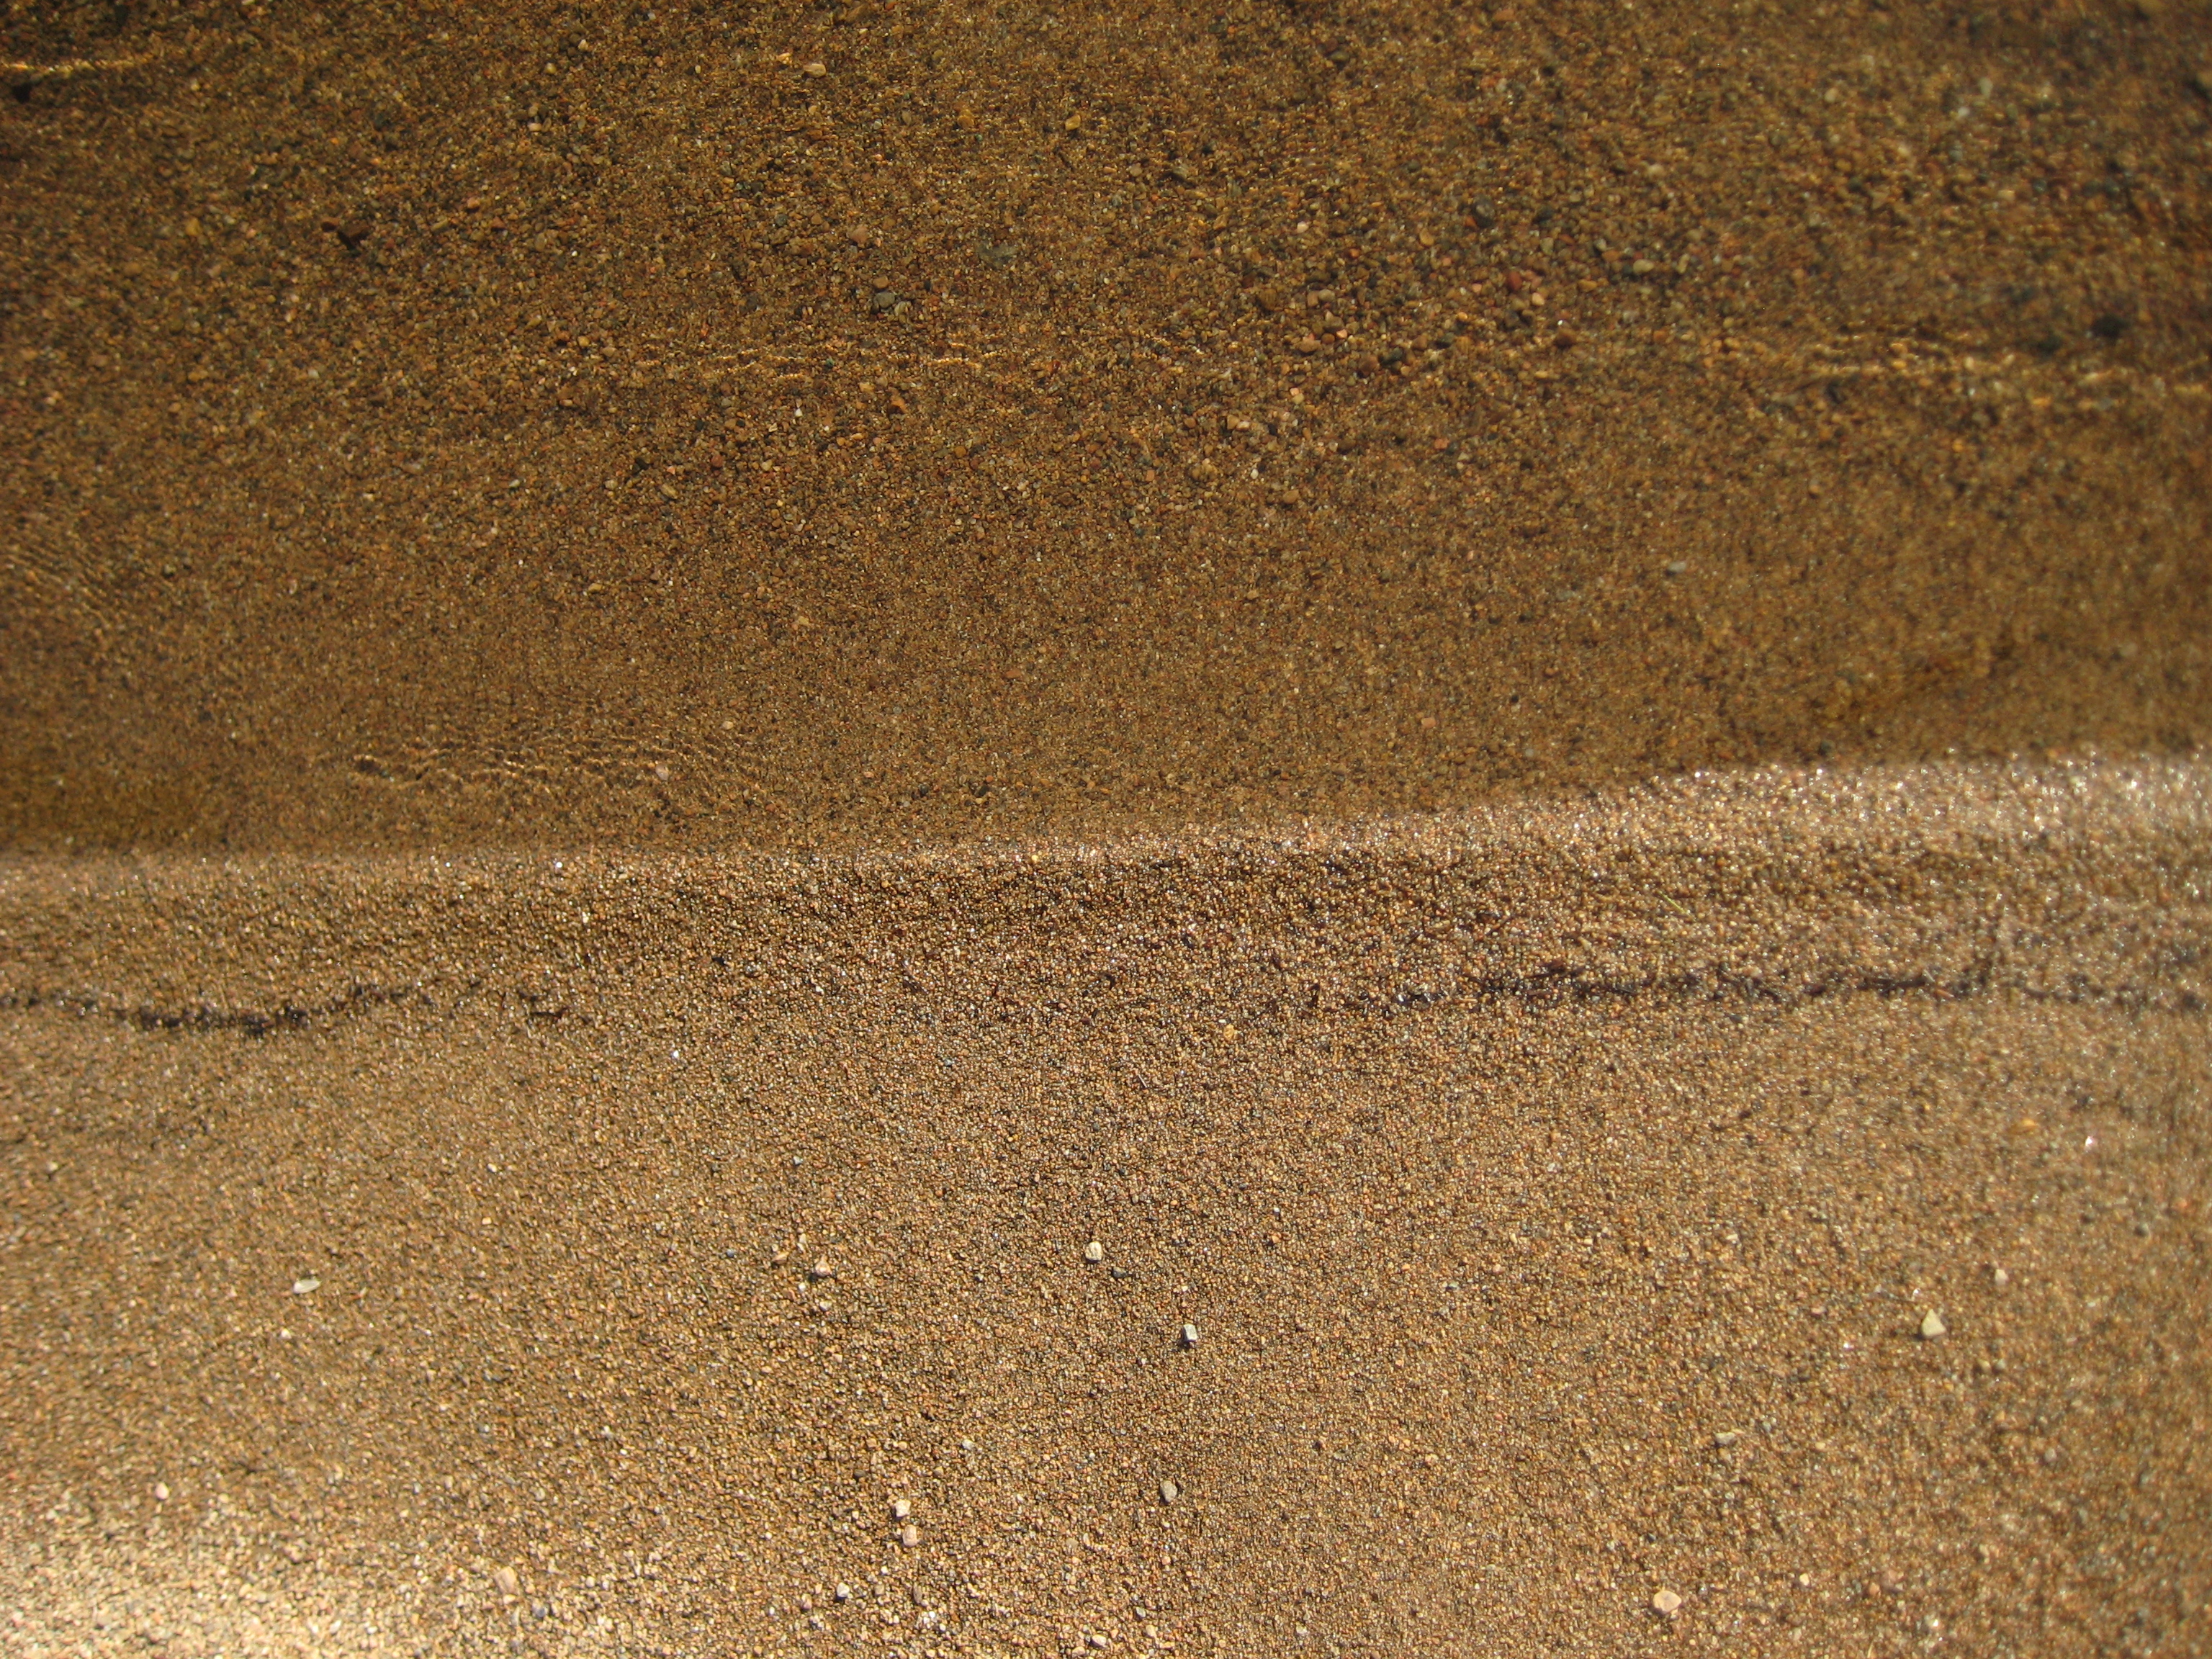 |
Huygens circles at middle left at sand/water interface. In the better examples, which I couldn't capture on camera, the circles were just like the diagrams used to illustrate Huygen's Principle.
Figure 49. Map: Day 5
 |
On the map, Graham Bay looks to be a duplicate of Hailstorm Creek; a long river presumably with lilies and water grass. Park write-ups only say that it's "little visited". I didn't visit it last trip and wanted to complete my exploration of Opeongo Lake. This was my longest and most fun day. Except possibly for a canoe on the horizon on the way to Graham Bay, I was by myself all day. "little visited" is right.
First part of the trip was to circumnavigate the North Arm, which I hadn't done before. The sky was blue for the first time. Since I would be on the water all day, I expected to roast. I did a quick Green's function integration of the amount of sun I'd get during the day, with the sun in the east in the morning on the way out and in the west in the afternoon on the way back. Should I circumnavigate North Arm clockwise or anticlockwise to get the least amount of sun? I quickly realised that both directions gave me the same amount of sun. The amount of sunburn was a conservative field. I was starting on the west side of North Arm and would get the sun in my face both heading east in the morning, and heading west in the afternoon. I would get full sun all day. It didn't matter which way I went around North Arm, I would be fried. Before I left, I sprayed my face and neck with sunblock, but without putting much on my forehead. I put ZnO cream on my nose. Stupidly, I didn't apply any more on the trip. When I got back to civilisation, I saw that my forehead was blistered and my face and neck brown, like I'd been on snow.
The NW area of the North Arm was a large shallow bay. I was paddling through water lillies with mud visible beneath me. If I dipped my paddle too low it stirred up the sulphur in the mud. It's anaerobic down there.
I circumnavigated the North Arm, went through the beautiful Bay of Islands and entered the gradually narrowing Graham Bay.
Figure 50. Water lily in Graham Bay (South Arm, Lake Opeongo, Algonquin Park)
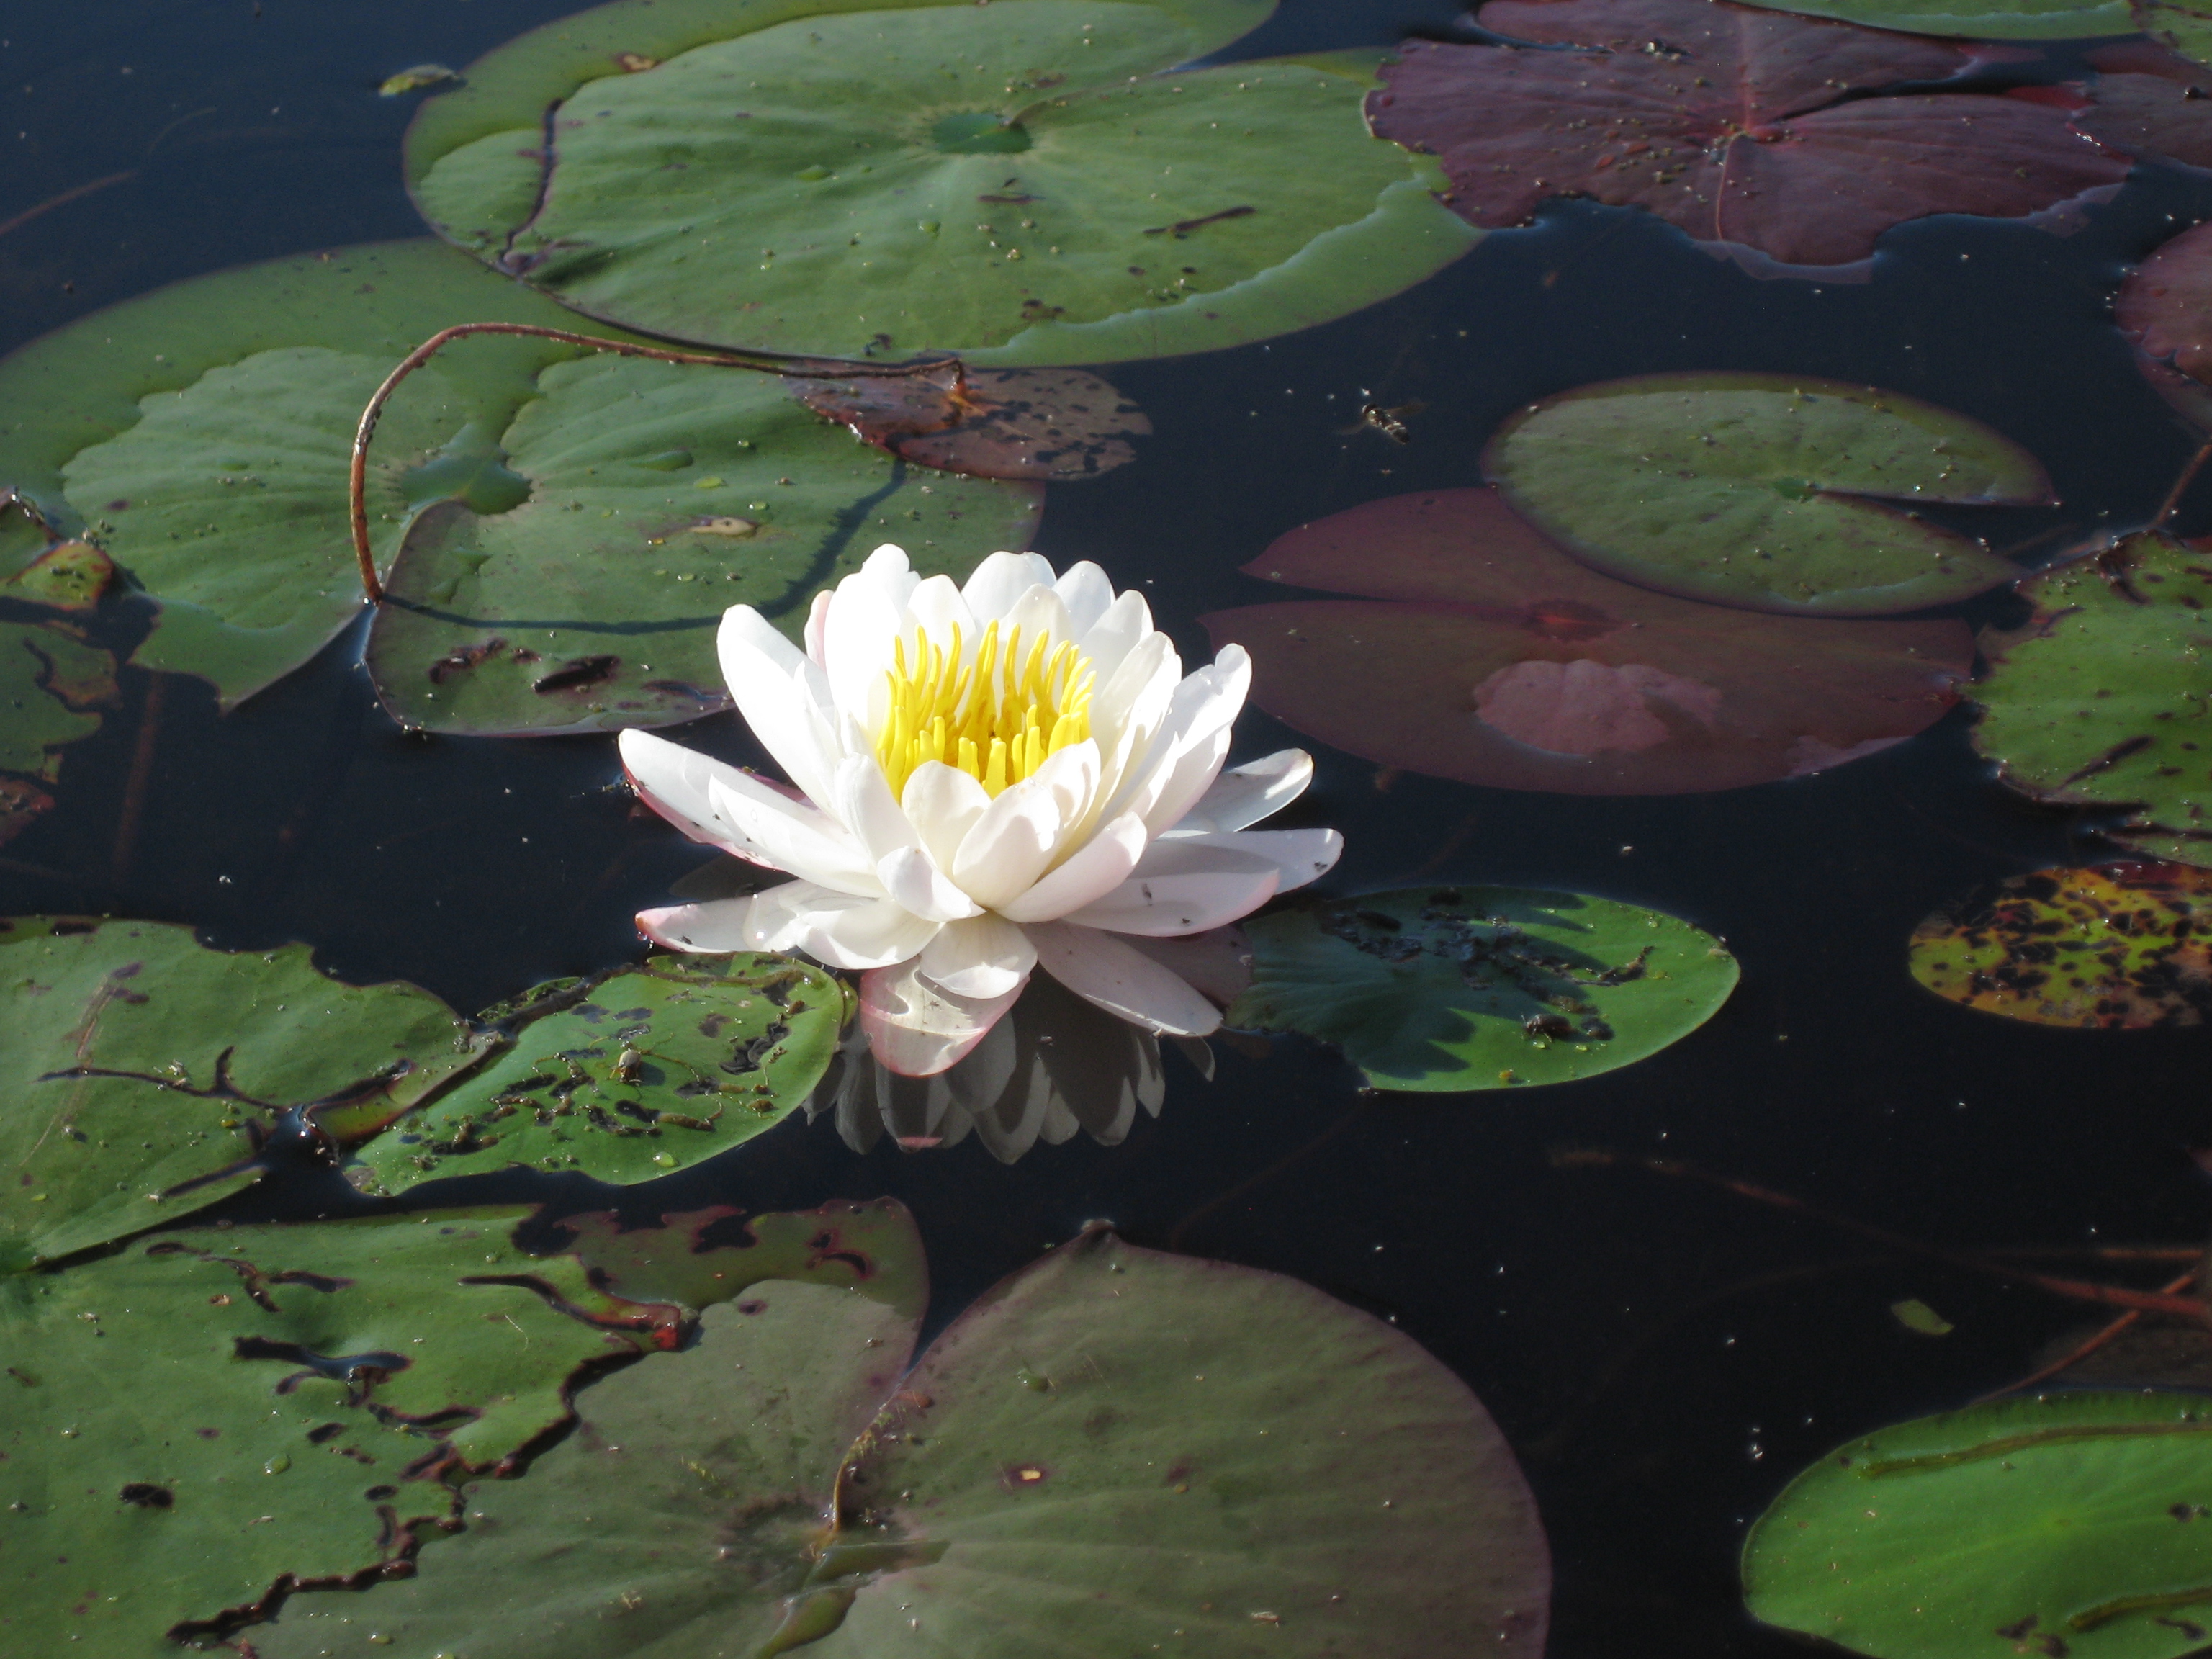 |
Water lily in Graham Bay.
Figure 51. General detritus in Graham Bay (South Arm, Lake Opeongo, Algonquin Park).
 |
General detritus in Graham Bay. Lots of wood floating here; not whole trees but single branches. Note the blue sky and flat water.
Figure 52. Apparent wall in Graham Bay (South Arm, Lake Opeongo, Algonquin Park).
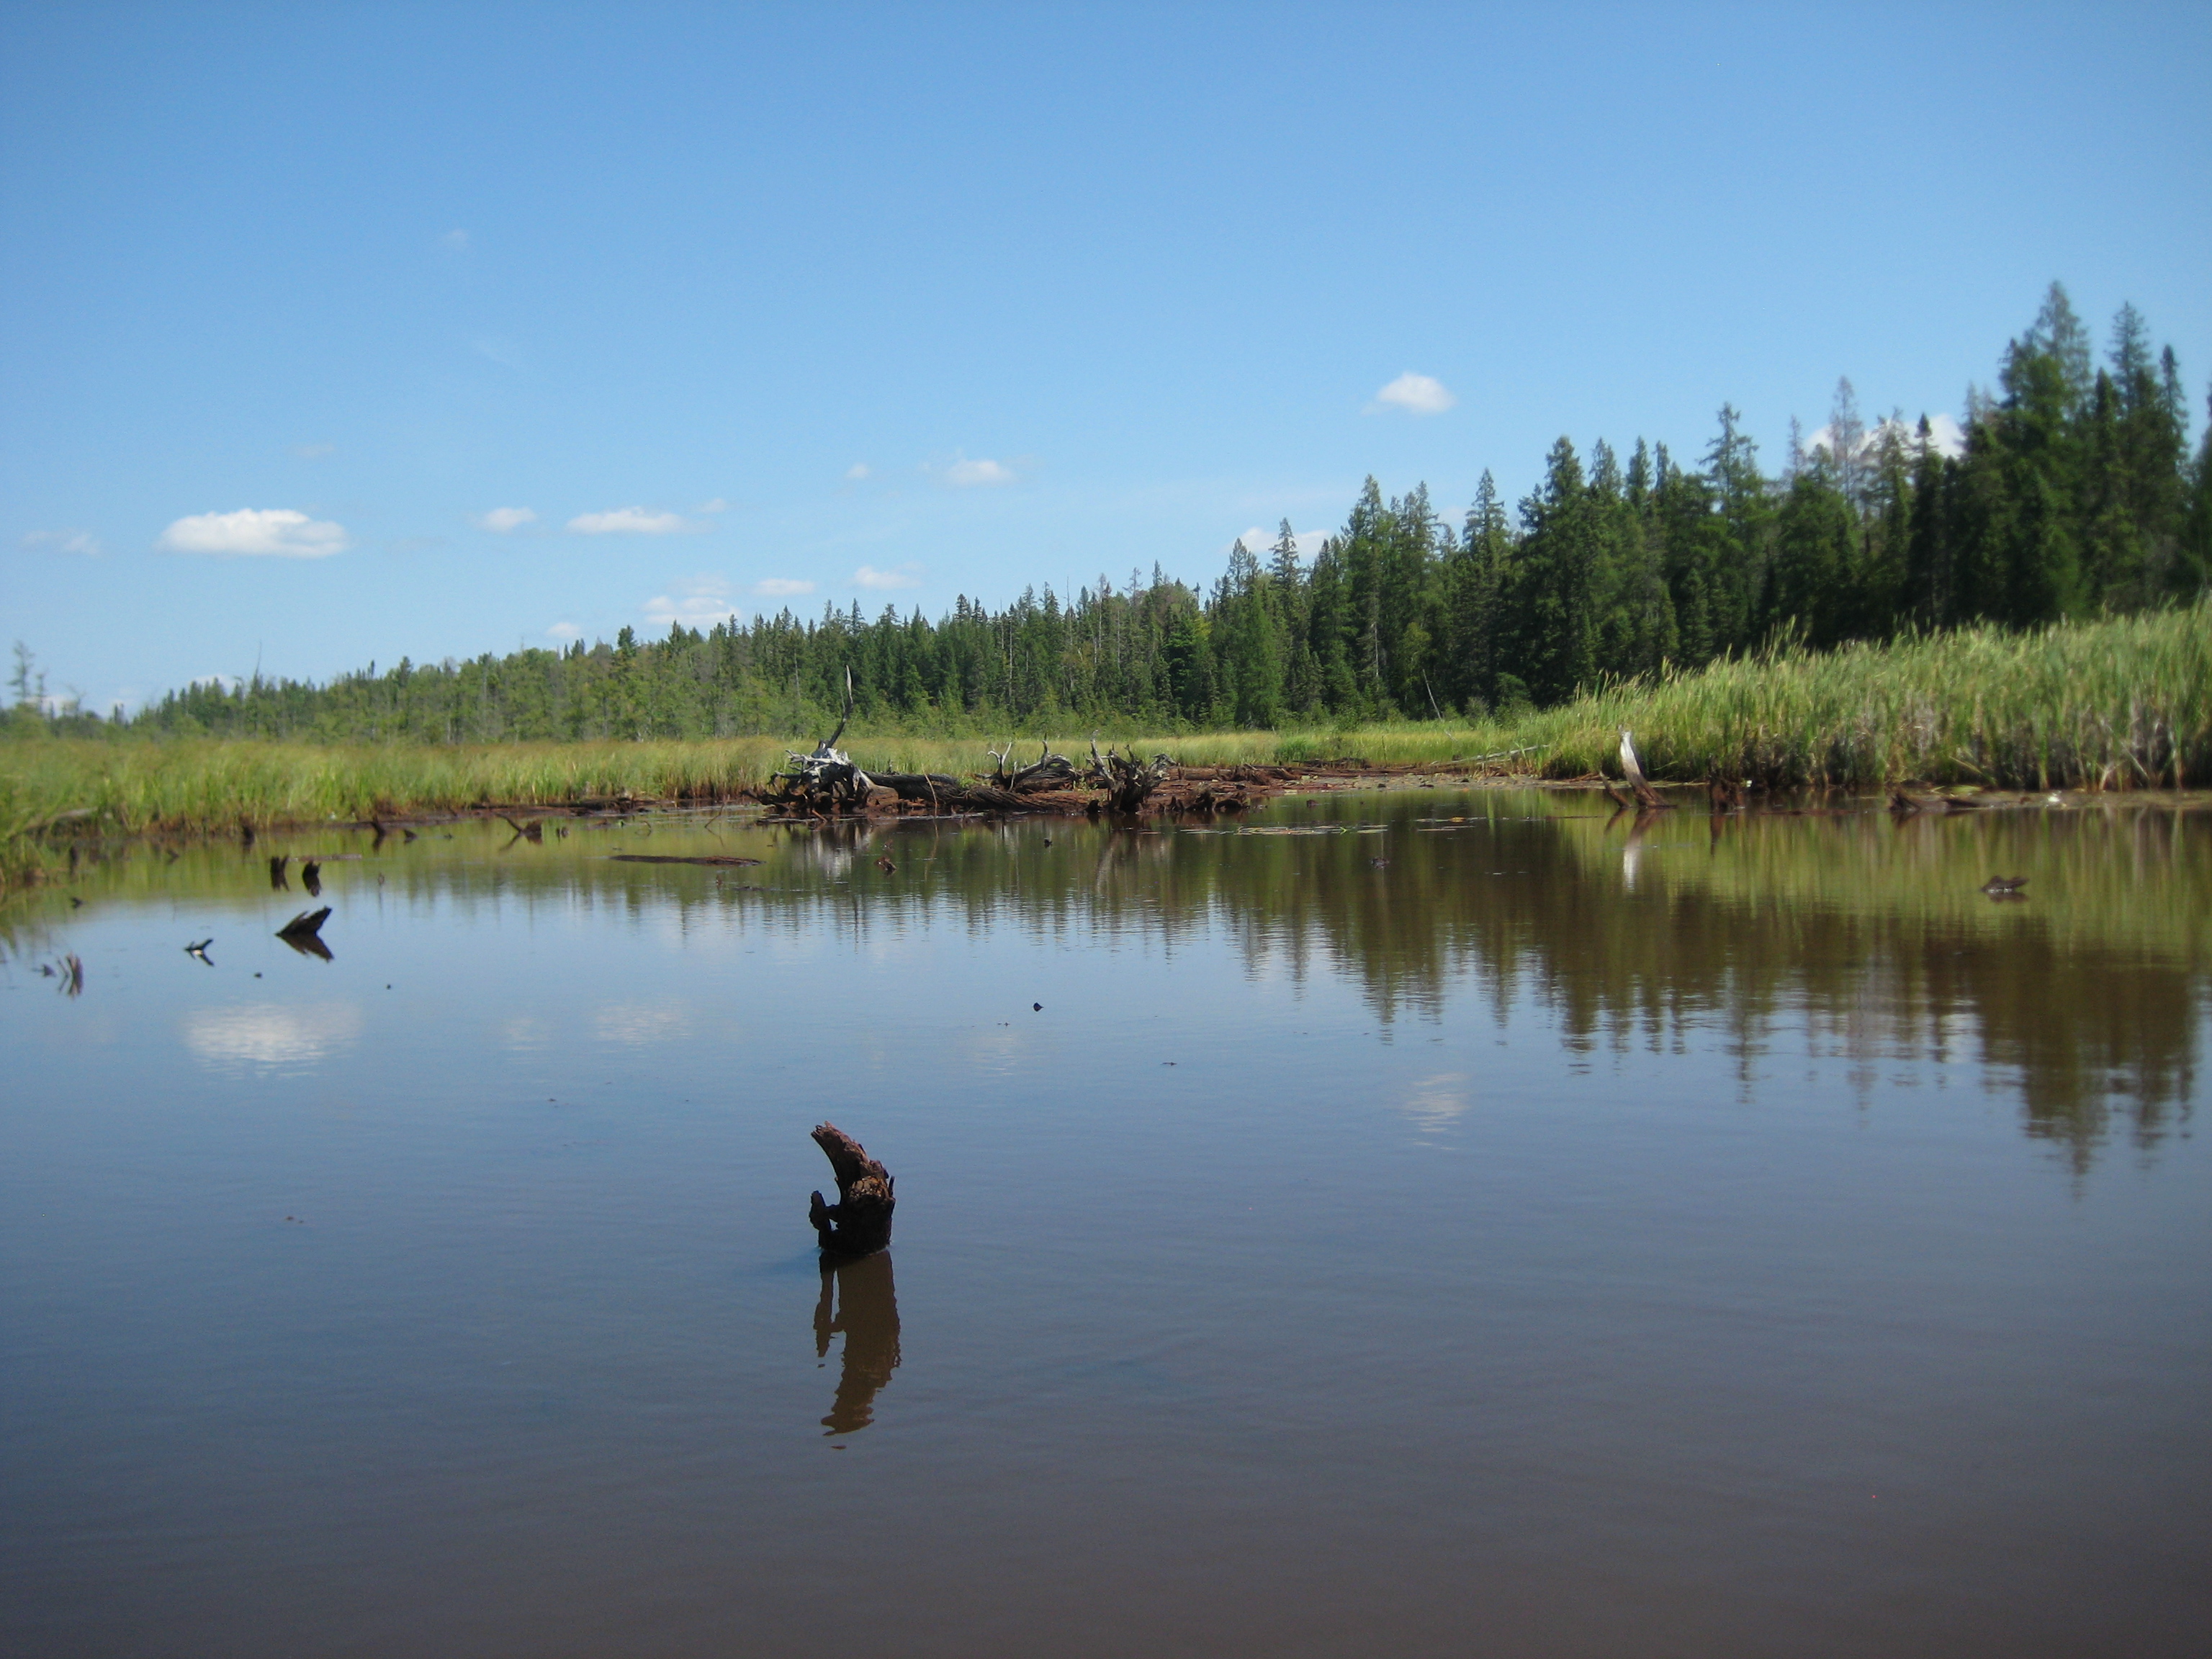 |
Apparent wall in Graham Bay. I paddled across this from the north to the south side, going around all the bumps looking for a way in. I had expected the entrance to be somewhere in the middle, but didn't find it. Was this the reason that no-one visited Graham Bay; you couldn't get in? Was it like the Everglades in Florida? Eventually at the south side of the wall, against the south bank of the river, after going around a corner in the wall, I found the break, perhaps 10m wide.
Once inside, I was in a large bay. I paddled down it about the same distance as for Hailstorm Creek, coming to a wall of grass and turned around.
Figure 53. Inside Graham Bay (South Arm, Lake Opeongo, Algonquin Park).
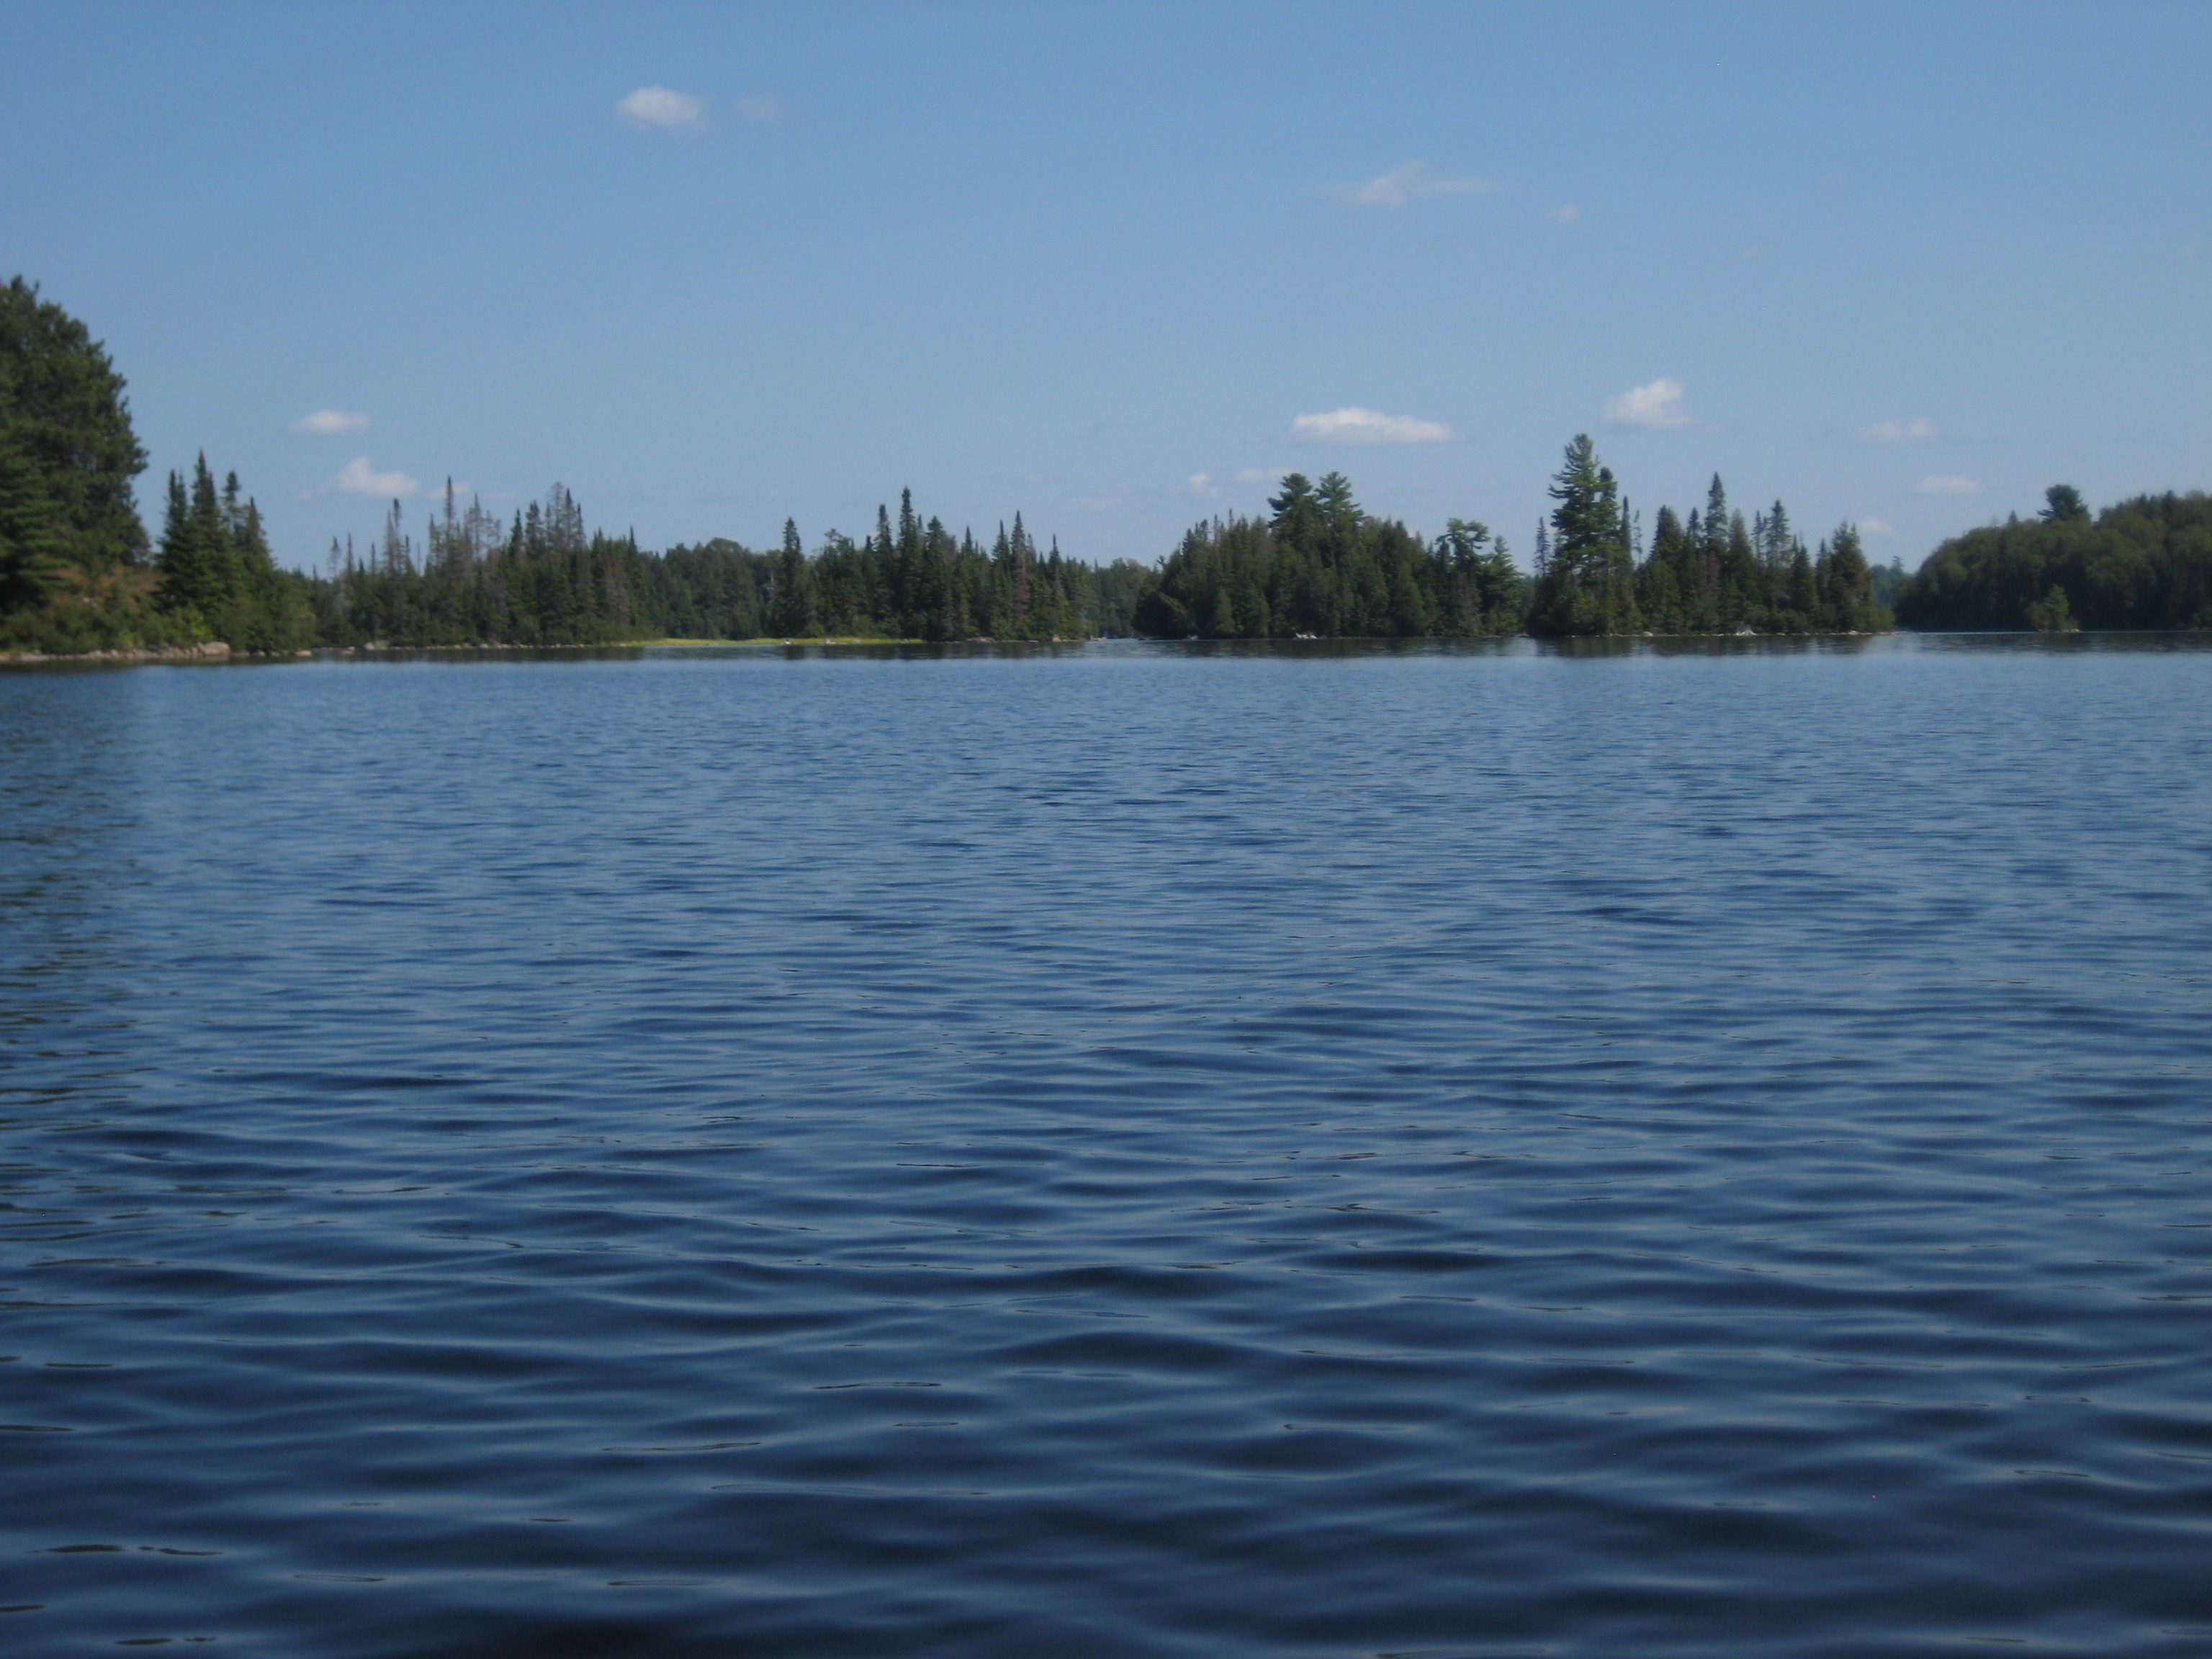 |
Inside Graham Bay.
I didn't see any beaver lodges in Graham Bay, although the reason was not obvious to me. Presumably it's not frequented by moose either (like you're supposed to see in Hailstorm Creek). I thought Graham Arm was worth visiting. If you only had time for one of Hailstorm Creek and Graham Bay, clearly you'd go for Hailstorm Creek.
I'd been thinking about how the trees on Cormorant Is might have died and I realised that it must have something to do with the thin soil. I remembered a large tree growing out of a rock in North Arm, near the entrance to Hailstorm Creek and paddled back there on the way back to my campsite, to get the photos for the section on cormorant island.
Figure 54. Map: Day 6
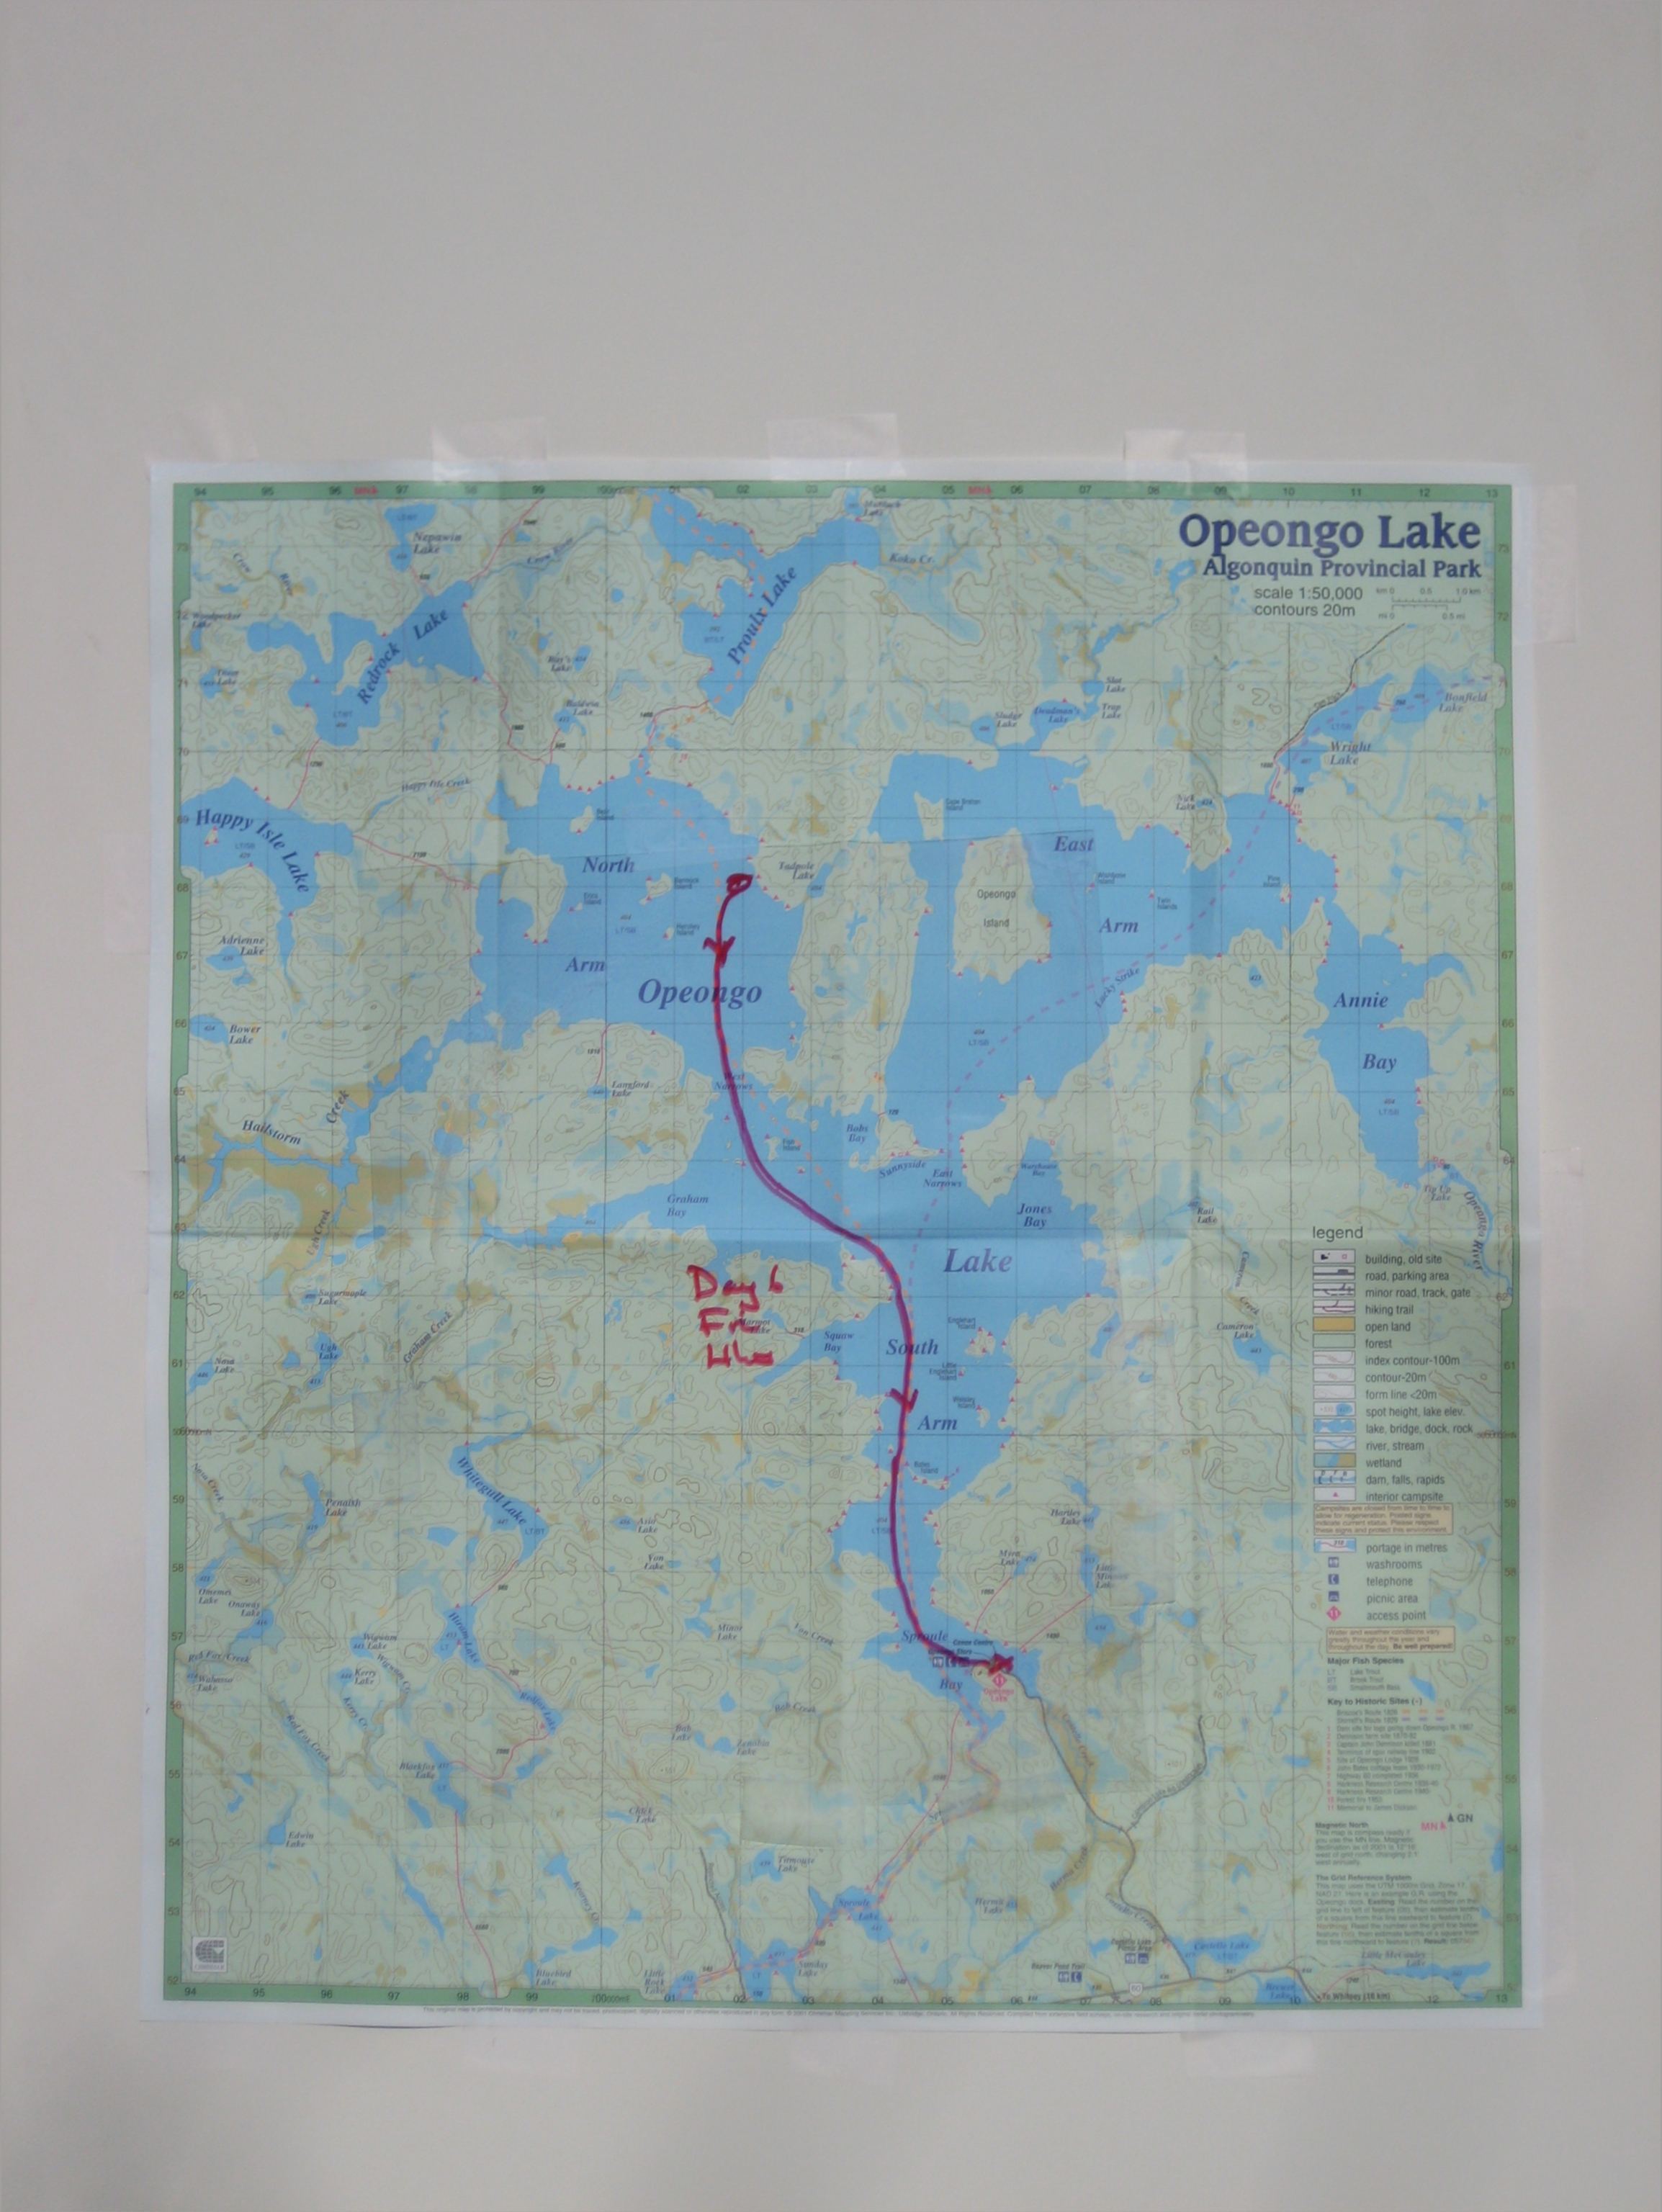 |
I had planned to stay out for friday if needed, but I'd paddled the whole shoreline of Opeongo Lake already and there was no spot I particularly wanted to revisit. If I left now, there were people who'd be available on the weekend and I could visit on the drive home. Originally I was counting on these people to do some laundry, but with the pleasant weather and multiple swims, laundry was now low on my priorities. I packed up and, with little wind, paddled easily back to the Outfitters at the bottom of South Arm. Near the bottom of the South Arm, the water traffic was quite high and I was sorry to leave the serenity of the more remote parts of the lake.
I visited the Musée du Bûcheron, which I like, again on the way out. Those guys lived a hard life. Back then, everyone thought the boreal forest of Canada was unlimited. But with a large fraction of the male populace (25%?) being lumberjacks, it didn't take long (100yrs?) before about 50% of it was cut down.
The cell phone I'd bought on the way in at Renfrew, and which had been unusable in the Park, started working about 10km out of the park. I received a chain of txts informing me as to the whereabouts of various friends. I had $50 of prepaid phone calls which would expire in 3 months if I didn't use it. Not expecting to be back in Canada before my money expired, I called a few friends in USA to say hello. It didn't take long to burn up my $50 (about $1/min).
As souvenirs I bought a dozen bottles of Canadian maple syrup at the farmer's market in Barry's Bay (Algonquin Outfitters, which sells all sorts of other tourist junk, had one bottle). One of the friends lives in Vermont, a state which touts its own maple syrup to tourists. I thought it would broaden her experience to have maple syrup from elsewhere. She received her souvenir with a quizzicle smile.
As I've alluded to in the section on dessicant, shortly after I left home on the way up, the length of time my cell phone held its charge dropped progressively from a week of being idle and on, to a couple of hours. I could only turn it on when I wanted to use it. Eventually it reached the stage where it wouldn't take a charge. Since I was going to be kayaking solo, I was counting on a cell phone on Opeongo Lake as backup. Thinking I had a battery problem, I called at a cell phone store in Potsdam NY, where the helpful assistant opened up the cell phone and showed me the pink water indicator on the battery and cellphone, indicating that the cell phone had been damaged by water. At home I walk every day with a pack, with my cellphone in a shirt pocket. In the heat I sweat and by the end of my walk, my shirt is soaked, and the cellphone bag is damp. Apparently this was enough to stew my cellphone and I had to buy a replacement on the way to Algonquin. As a result of this purchase, I now had two cell phones, my brand new one and my old, now deactivated, cell phone.
The US, always being the only country in-step, has been diligent in its effort to be incompatible with the cell phone system in the rest of the world (it's called innovation, something that only the US can do; Hillary Clinton talks about it all the time). For 20yrs now, an Australian getting off the plane in Paris and walking across the tarmac, can dial home and say "Hi Mum", without making prior arrangements. In contrast, for the same time period, anyone from Europe arriving in the US or Canada, with a standard European cell phone, hasn't been can't make even a local cell phone call.
Usually the US tries to be compatible with Canada, so I had expected that my US cell phone would work there. Sure enough, shortly after leaving Potsdam with my brand new US phone, as I drove over the St. Lawrence River at Ogdensburg into Canada, I got 3 txt messages on my new cell phone, two welcoming me to Canada and telling me that I may have to pay roving charges. Another gave me a 908 area code number (in New Jersey, back in the US) to call to ask about my roving plan. These calls confirmed that my newly purchased US phone worked just fine in Canada. Hooray!
It wasn't till later in the day, when I stopped for lunch at the Subway in Renfrew, that I found I couldn't call any US numbers, even with good signal strength. I got an immediate disconnect. I couldn't even phone the 908 number to find out about my roving plan. So why did they tell me about it?. The friendly and helpful proprieter at "The Source", on Rte 60 on the way into Renfrew, explained the situation to me. Canadians who took their cell phone with them to Florida on vacation using a roving plan, would come back with a bill of 2k$ for a week's phone usage in Florida. Even though my US prepaid phone worked just fine in Canada, the Canadian cell phone companies were not going to service it. If I wanted a prepaid phone in Canada, I would have to buy one at Walmart just down the road.
Since there was cell phone coverage at spots on Opeongo Lake and I was going solo, I wanted some backup, so I bought my second prepaid cell phone for the day. I had the choice of a phone that worked with the Bell company or one that worked with Rogers. I'd never heard of Rogers, and thinking I would have better coverage on the lake, I got Bell. I now was the pround owner of 3 near identical looking cell phones, all by the same manufacturer (Samsung), but all with different user interfaces (it's called innovation folks; we put the brake pedal in the back seat for your convenience). At least the chargers are interchangeable.
When I got to the lake, I found that coverage was only with Rogers. So my new Canadian cell phone was just another piece of plastic. Still on the way back from Opeongo to the US (about 8hrs), I did get to call my friends in the US on this phone, thus burning up the $50 of prepaid phone time, which would expire if I didn't use it. I used this cell phone for an hour, mainly to burn up the prepaid phone time. (I'll take it with me on my next trip to Canada.) Thanks to dessicant my original US cell phone revived. I have more cell phones than I can use in my lifetime.
On trips over the last 30yrs into Canada, I've had to handle paperwork about cars; forms saying that I will take the car with me when I return to the US rather than selling it in Canada, and proof of car insurance. I had brought the required letter from my insurer, but I wasn't asked for it and I just breezed through immigration and customs. I think it's possible that now I'm a US citizen has made the process simpler.
[1] The white cap is on the bottle with the coloured contents (iodine). The coloured cap is on the bottle with the white contents (ascorbic acid). No wonder the Challenger blew up. I exchanged the caps. The cap on the iodine bottle should be purple (or dark green). Presumably the colours were determined by marketing or a designer, not by anyone with a brain.
[2] I've never understood why camera cases are black. It's certainly not for functionality. In optimal conditions for photography, the sun is out and your gear (cameras, film, batteries) are cooking inside a black bag. Camera bags should be silver coloured.